Git and Legacy Staging
This article is geared toward users on the legacy staging experience. If you are on the new User Portal experience, which allows users to create sites made of Production, Staging, and Development environments, learn how to use Git on Sites with Production/Staging/Development Environments instead.
Getting Started
Setup your User Portal and local computer for git access by following the steps below:
Set up Git Push in your User Portal
To use Git Push integration with WP Engine, you need to add your SSH Public Key. After generating your SSH Public Key, the next step is to add it to the install of your choice in the User Portal by navigating to the Git Push tab and submitting your developer name and public key in the form. If you need help generating an SSH public key – check out GitHub Help: Generating SSH Keys. If you use multiple SSH keys with git, learn how to create a config file for easy key management.
Once you have added your public SSH key in your User Portal, you’ll need to obtain a snapshot of your application to work with. You can download a backup of your production or staging site in the user portal. If you are already using Git for your application’s source control but just need the details to deploy your application, feel free to skip ahead to Deploying to Production.
Confirm access
Now you should be able to execute a test to confirm that you can see the Git remotes for your application. If you’ve never connected to git.wpengine.com before, you’ll first be asked to confirm SSH host authenticity. This is normal (provided you aren’t setting StrictHostKeyChecking no in your SSH configuration).
$ ssh [email protected] info
The authenticity of host 'git.wpengine.com' can't be established.
RSA key fingerprint is 19:17:ee:d2:1d:8d:c9:3e:dc:3e:0d:21:a7:c6:52:fc.
Are you sure you want to continue connecting (yes/no)? yes
Warning: Permanently added 'git.wpengine.com,' (RSA) to the list of known hosts.
These are the host fingerprints for our Git Push feature:
RSA 19:17:ee:d2:1d:8d:c9:3e:dc:3e:0d:21:a7:c6:52:fc
ECDSA 0c:4b:07:92:dd:e0:be:50:90:7d:0d:c3:30:56:fa:9a
ECDSA SHA256 Jgp8bPftGbM0rzQaeA7KTBrZa1UfEN1nqQMLIwu5i18
If you receive a different fingerprint, do not continue to establish a connection to git.wpengine.com.
Obtaining a snapshot of your application (optional)
If you already have a version controlled code base, or even just a code base for your application – you can skip ahead to “Setting up the recommended .gitignore”.
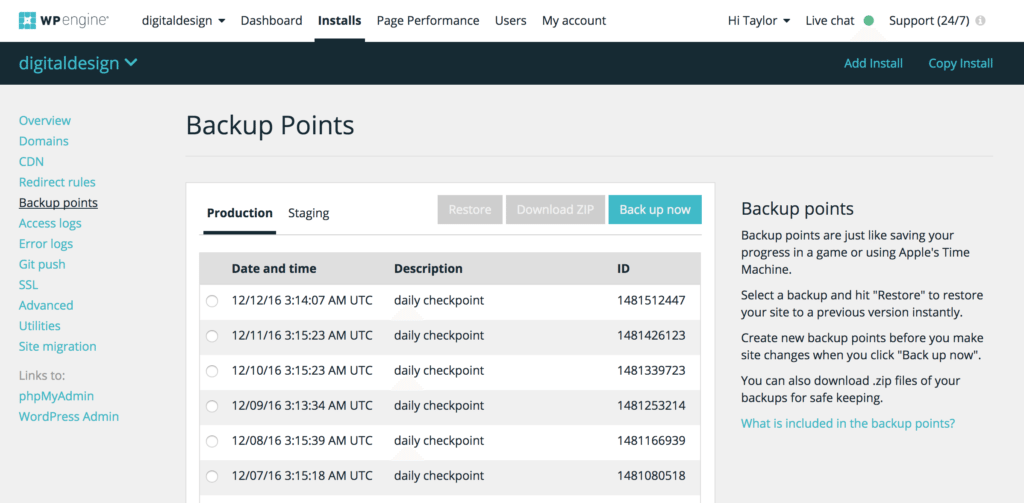
Log in to your account at my.wpengine.com and navigate to the Backup Points section for the chosen install that will be setup to use Git. Once there, select Download Zip for the preferred backup point, or create a new backup-point.
Once the download of the preferred backup point is complete, extract the contents to a directory of your choosing. This guide will assume ~/wordpress/my_wp_install_name.
Removing the mu-plugins directory from the snapshot
The mu-plugins directory that is contained within the snapshot includes several WP Engine scripts. These scripts may conflict with components of your local environment or cause other errors. We suggest that you remove the mu-plugins directory’s content (which can be found within the wp-content directory) to avoid conflicts.
Setting up the .gitignore
Once a snapshot of the application is obtained and extracted, a .gitignore file will be required to prevent you from pushing back files that would interfere with WP Engine systems or large media files that are better housed on a CDN.
The .gitignore can be modified based on specific application needs, although the deployment process on the WP Engine side will disallow pushing the above files/file types.
Download one of our.gitignore template that makes the most sense for your application requirements. Then rename it to .gitignore and place it in the root directory of your install’s code base.
| Download! | Starter `.gitignore` (keeps WordPress core files versioned) |
| Download! | Starter `.gitignore` (ignores WordPress core files) |
Note: You can find out more about disallowed files/file types, or whether or not WordPress core itself should be version controlled on our FAQ…
Making the first commit
Once the .gitignore is in place, the repository will need to be initialized and the initial commit performed so that there is data to push to WP Engine. Note: The git init . command below is only needed if your code base hasn’t already been setup as a git repository. This can be determined by running git status from the project’s root directory.
$ cd ~/wordpress/my_wp_install_name
$ git init .
$ git add . --all
$ git commit -m "initial commit..."
At this point, the .gitignore file has been added, repository created, and the initial commit performed. Nothing has changed on any of your WP Engine applications yet. For that, a git remote is needed…
Deploying to Production
If you are on the new User Portal experience which allows users to create sites made of Production, Staging, and Development environments, learn how to Use Git on Sites with Multiple Environments instead.
Setup ‘git remote’ for production…
In order to ‘git push’ application code to WP Engine, the application repository must be configured to add the production ‘remote’ of the application. The examples here assume an application named my_wp_install_name located in ~/wordpress/my_wp_install_name.
$ cd ~/wordpress/my_wp_install_name
$ git remote add production [email protected]:production/my_wp_install_name.git
You can call the ‘remote’ whatever you’d like – in the above example it is production. Some other examples:
$ git remote add wpengine-prod [email protected]:production/my_wp_install_name.git
$ git remote add live-site [email protected]:production/my_wp_install_name.git
Above, the ‘remote’ names are wpengine-prod or live-site. You only need one of these, so feel free to call it what works best for you. Important: the ‘remote’ name can be changed, but the path to the application repository at WP Engine will always include ‘production/’ when working with the production ‘remote’. When deploying to ‘staging’, it will always include ‘staging/’. Find out more about Deploying to Staging…
To confirm the remote was added, you can execute:
$ git remote -v
production  [email protected]:production/my_wp_install_name.git (fetch)
production  [email protected]:production/my_wp_install_name.git (push)
Deploy!
At this point, the Git repository has been initialized, the .gitignore added, and the initial commit performed. In order to update the code on your application/install at WP Engine, a git push needs to be performed:
$ git push production master
In the example above, the code on the master branch is what will end up deployed on the WP Engine application/install. You can use whatever branch you’d prefer to send to WP Engine by running git push production other_branch:master . If you used a different ‘remote’ name above, this command may look like git push live-site master or git push wpengine-prod master.
That’s it! Once WP Engine receives your git push, our systems will automatically take care of the rest.Note: Be sure to pay attention to the output as it will contain detailed information about any issues encountered, and whether or not the deployment was successful. If you encounter any issues please contact Support in your User Portal and provide the command you are running and any output shown.
Deploying to Staging
If you are on the new User Portal experience which allows users to create sites made of Production, Staging, and Development environments, learn how to Use Git on Sites with Multiple Environments instead.
Create your staging area…
In order to deploy application updates to your staging environment, you first need to create the 1-click staging environment! You can learn how to use our 1-click staging areas in this support article. If you use a separate staging environment as part of a Dev-Stage-Prod site, you will be able to add your git key to this environment separately after creating this staging environment. Learn how the 1-click staging and staging environments differ.
Setup ‘git remote’ for staging…
Once your staging area has been setup, a new remote will need to be added to point to your staging application. A staging remote is very similar to a production remote, and only differs in the path of the remote.
The examples here assume an application named my_wp_install_name located in ~/wordpress/my_wp_install_name.
$ cd ~/wordpress/my_wp_install_name
$ git remote add staging [email protected]:staging/my_wp_install_name.git
Similar to the production remote, you can call the ‘remote’ whatever you’d like – in the above example it is staging. Some other examples:
$ git remote add wpengine-stage [email protected]:staging/my_wp_install_name.git
$ git remote add stage-site [email protected]:staging/my_wp_install_name.git
Above, the ‘remote’ names are wpengine-stage or stage-site. You only need one of these, so feel free to call it what works best for you. Important: the ‘remote’ name can be changed, but the path to the application repository at WP Engine will always include ‘staging/’ when working with the staging ‘remote’. When deploying to ‘production’, it will always include ‘production/’. Find out more about Deploying to Production…
To confirm the remote was added, you can execute:
$ git remote -v
staging  [email protected]:staging/my_wp_install_name.git (fetch)
staging  [email protected]:staging/my_wp_install_name.git (push)
If you have both a ‘staging’ and production’ remote, your output may resemble:
$ git remote -v
production  [email protected]:production/my_wp_install_name.git (fetch)
production  [email protected]:production/my_wp_install_name.git (push)
staging  [email protected]:staging/my_wp_install_name.git (fetch)
staging  [email protected]:staging/my_wp_install_name.git (push)
Deploy!
In order to update the code on your application/install at WP Engine, a git push needs to be performed:
$ git push staging master
In the example above, the code on the master branch is what will end up deployed on the WP Engine application/install for the staging environment. You can use whatever branch you’d prefer to send to WP Engine by running git push staging other_branch:master . If you used a different ‘remote’ name above, this command may look like git push stage-site master or git push wpengine-stage master.
That’s it! Once WP Engine receives your git push, our systems will automatically take care of the rest.
Git pull
Pull from production
Now that you have successfully setup and deployed to your production remote, you can now git pull code from your repository. Notice: You will not be able to git pull site content that has been deployed to the site by any other means than git, since they will have bypassed the git repository.
The standard git pull command will sync your remote repository effectively with your local repo.
$ git pull production master
Pull from Staging
Once your team has successfully deployed code to the staging remote, you will be able to pull down content from that repository as well.
$ git pull staging master
These tools will effectively allow your team to collaborate on projects using a complete git workflow!Note: Be sure to pay attention to the output as it will contain detailed information about any issues encountered, and whether or not the deployment was successful. If you encounter any issues, contact Support in your User Portal and provide the command you are using and any output shown.
Errors and Troubleshooting
If you are using the new Sites experience with Production, Development, and Staging environments, follow our guide at https://wpestaging.qa/git/ instead. If you would like to upgrade to the Sites experience, you can find more information in the Sites and Environments guide.
When using git push, if you encounter errors, the bottom of our guide at https://wpestaging.qa/git/ provides troubleshooting steps and reasons you might encounter an error with git. If you use multiple SSH keys with git, use our guide to creating an SSH Config file to ensure the right keys are used for the right environments.
Last, if you need more help with git push, please contact our Support team via chat in your User Portal and provide the output and error you receive. We are available 24/7 to help!