Local and WP Engine Connect
Manually setting up a local environment to develop a website can be a needlessly extensive process. Local is a free program that allows you to easily set up a WordPress environment on your local computer, regardless of your skill level or experience. Local is supported on Windows, Mac and Linux systems.
Once a site is created it can then be transferred to any account type or hosting provider, such as WP Engine. Local provides an experience that is user-friendly and speeds up the overall development workflow.
NOTE: Local does not support Multisite configurations, at this time.
Local Features
The following features come standard with Local. We also recommend keeping your eye on the Local Release Notes page for new feature releases.
- Local development environment
- Push/pull any environment
- Demo site URL
- SSL
- Mac/Windows/Linux compatibility
- Sleek GUI (General User Interface)
The best part about Local is that it’s totally free! Check out this article to learn more about how all the Local Pro features have been made free for everyone.
For feature requests and additional questions, please refer to the Local community forums.
Install Local
Before starting the setup process, we recommended signing up for the Local community forums. The WordPress community is always a great source of information, feedback and guidance.
- Get the Local application for free, by clicking “Download” here
- Choose your platform
- Fill in your information
- Download and Save the installation package to your computer
- Open the installation package for Local on your computer
- Follow the installation setup prompts
- Launch Local on your computer
Connect Local to WP Engine
The WP Engine Connect feature will allow Local users to connect any Sites they have created on their WP Engine Account and download associated environments. Additionally if a website was initially setup on WP Engine and you would like to pull that site to Local, WP Engine Connect can help!
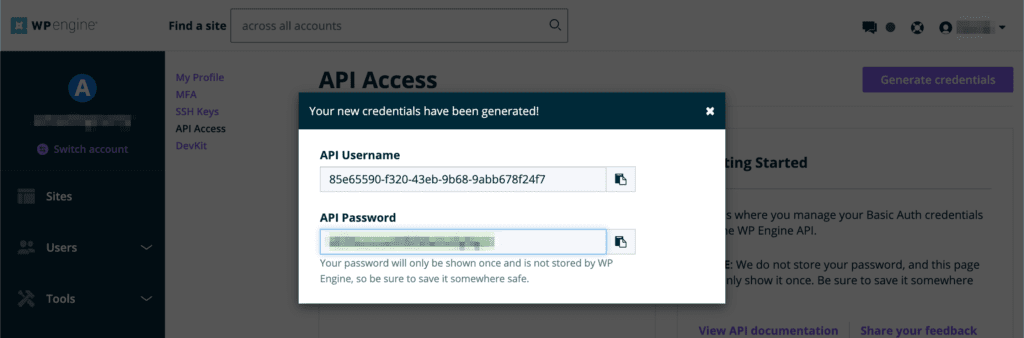
Enable WPE API and Generate Credentials
- Open the API Access page of your WP Engine User Portal:
- Locate the account name you wish to enable access for
- Click Manage
- Toggle Account API Access to on
- Click Generate Credentials to return to the previous page
- Click the Generate Credentials button at the top
- Leave this page open for easy access in the next step
See our guide for more information on the WPE API.
Connect Local to WP Engine
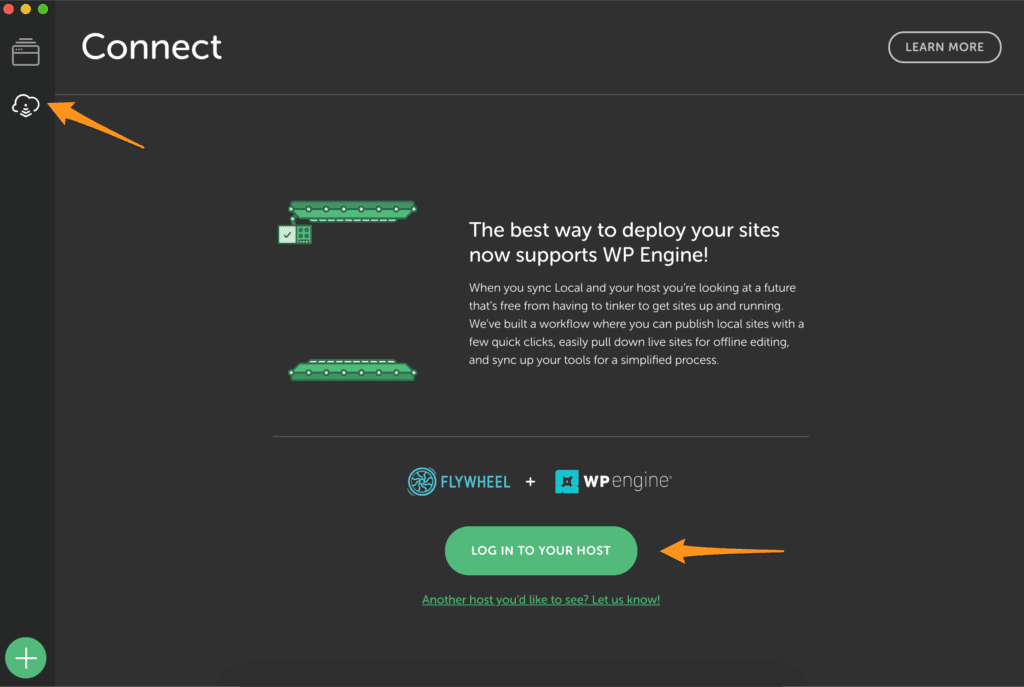
- Open the Local application on your computer
- Click Connect at the top left
- Click LOG IN TO YOUR HOST
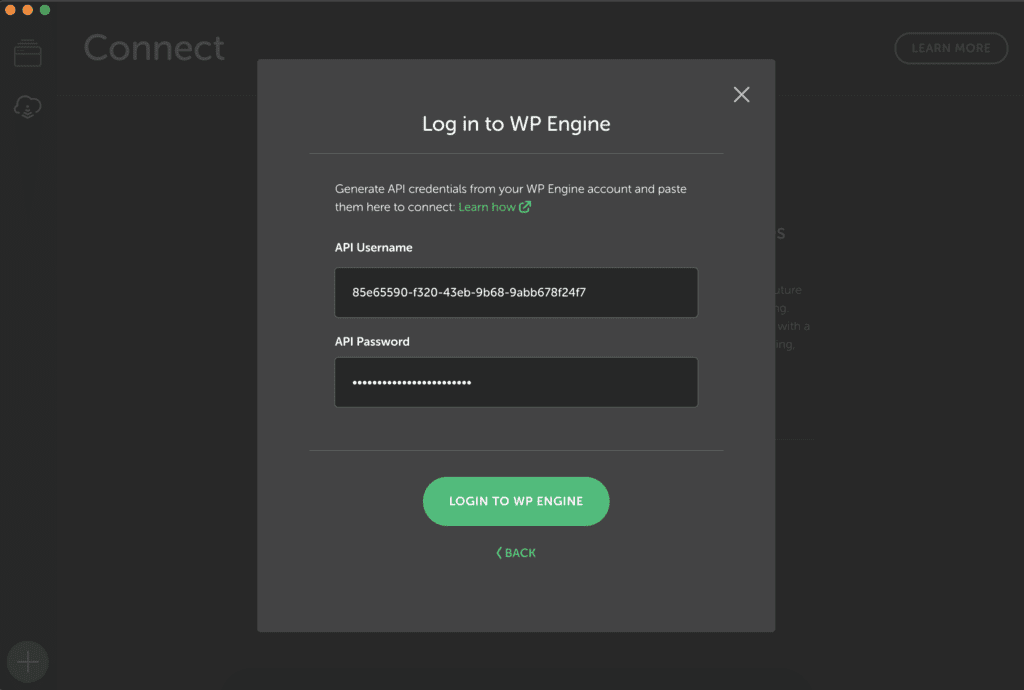
- Select WP Engine
- Copy and paste your WPE API credentials, from the previous step
- Click LOGIN TO WP ENGINE
Pull to Local From WP Engine
When setting up a site in Local an initial pull will typically be made from WP Engine to copy content locally. After the initial pull, subsequent pulls can be made any time to overwrite you local content.
Initial Pull to Local
This process needs to take place the very first time you pull to Local from WP Engine.
- Ensure you’ve already connected Local to your WP Engine account
- Open Local on your computer
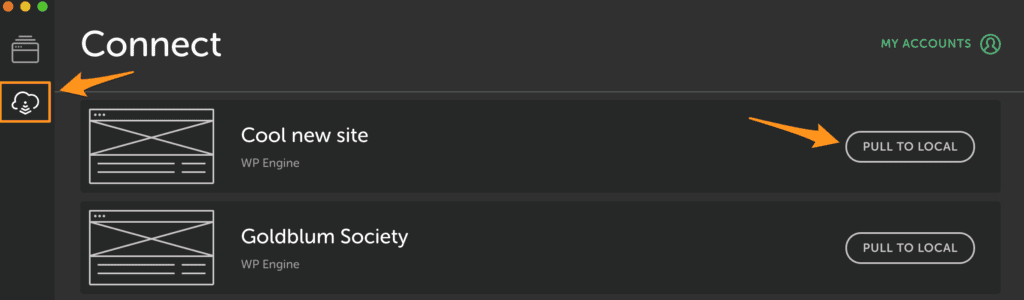
- Go the Connect tab
- Locate a Site in the list
- Click PULL TO LOCAL
- Choose whether or not to include the database
Subsequent Pulls to Local
After the initial pull to Local, additional pulls can be made using the following steps.
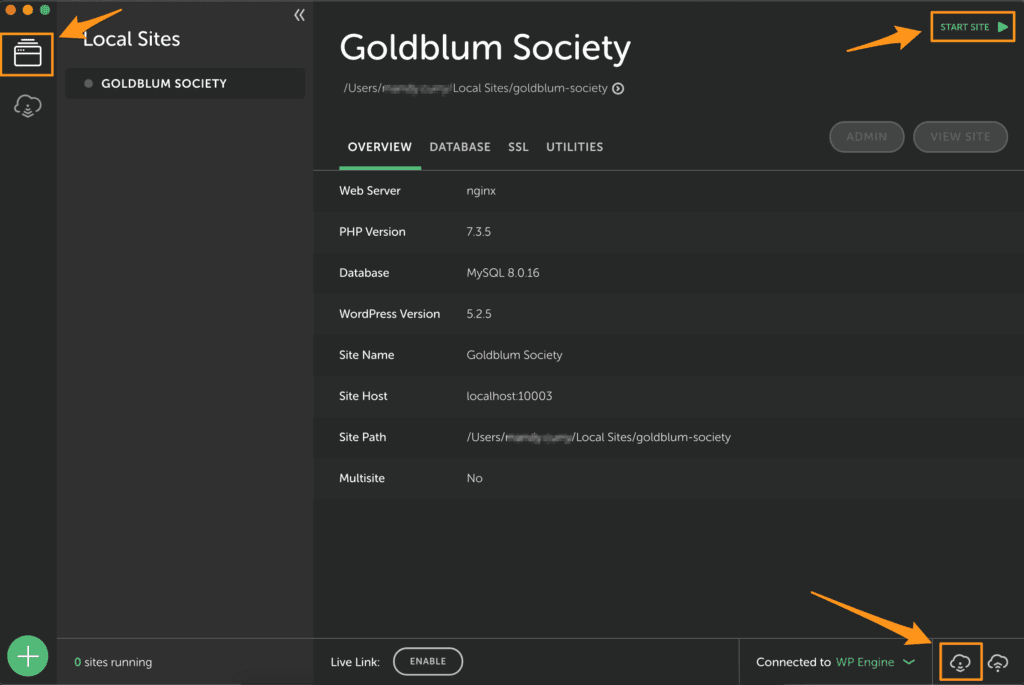
- Open the Local app
- Select the Local Sites tab
- Select the site name
- Click START SITE at the top right
- Click PULL TO LOCAL in the lower right
- Choose whether or not to include the database
Push to WP Engine from Local
- Open Local connected to WP Engine
- Click Start Site on the environment that you want to push
- Click the bottom right hand icon to push to WP Engine
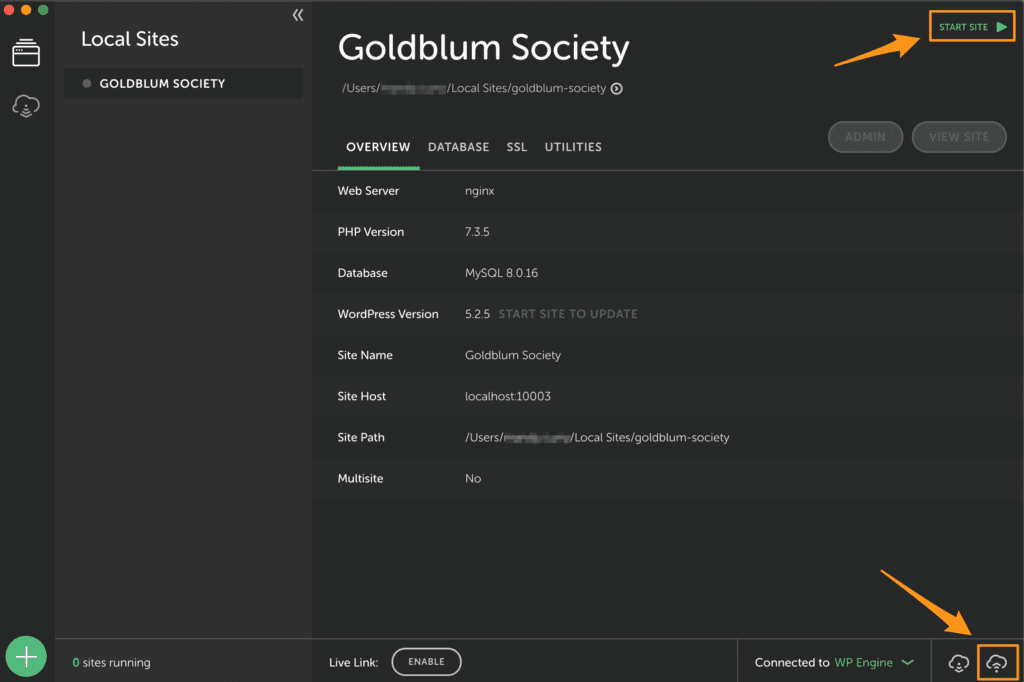
- Choose an environment to push to:
- Production, Staging and Development are all options if already created in User Portal
- If an environment doesn’t yet exist, click the link to create one from the User Portal
- Chose whether or not to push the database
- Including the database will overwrite all database information on the destination environment
- It is never advised to include a database when pushing to Production
- A success message will display within Local when the push has completed:
Site Pushed! Your site has been pushed to WP Engine
NOTE: If you do not wish to push your site to WP Engine, you can take it to another hosting provider and upload it to them as well. Be sure to check with the new host first if they accept Local’s formatting and configurations. You can read more in this community forum thread.
Backup Process
Like other files on your computer, backing up your Local sites is essential. Local site are stored in ~/Local Sites, and you may be able to recover sites from this directory. Follow the instructions below for a complete backup:
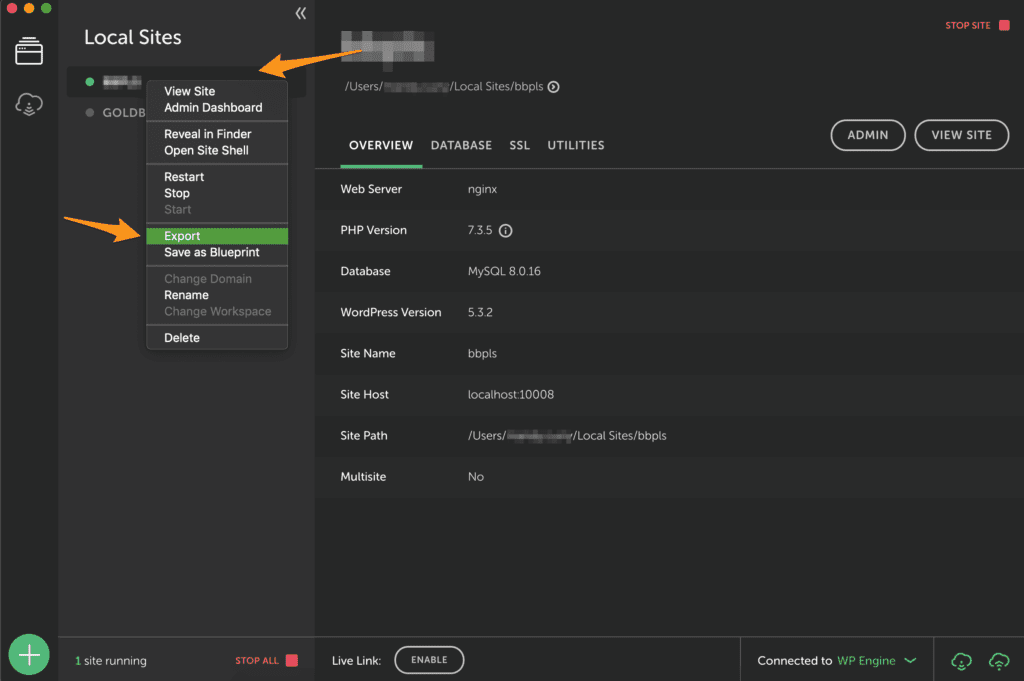
- Click Start Site on your Local site to start it
- Right-click or CTRL+click on your site
- Select Export
- This will include site files and database in a single
.ziparchive
- This will include site files and database in a single
- Click Export Site
- Depending on the size of the site, exports can take several minutes
Success! You now have a backup of your Local Site. Simply drag this .zip archive into Local to import content from the backup.
NOTE: If you export your site to your computer and also backup your computer (EX: to an external hard drive), you’ll backup your Local Site backup for extra protection!
Migrate DevKit to Local
If you’ve been using DevKit by WP Engine, you will need to migrate your content into Local.
- Open terminal on your local machine
- Change directory into your site. Replace
SITENAMEwith your own site name.cd SITENAME
- Initiate your DevKit environment:
wpe start
- Once in the running site, run the following command. Replace
SITENAMEwith your own site name in DevKit.mkdir local-SITENAME; wpe wp db export local-SITENAME.sql && mv local-SITENAME.sql local-SITENAME/; rsync -avP wp-content/ local-SITENAME/wp-content --exclude mu-plugins; zip -r local-SITENAME.zip local-SITENAME/
- Open the Local app on your computer
- Drag and drop the zip file created in step 4 into Local from a finder window.
- With the above command, your zip will be called
local-SITENAME.zipand is stored in the root of your DevKit environment.
- With the above command, your zip will be called
- The import process will begin in the Local app
- Start the site in Local to confirm the import was successful
For additional assistance, please use the community forum.
NOTE: If you need to migrate from Local by Flywheel (versions up to 3.3) to Local (versions 5.0+), check out this guide from Flywheel.
Manual Import
If the pull from WP Engine fails to import your environment(s), use the following steps to manually import each environment from a backup.
- Create a backup of the environment
- Download the full backup as a zip
- Rename the zip file locally to match the name of your environment
- EX:
mystagingenv.zip
- EX:
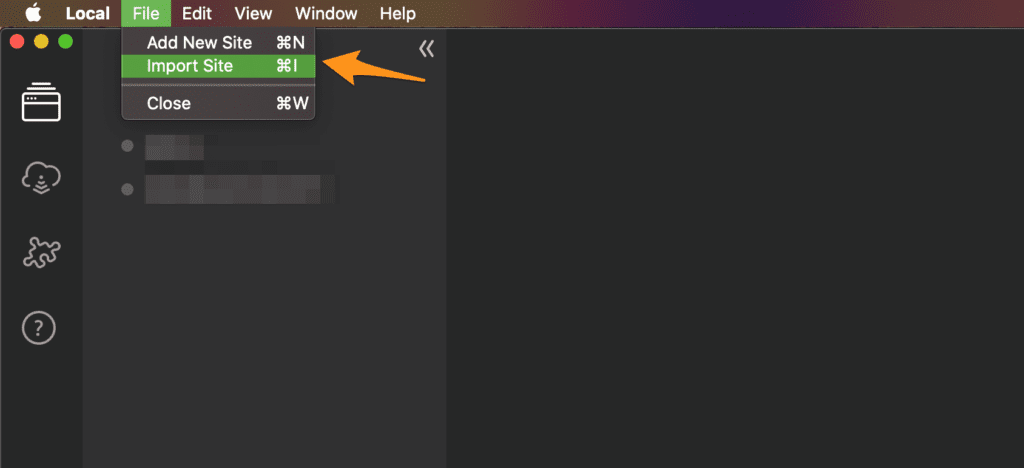
- Open Local on your machine
- Open the File menu
- Select Import Site
- Open the file from Step 3
- Confirm the Environment name
- Click Continue
- Select Preferred
- Click Import Site
Once the import completes, we recommend clicking View Site at the top right to confirm that it works.
Local’s Log
When troubleshooting an issue Support may request your Local log file. Version 5 of Local introduced a new file called local-lightning.log. Older versions of Local will use a log file called local-by-flywheel.log.
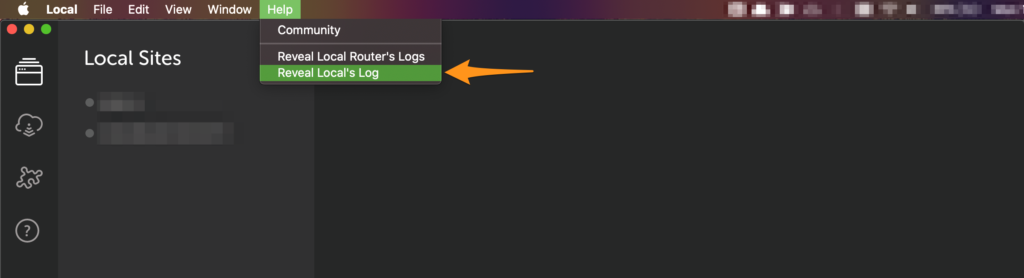
Reveal Local’s Log
- Open the Local app on your machine
- Click the Help menu
- Select Reveal Local’s Log
- Attach this file when request to a ticket or chat
Log File Locations
If you’d prefer to locate the file on your own, you will need to check in the appropriate location for your operating system.
Mac: ~/Library/Logs/local-lightning.log
Windows: %AppData%RoamingLocallocal-lightning.log
Linux: ~/.config/Local/local-lightning.log
NEXT STEP: Learn how to connect to the WP Engine API