Get Started
WP Engine’s Advanced Network
Tags:
Key Takeaways
WP Engine has implemented a faster, more secure advanced network with auto-enabled CDN and image optimization, boosting performance by up to 25%.
The advanced network offers Layer 3 & 4 DDoS protection, Cloudflare’s CDN, and HTTP/3 support for faster HTTP requests.
Switching to the advanced network requires updating DNS and clearing caches for full activation.
SSL and CDN are automatically applied in the advanced network, simplifying security setup for users.
WP Engine has invested in implementing a faster, more secure Advanced Network across its entire platform. Customers using our Advanced Network benefit from a more robust, auto-enabled CDN and automatic image optimization that has generated up to 25% better performance as well as more advanced DDoS protection.
We may eventually end support for our legacy network, so we recommend updating your DNS to our Advanced Network or Global Edge Security (GES) network as soon as possible.
Not sure what the differences between the Advanced Network and our other network types are? Check out our network comparison guide.
About the Advanced Network
At WP Engine, we’re focused on delivering the most innovative, fast, and secure platform for WordPress® to power your digital experiences.1 We have been hard at work this past year to create and deliver innovative improvements to our platform at no additional cost to you. One of these innovations is our new advanced network, in partnership with Cloudflare.
This advanced network delivers increased security and performance out of the box. When you update to this network option you will have Layer 3 & 4 DDoS protection, Cloudflare’s powerful CDN, and Cloudflare Polish lossless image compression.
Additionally, our advanced network supports HTTP/3. HTTP/3 accelerates HTTP requests by using QUIC, which provides encryption and performance improvements compared to TCP and TLS. Learn more on the Cloudflare blog.
Update Network
An environment can be updated to the advanced network through the User Portal. This step ensures that the new Cloudflare features are enabled and ready to go for the environment.
Each domain pointed to the legacy network must have this step performed before updating DNS. Pointing DNS alone will not enable the advanced network and can take your site offline. The option to bulk update will be made available in the future.
Environments created after May 2023 will default to the advanced network and do not need to update their domain. Skip to pointing DNS.
- On the Sites page, select the environment name where the domain has been added
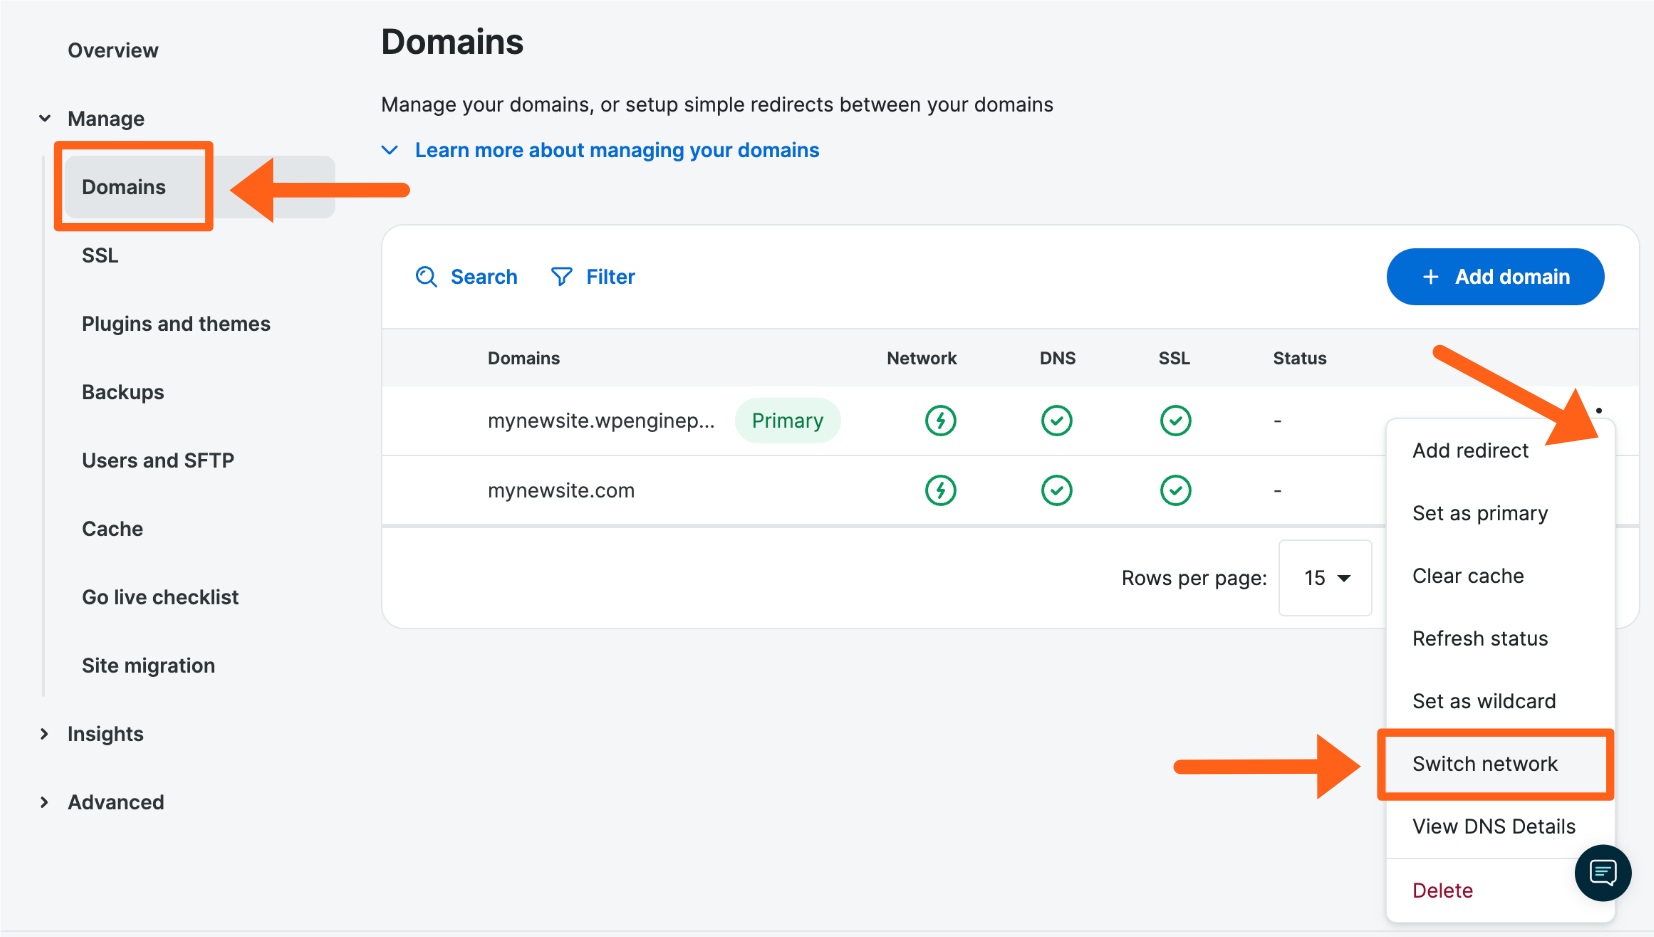
- In the lefthand secondary navigation menu, select Domains (You may have to expand the Manage dropdown section)
- Locate the domain name, and open the three dot menu icon to the right
- Select Switch Network
- Choose whether or not to include the www/non-www domain in this network switch
- Confirm that this domain will be switched to the advanced network
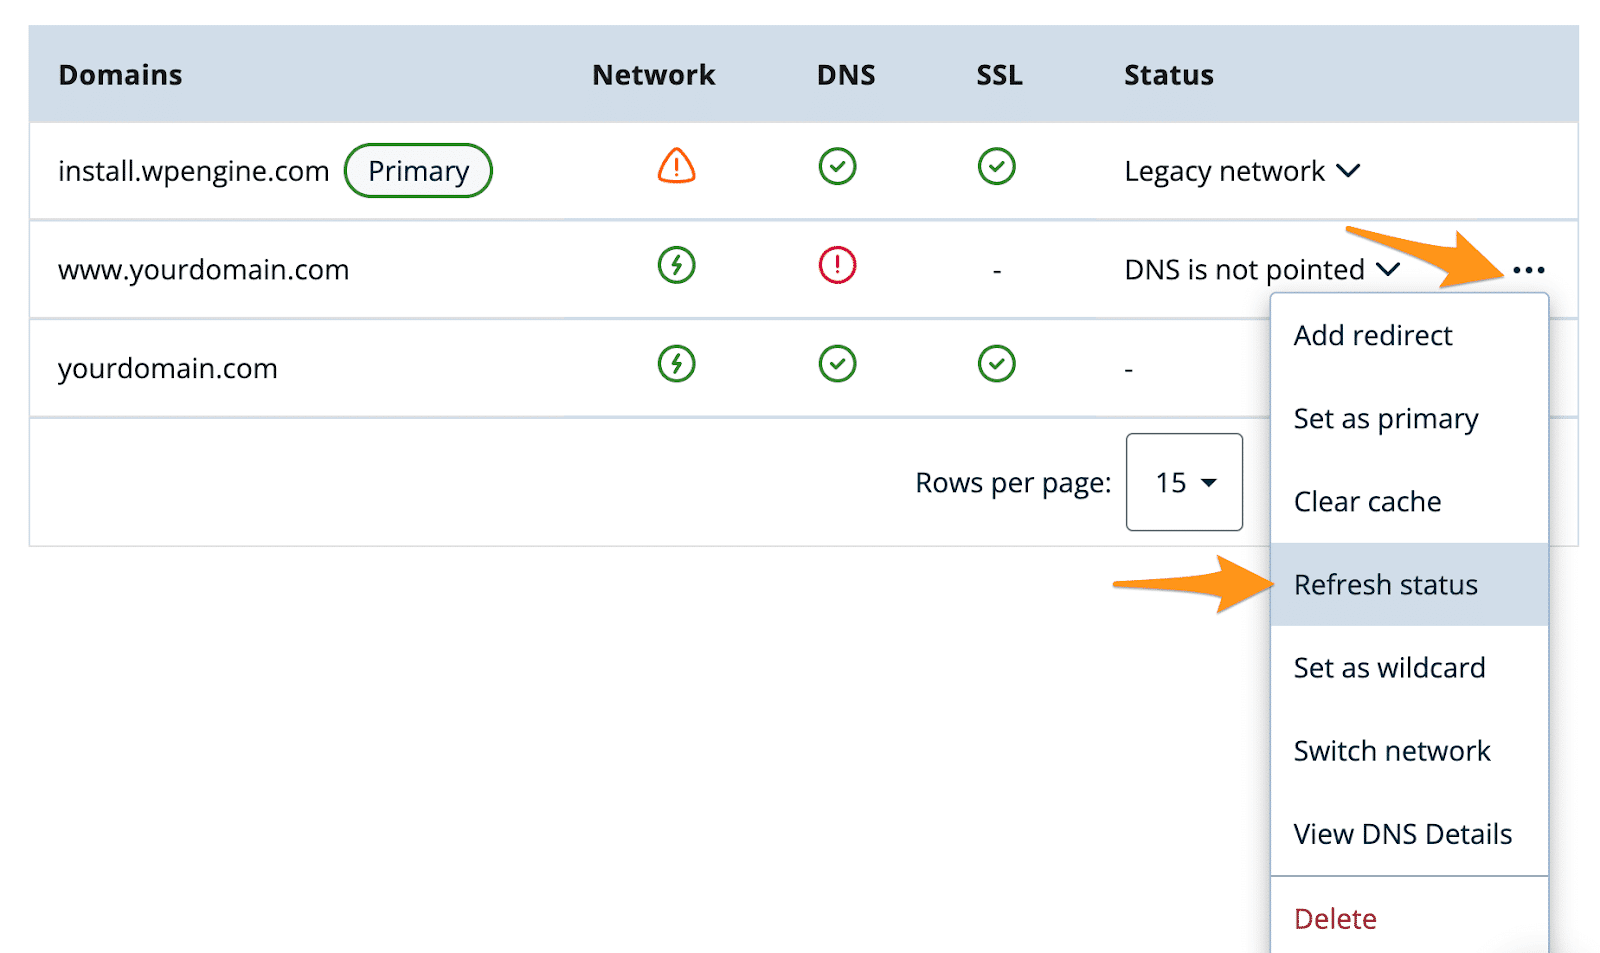
To refresh the new DNS status shown in the WP Engine User Portal, expand the three dot menu next to the domain and click Refresh Status.
Point DNS
After switching a domain to the advanced network, DNS records must be pointed to complete network activation.
The advanced network DNS Details will be displayed automatically when updating networks and two options will be displayed to point DNS:
- Option 1: Automatically – If available, log in to the domain provider to point DNS automatically. Learn more about automatic DNS configuration here. Automatic DNS configuration will use the Advanced Network CNAME or IPs, based on which option the DNS provider supports.
- Option 2: Manually – If automatic DNS configuration is not available, or not needed, point DNS to WP Engine manually. Learn more about manually updating DNS here.
To point DNS manually:
There are two options when manually pointing DNS:
- Point DNS to advanced network using CNAME flattening.
- The advanced network CNAME is a the same for each WP Engine environment:
wp.wpenginepowered.com - If you already have CNAME flattening configured, simply replace the current WP Engine CNAME with the new advanced network CNAME.
- The advanced network CNAME is a the same for each WP Engine environment:
- Point DNS to advanced network using dual A records.
- While CNAME flattening is preferred, A records are supported. To ensure maximum load balancer accessibility, two A records should be configured for any domain pointed via A record, using two separate IP addresses. Although rare, these IP addresses are subject to change for security purposes. Learn how to view advanced network DNS details again here.
That’s it! Once your records have been updated with your DNS host you will have successfully enabled the advanced network. The Cloudflare SSL and CDN will be applied after the DNS has been verified. This process may take a few minutes.
If you have questions, or run into an issue, please reach out to our Support team at any time.
CDN and SSL
When using the advanced network, SSL and CDN are automatically applied at Edge. Neither needs to be added, activated, or configured.
Let’s Encrypt certificates ordered through WP Engine will not be applied to the advanced network. Third party SSL certificates can be applied, if desired. Learn more about SSL here.
Cache
To clear advanced network caches:
- Log in to the User Portal
- Select the environment name
- From the secondary lefthand menu, click Domains
- Expand the 3 dot menu icon to the right of the domain
- Select Clear cache
NEXT STEP: Learn how to point your DNS to WP Engine