Configure Mailgun for WordPress
Most WordPress hosts, including WP Engine, limit your website’s email usage because web hosting servers are not optimized for sending email. Email is better served when sent from a specialized email server. This allows you to manage spam, view logs and ensure deliverability.
Mailgun is a popular email relay service to help ensure your emails are delivered to your recipients. In this article we will explain how to configure Mailgun and the Mailgun WordPress plugin to help improve email deliverability.
Sign Up with Mailgun
The first step to configuring Mailgun is to sign up for an account. Mailgun is free for the first 5,000 emails every month, making it a great cost-friendly option for websites that don’t send a massive amount of email.
After signing up you will be prompted to verify your account via email and text message. When your account is verified, you will be able to add your domain to Mailgun.
Add Domain
Once you’re logged in to Mailgun’s dashboard, click Add Domain.
Choose a domain (or subdomain, preferably) for sending mail through your website. In my example I chose the “mail” subdomain of my top-level domain (mail.areallycoolwebsite.club).
Mailgun will then guide you to the records you will need to add to your DNS manager. Leave this page open in a separate tab to easily copy the information in the next step.
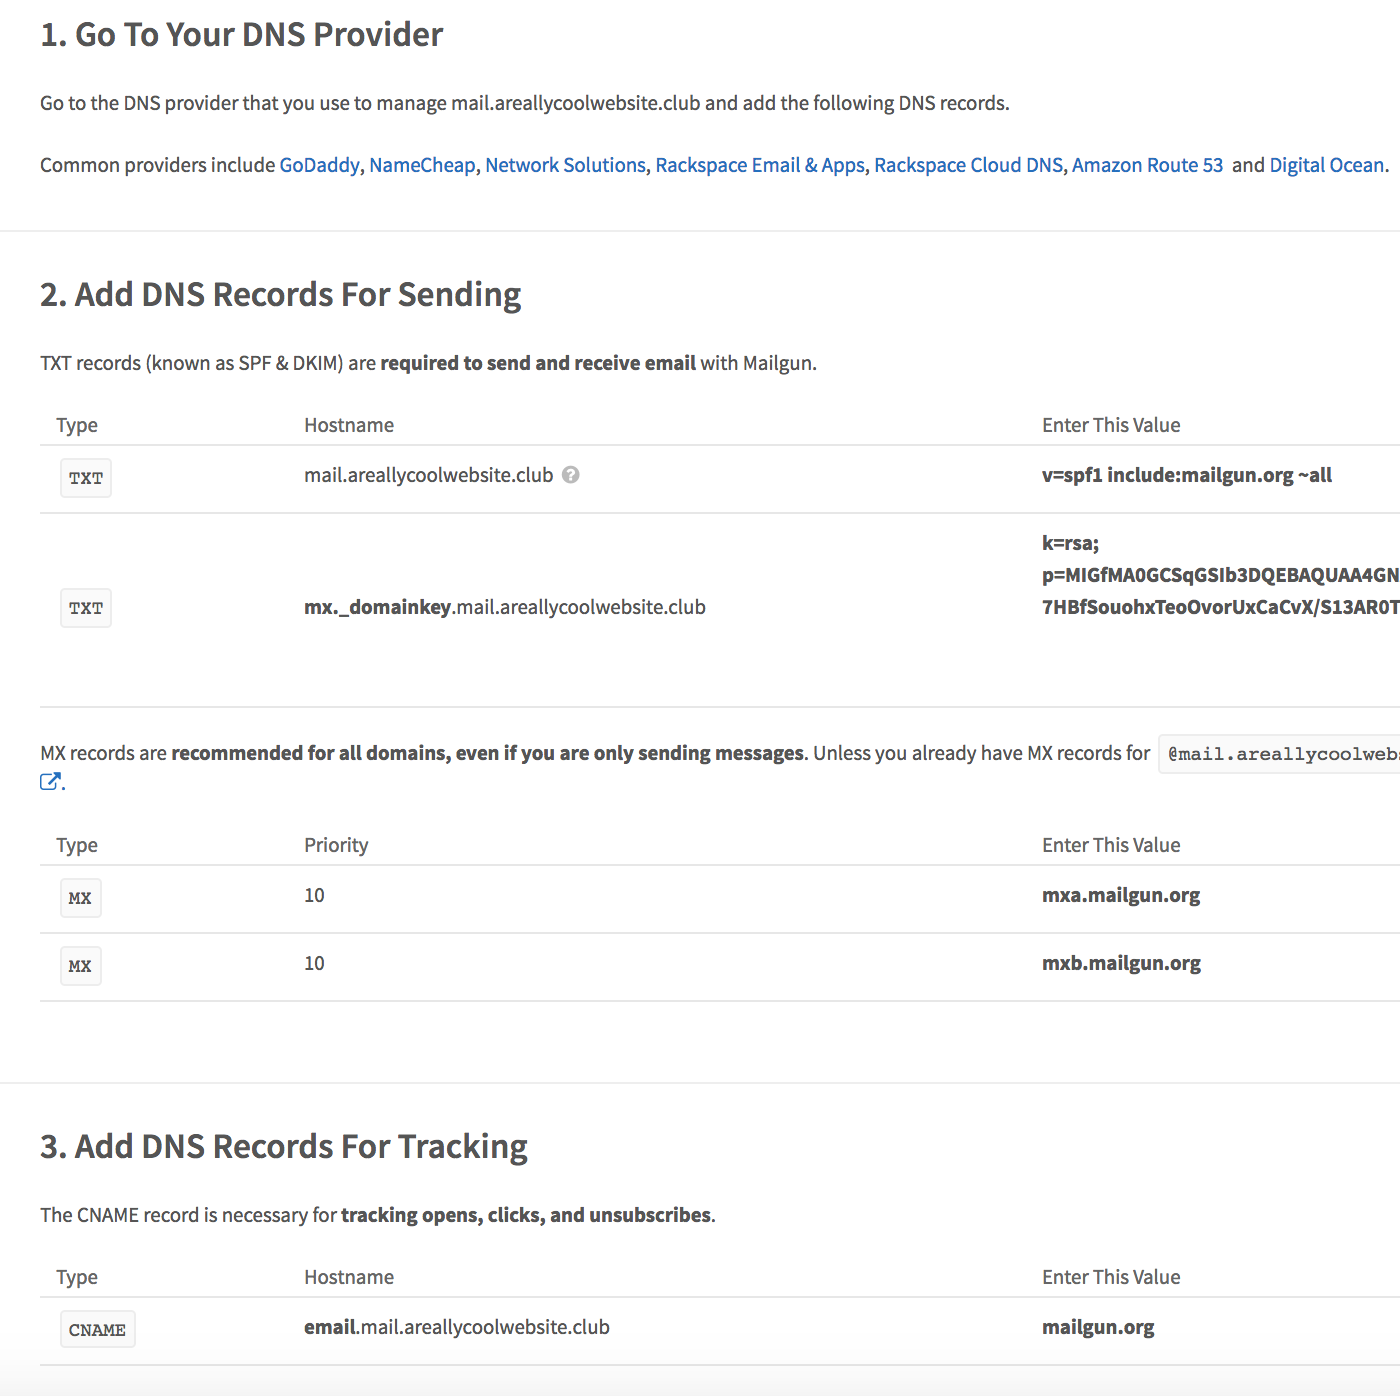
Add and Verify DNS Records
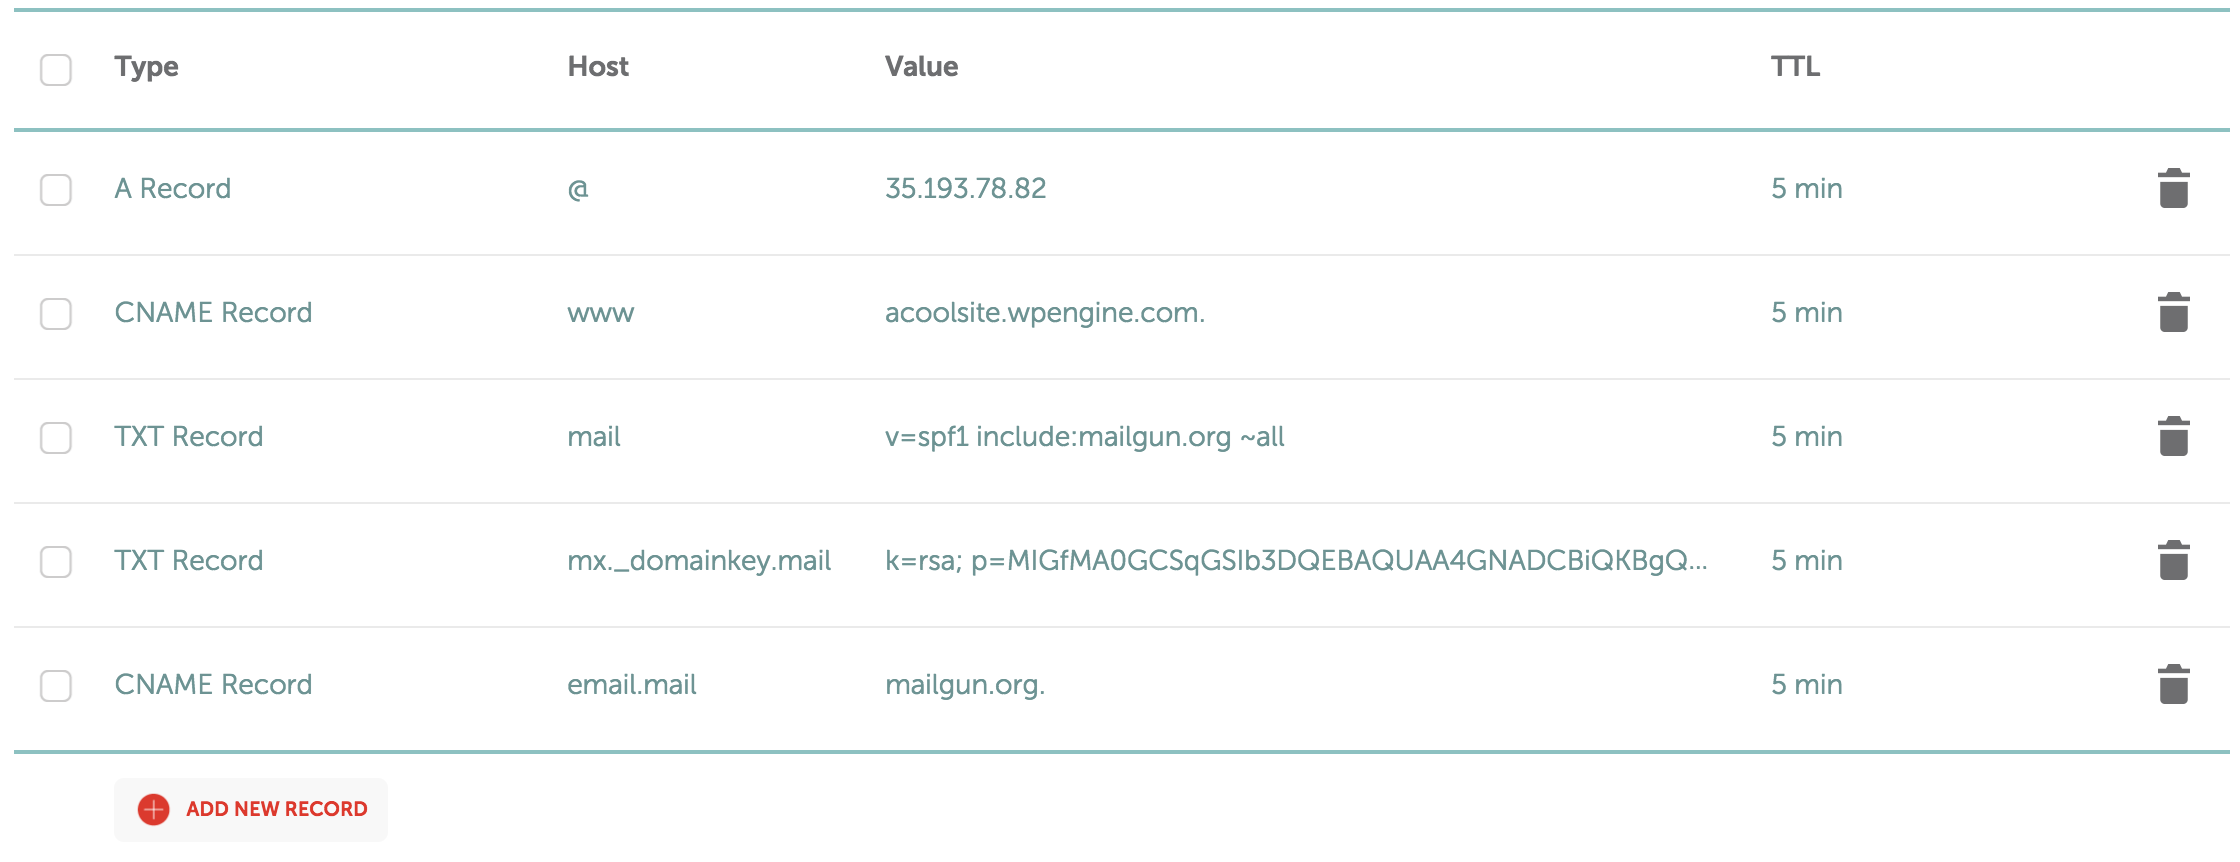
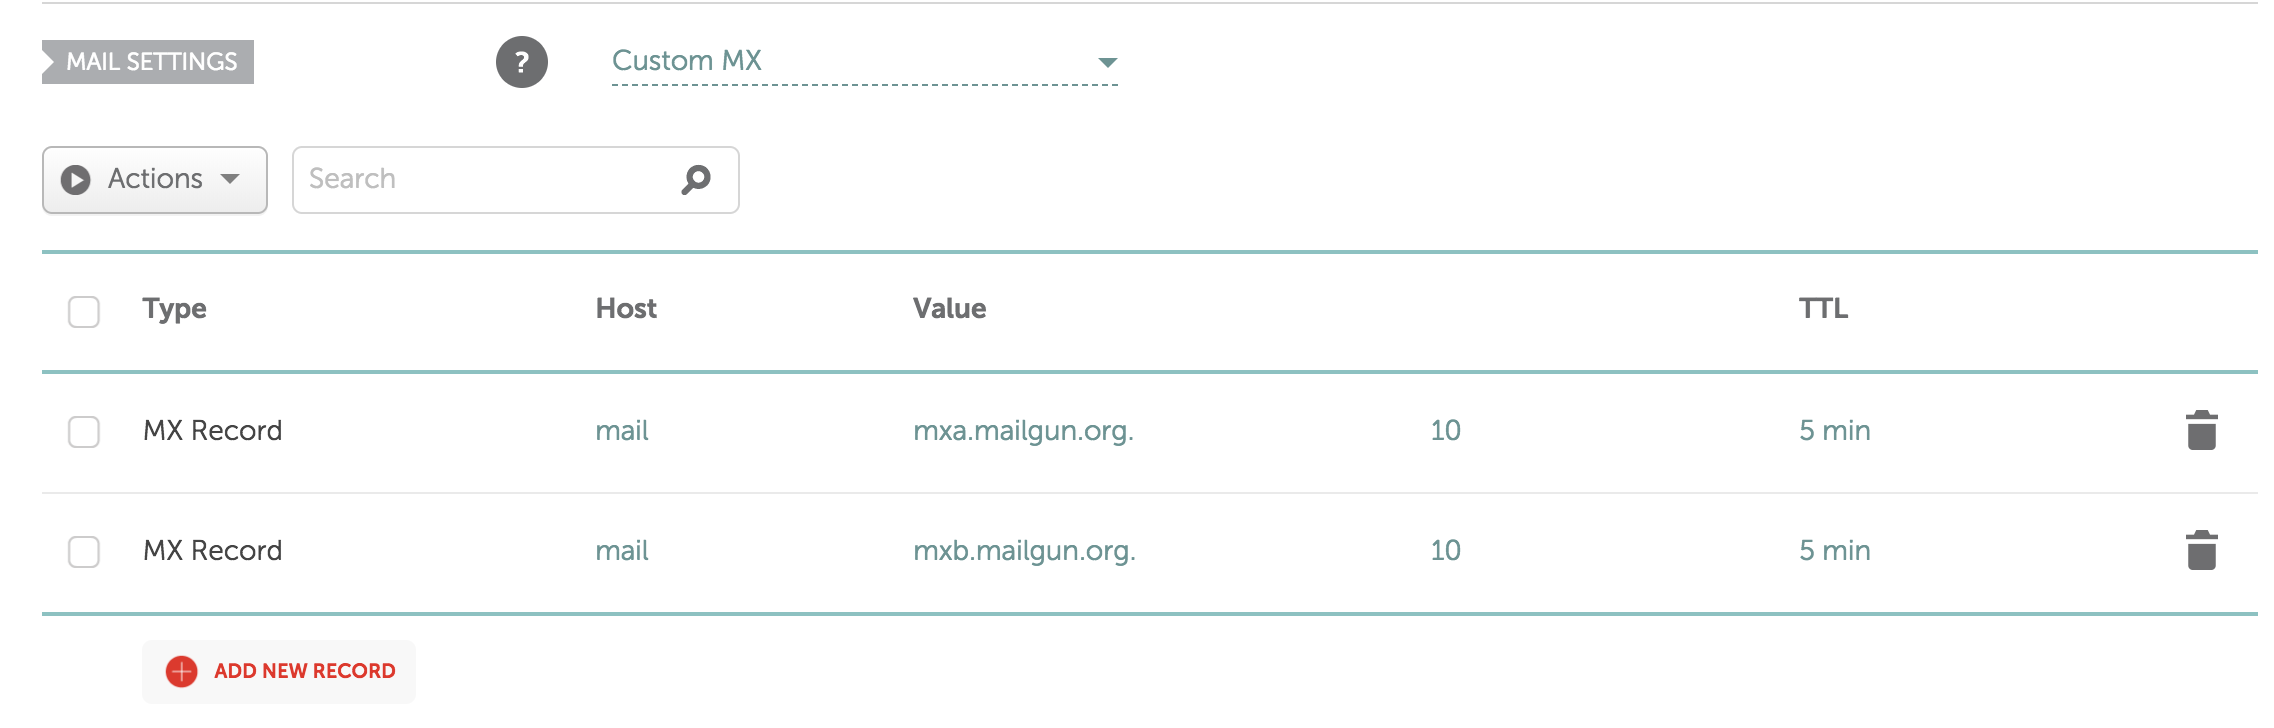
Copy the records listed in Mailgun’s configuration page into your DNS provider’s dashboard. I manage this domain through Namecheap, so this is where I added the mail records as shown in Mailgun.
Once your records have been added, you can verify your records have been successfully configured on the Mailgun Domains page. Scroll down and click “Domain Verification & DNS” to check whether your records were successfully configured (remember: these records can take up to 24 hours to propagate).

Install and Activate Mailgun
You will need to login to your WordPress Admin Dashboard for the following steps. Login to your website at the /wp-admin path to access the WordPress Admin Dashboard.
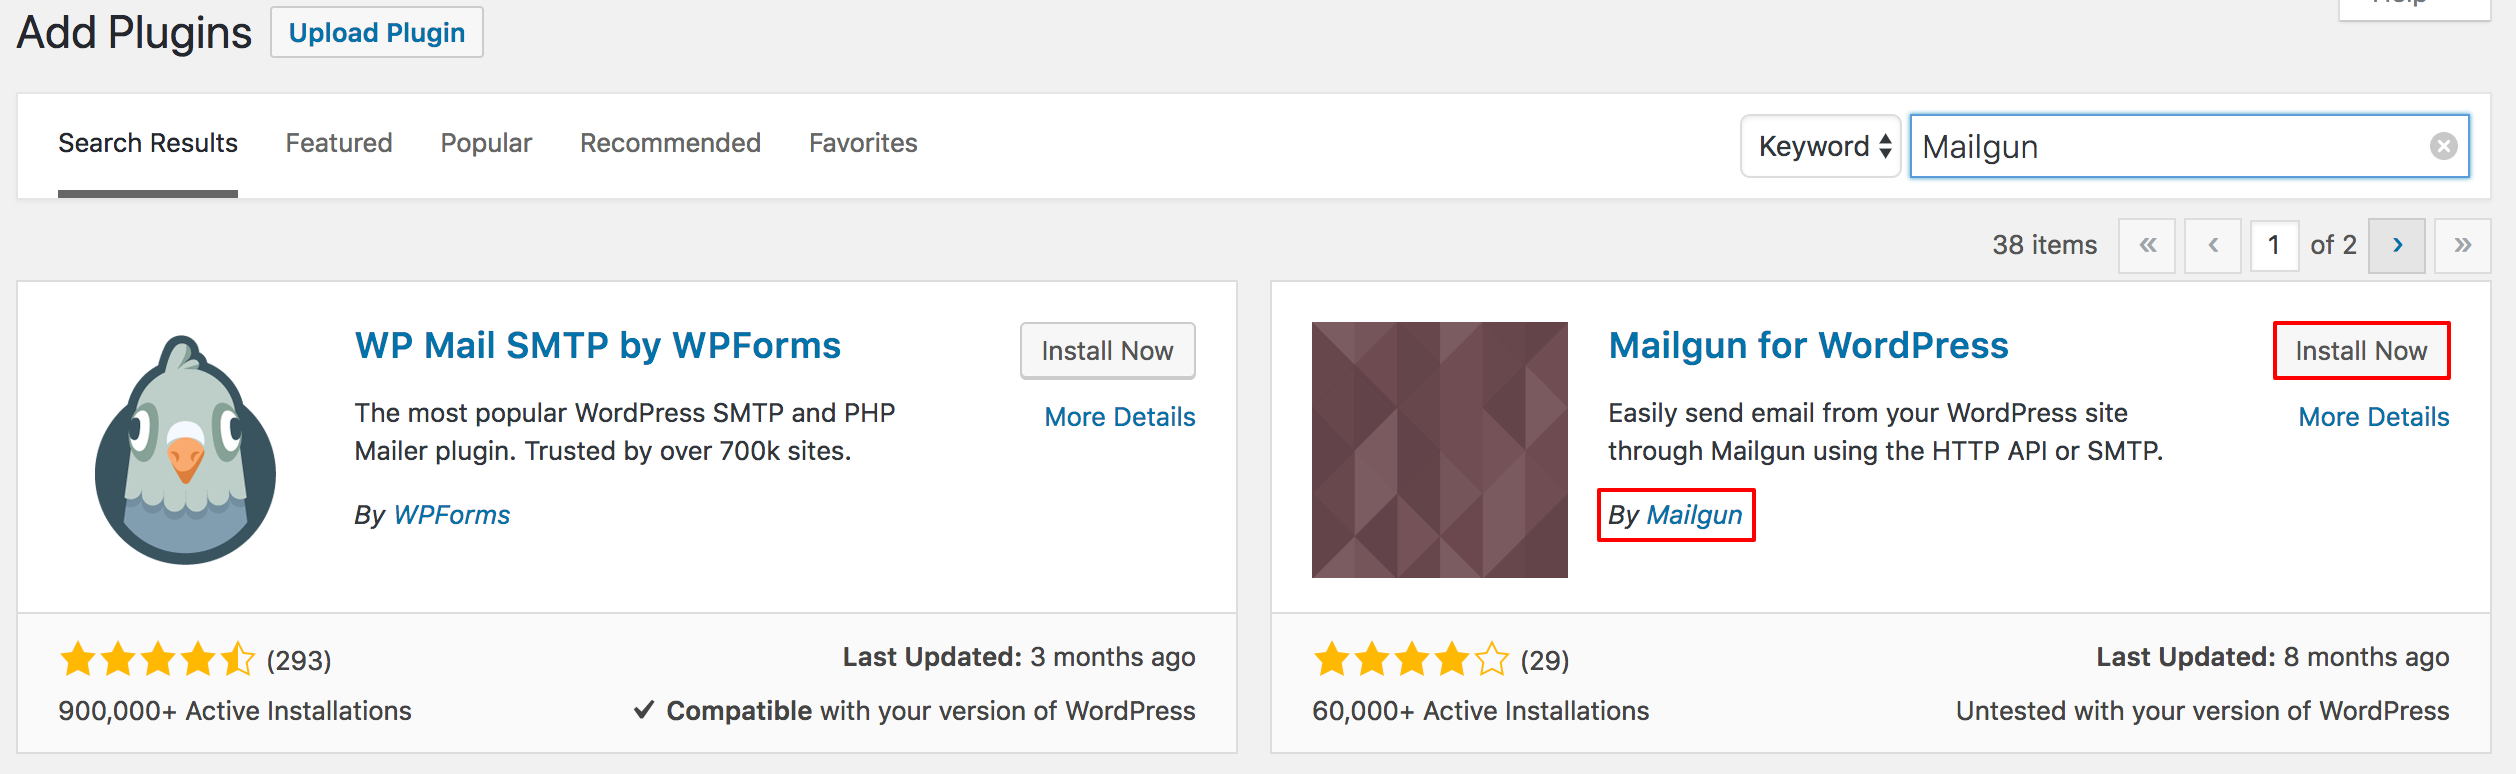
Navigate to Plugins > Add New and type “Mailgun” to locate the Mailgun for WordPress plugin. You will be able to recognize it because it is both named “Mailgun” and made by “Mailgun” as the author.
Once it is installed, activate the plugin on the same screen. Then you can configure Mailgun from the Settings > Mailgun section.
Configure Mailgun
Once you have arrived to the Mailgun plugin Settings page, you will enter some important settings from the Mailgun portal.
Firstly, ensure “Yes” is selected for the Use HTTP API setting. This ensures your mail will be relayed over the Mailgun API instead of using an SMTP port. The API setting is more reliable, and works even when normal mail ports are closed.
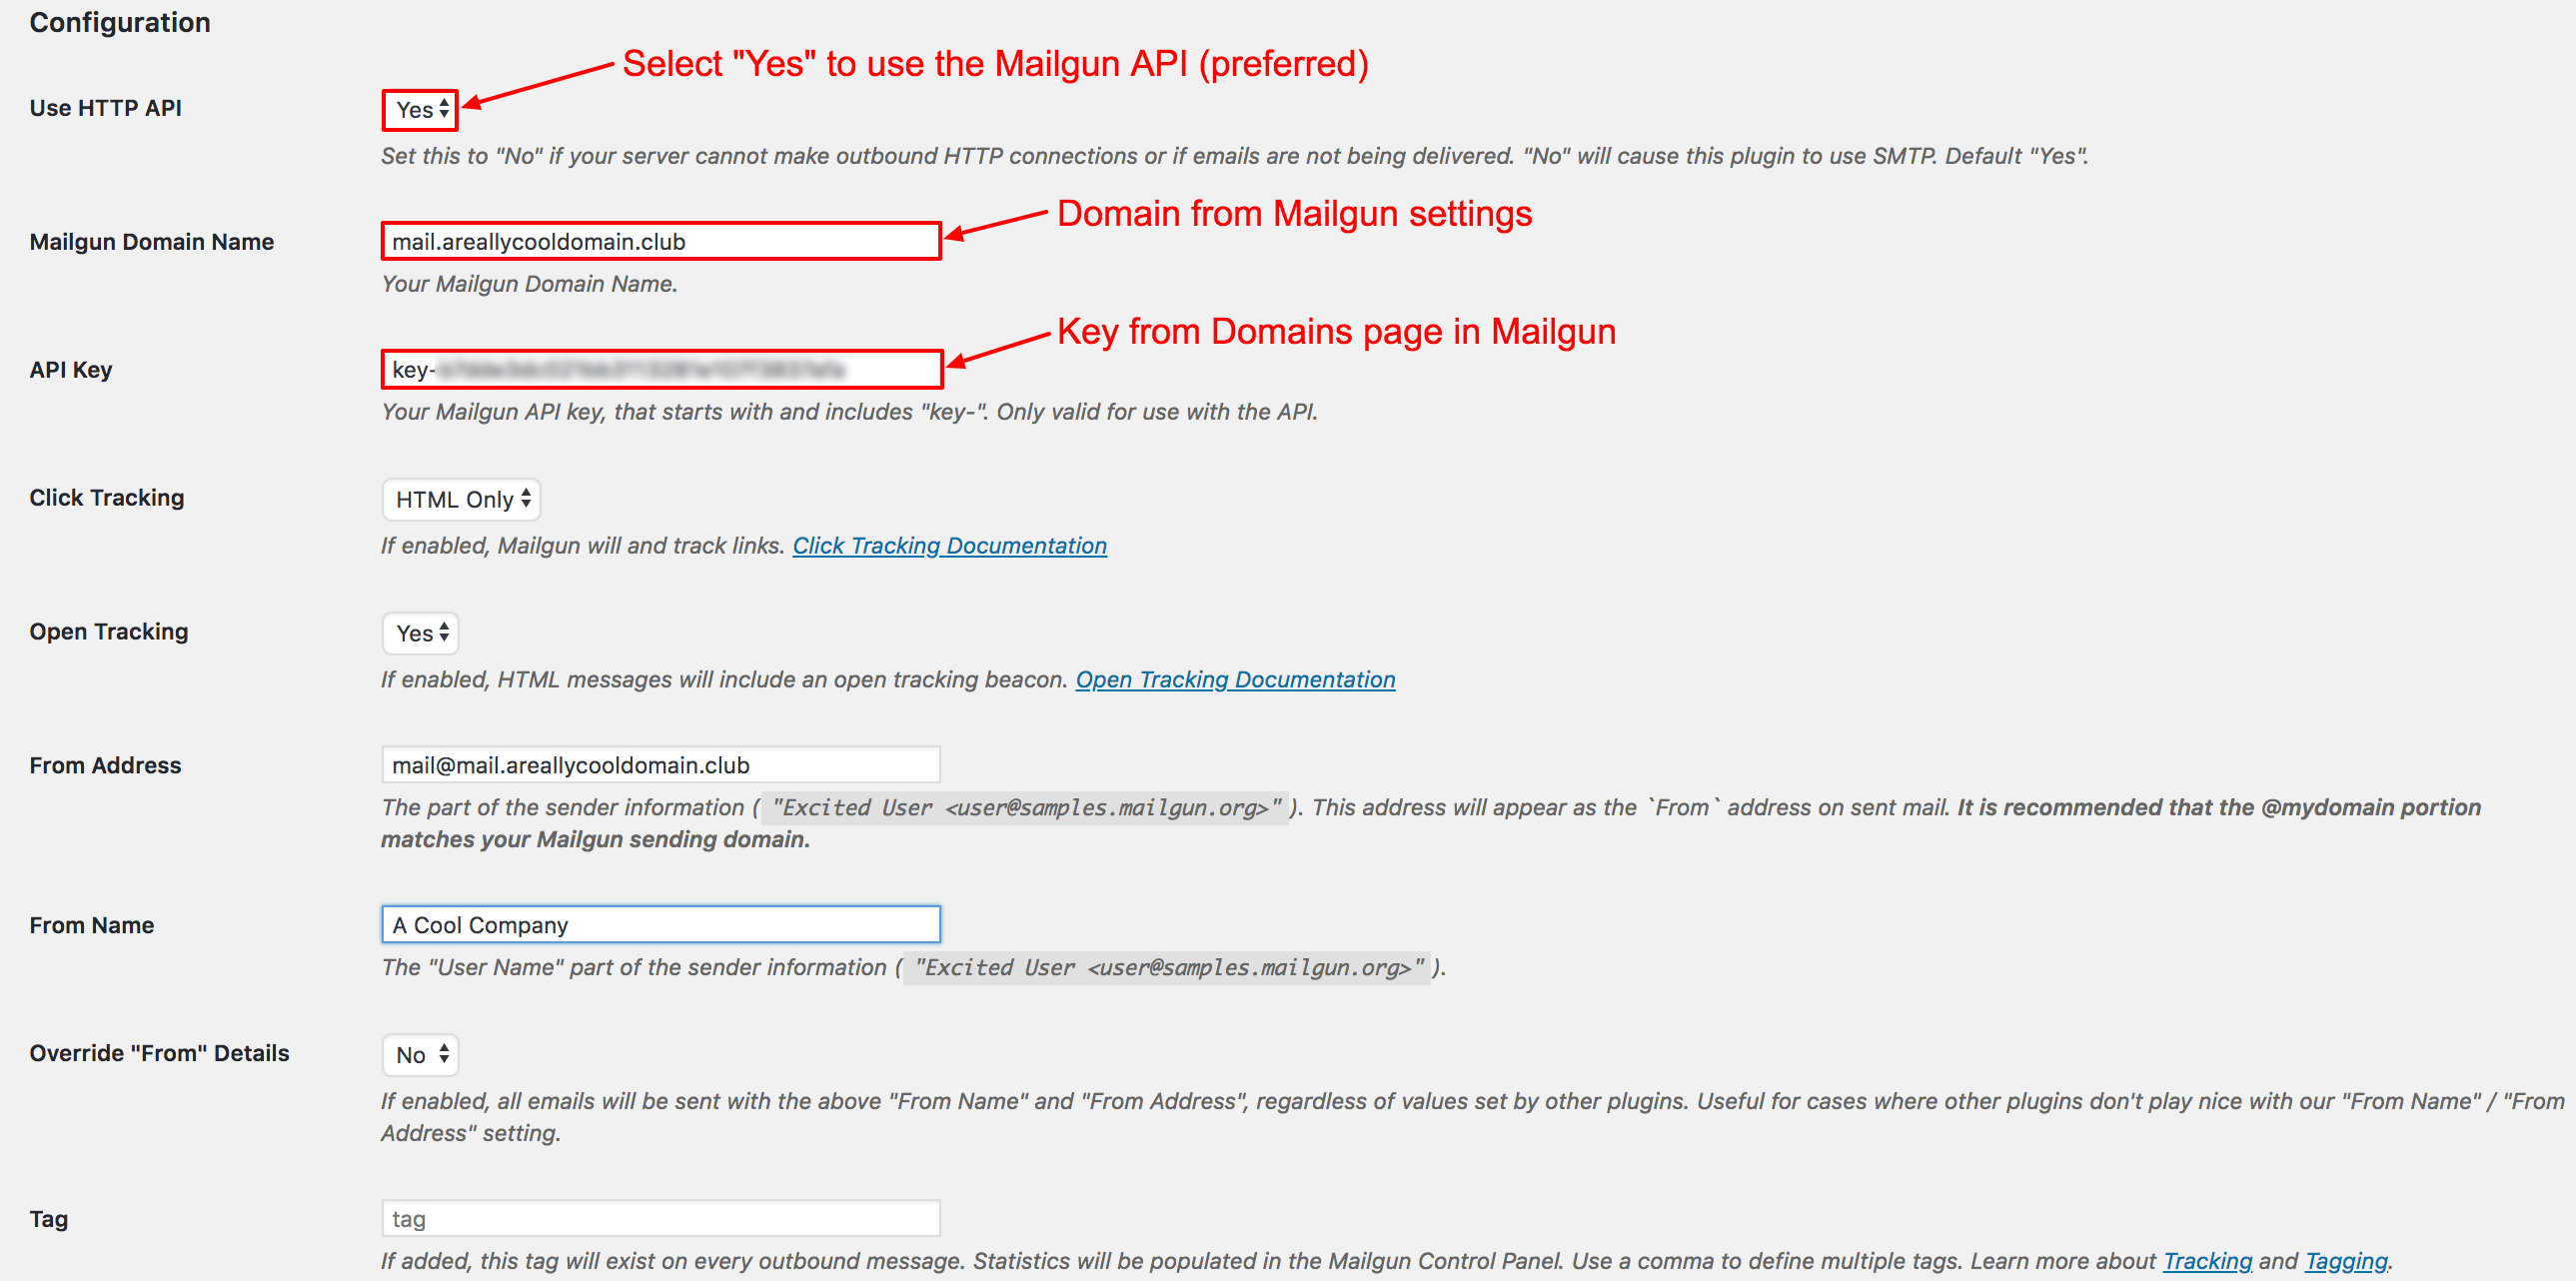
Then, enter the domain you configured for use with Mailgun in the Mailgun Domain Name field.
Enter the API Key from the Mailgun Domains page, then continue to set the rest of your preferences before saving.
After saving you will be able to send a test email to ensure your settings were configured properly.
If you encounter any errors, it could mean your DNS settings are still propagating, or that your settings are misconfigured–make sure your Mailgun domain also shows “Active.”
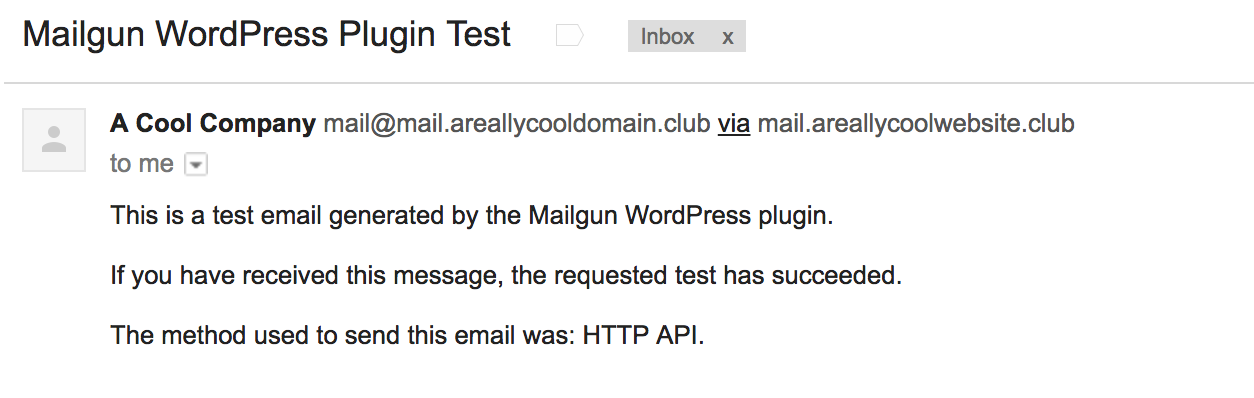
If the email is sent successfully, you should receive an email with the following text:
This is a test email generated by the Mailgun WordPress plugin. If you have received this message, the requested test has succeeded. The method used to send this email was: HTTP API.
Send Emails with WordPress
Now that your Mailgun settings are configured and tested, your WordPress emails (like password resets, etc.) are automatically sent through Mailgun.
Once Mailgun is configured, you can add other plugins that will send email through WordPress, like Contact Form 7 or Gravity Forms, to allow your users to send inquiries to you. You may also send newsletters or other mass communications to your users.
Be aware, your account is free up to 5,000 emails. Beyond that, you can pay for what you use according to Mailgun pricing per plan.
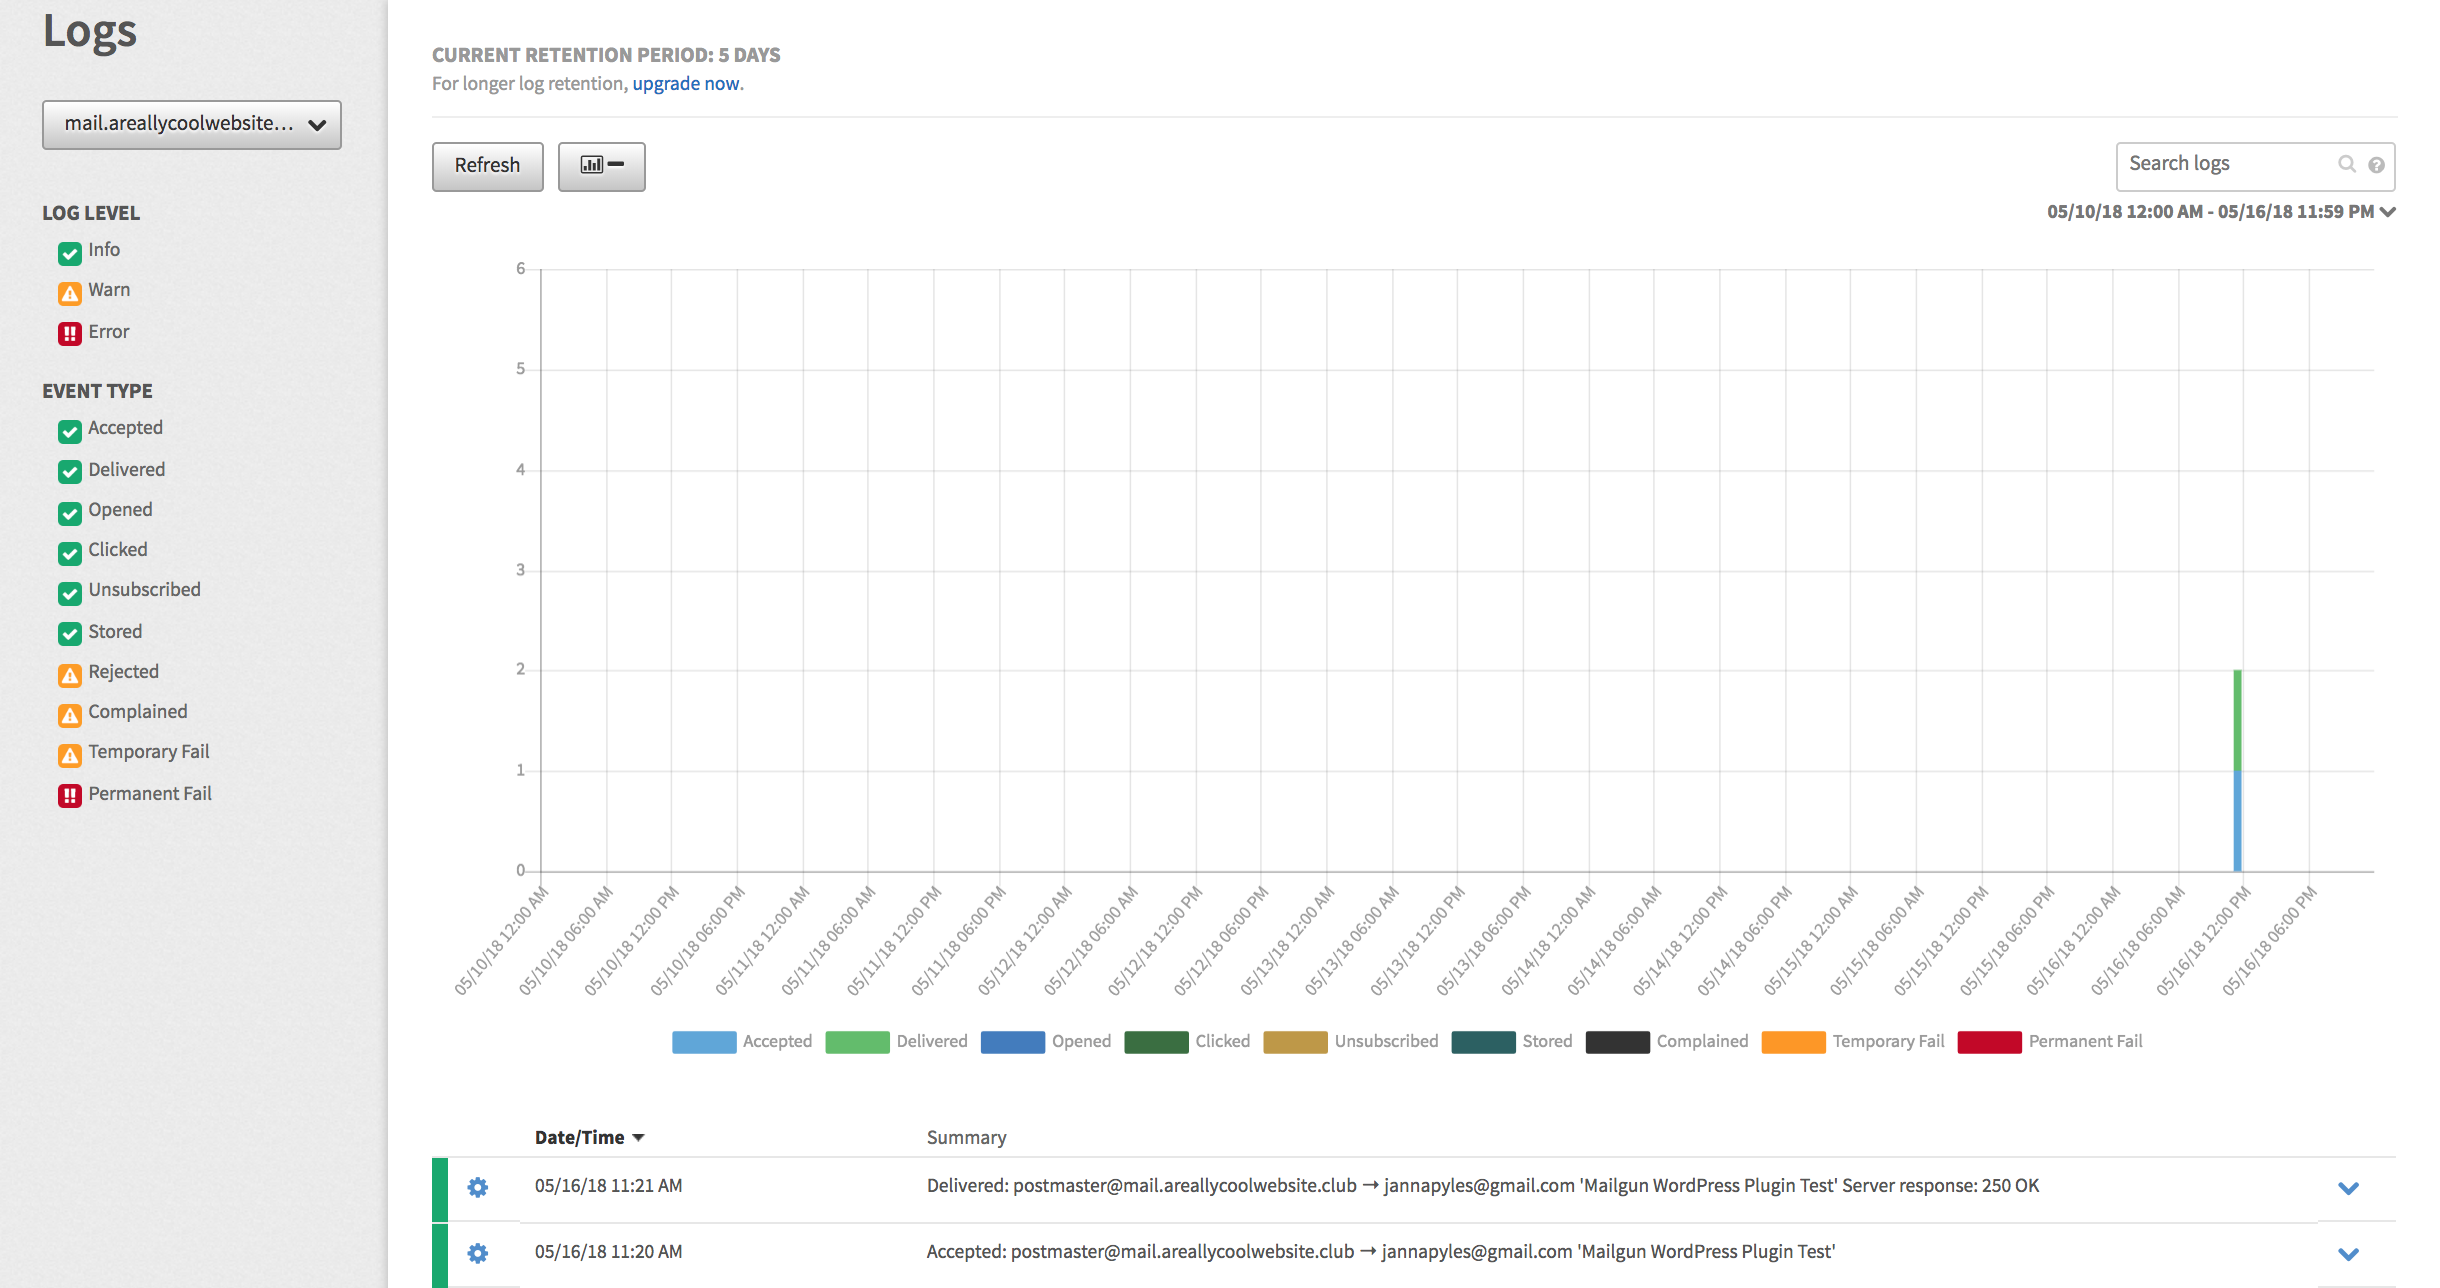
You can track your email deliverability, as well as statistics (accepted, delivered, bounced, opened, clicked, etc) from the Mailgun Logs area.
NEXT STEP: How to use DMARC policies to ensure emails can be delivered