Point DreamHost DNS to WP Engine
If you use DreamHost as your DNS provider, this guide will help you point your DNS records to WP Engine. This step is required in order to “go live” with your domain on the WP Engine platform.
NOTE: Before taking these steps, please add your domain in User Portal.
Step 1: Locate your DNS information in User Portal
The first step is to locate your CNAME and A Record in your WP Engine User Portal. You can find this information from the Overview page for your production environment.

Keep this page open as you continue through the following steps for easy copying!
Step 2: Login to DreamHost
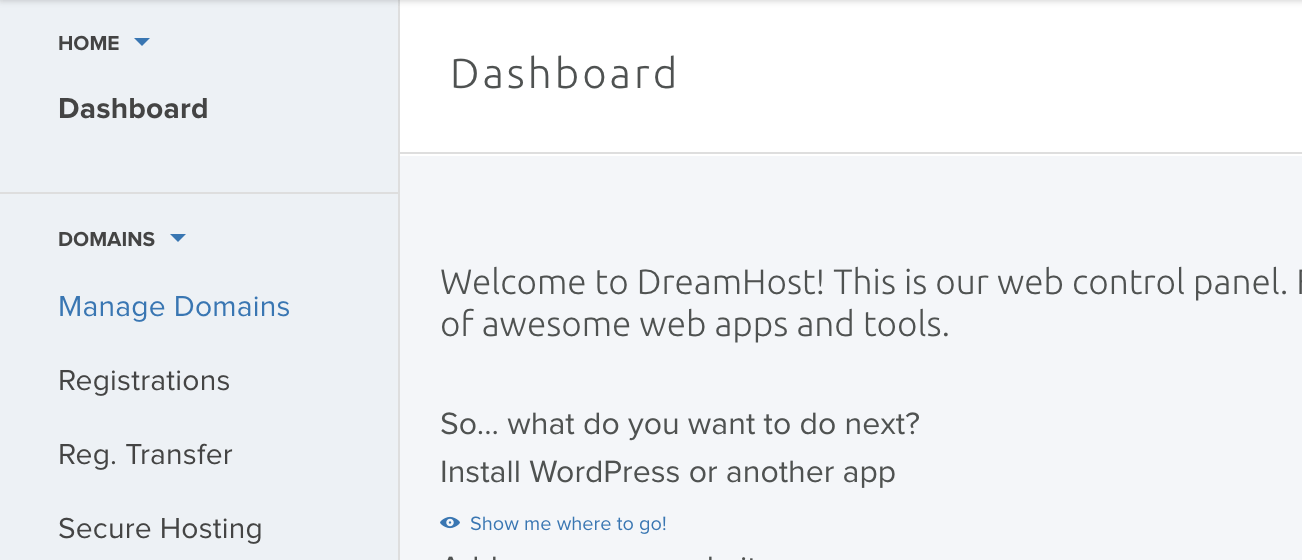
Now, enter your login credentials at panel.dreamhost.com. Under the “Domains” section at the left, select “Manage Domains” from the list.
In the following steps we will help you update the records on file with DreamHost to point to WP Engine.
Step 3: Update DNS
Now it is time to plug in the settings from the WP Engine Overview page into your DreamHost settings. Before doing this, it’s time to make a choice:
- Option A (preferred): point your nameservers to Cloudflare. If your site is migrated internally with WP Engine, DNS changes won’t be needed.
- Option B (still okay!): point your A records to WP Engine. This will work just fine, but you will need to update your DNS records if your website is ever migrated to a new server. This method keeps your Domain and DNS management at DreamHost.
Option A: Point Nameservers to Cloudflare
Option A is to use a service called Cloudflare to point your DNS records to WP Engine. Cloudflare has several plan tiers, including a free option. Cloudflare’s services include SSL, CDN, more fine-tuned control of the visitors to your website, and even DDoS protection on some plan tiers. In this case, we are using Cloudflare to allow for CNAME flattening, which means that if your site is migrated internally with WP Engine, DNS changes won’t be needed.
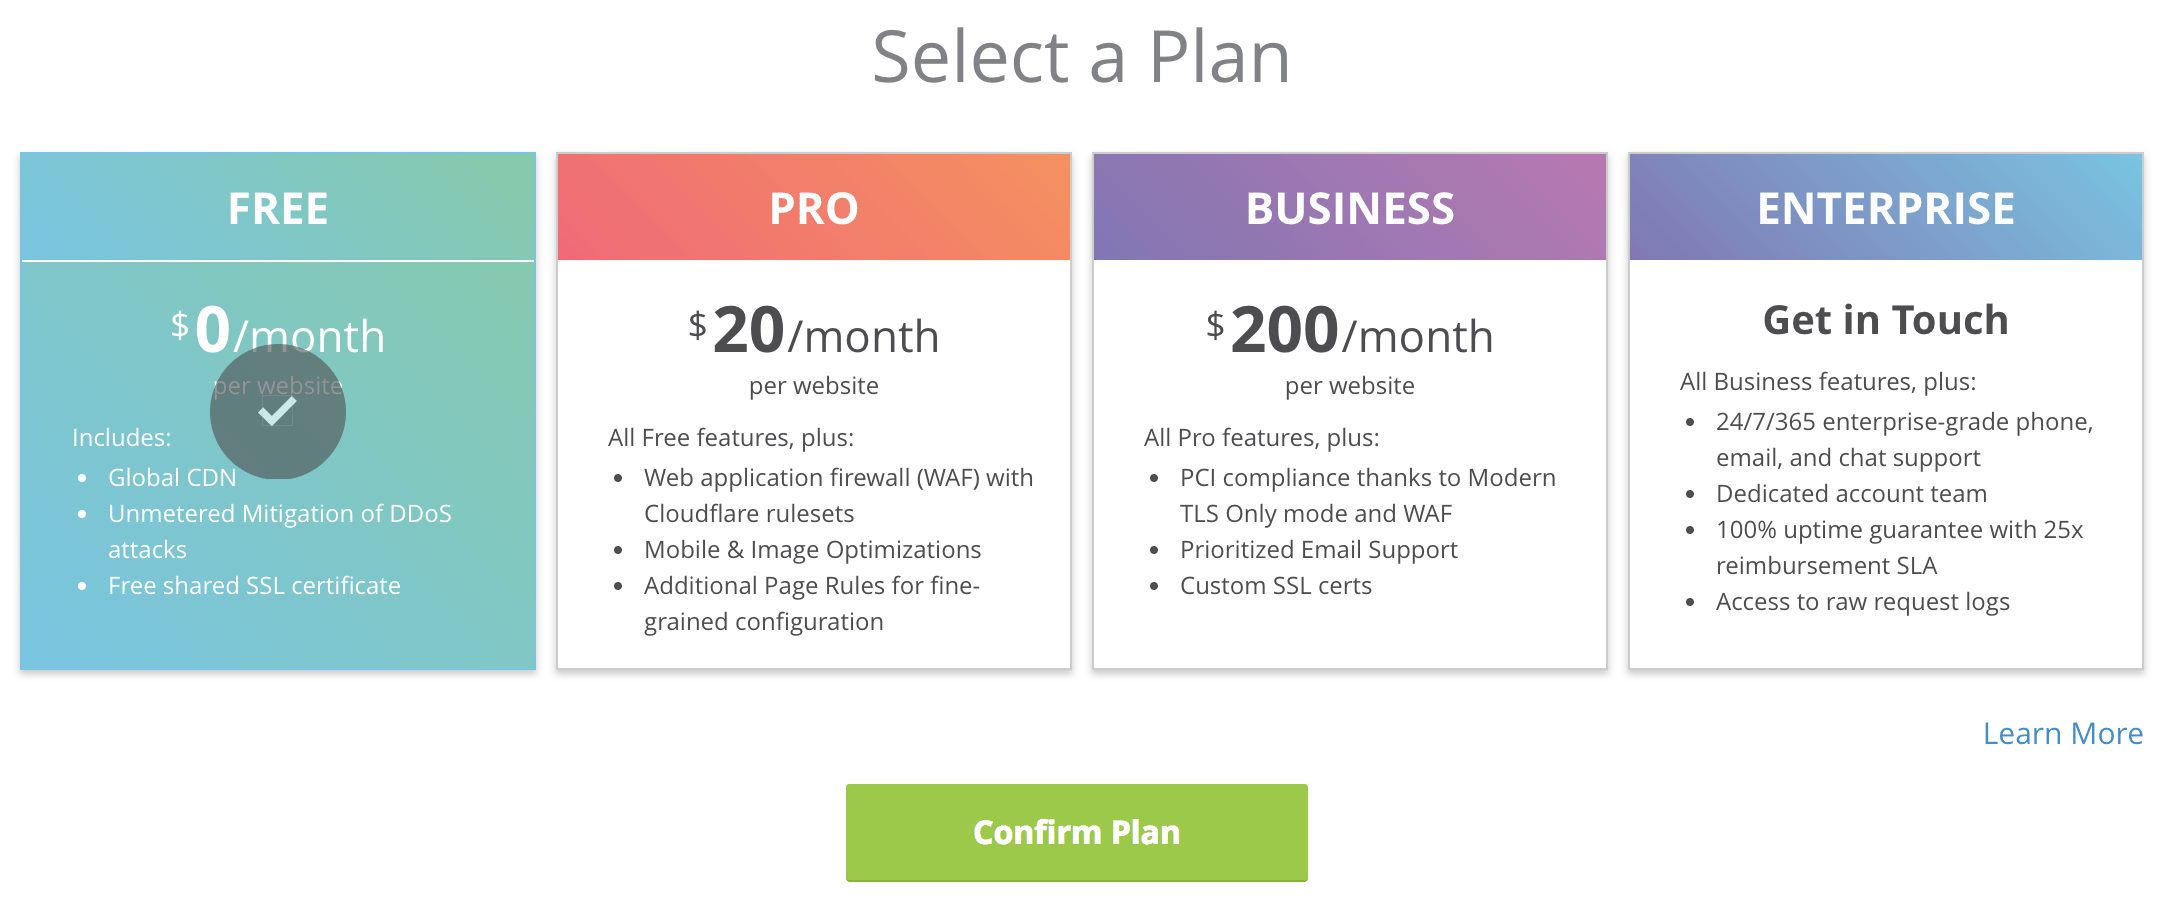
To get started, head to www.cloudflare.com and choose to sign up. In the process you will be asked for your domain name. Cloudflare will look up your existing DNS records, and ask you to choose a plan. For the purposes of this article we have selected the free plan.
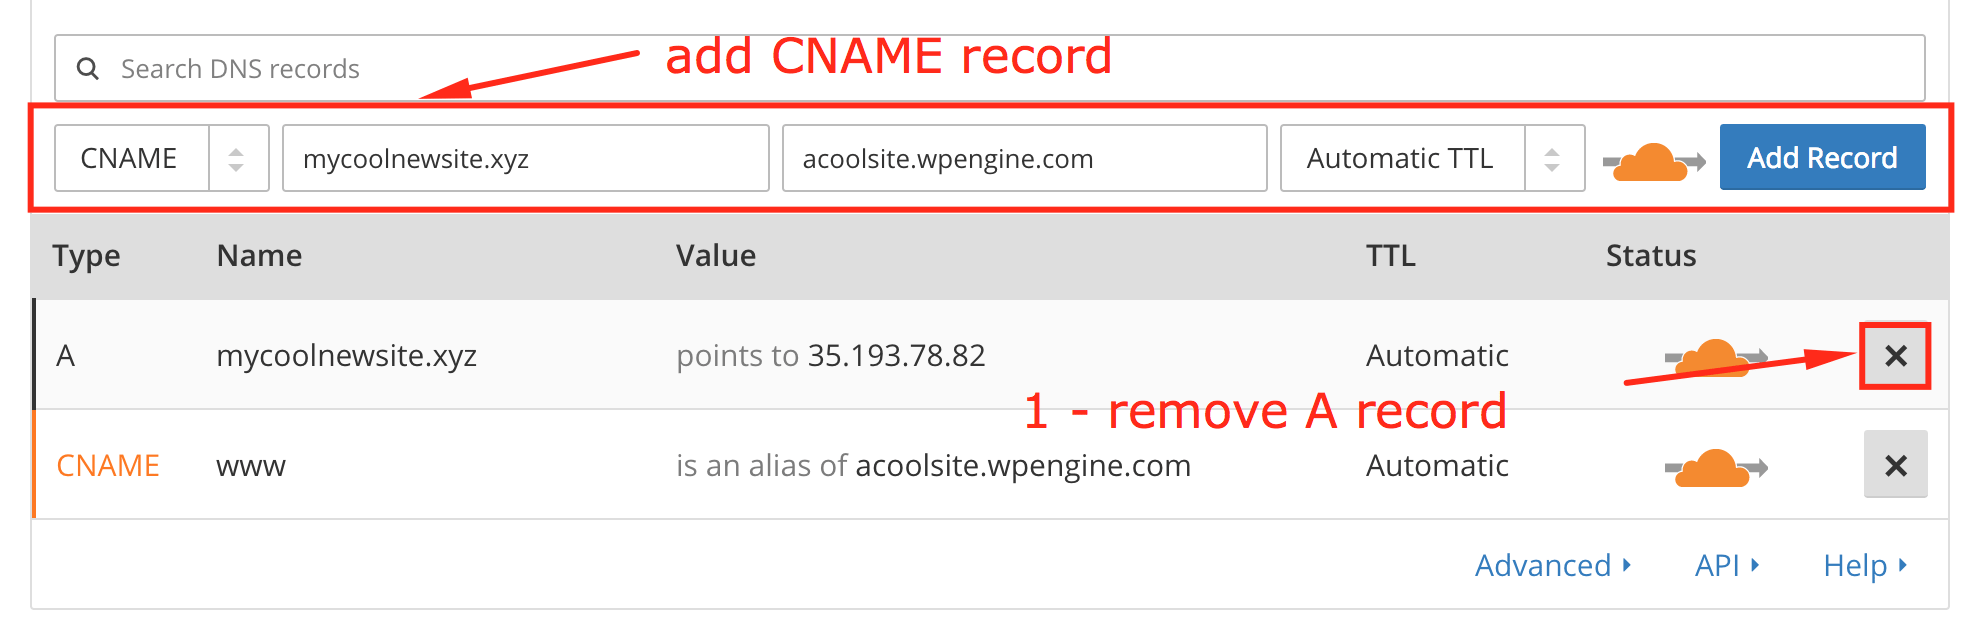
Once you confirm the plan, Cloudflare will show you the DNS records they found. Select the A record for your root domain in the list and remove it. Then, add a CNAME record to replace the one removed. The CNAME record should point to the CNAME showing in the Overview page of your WP Engine User Portal.
Upon saving, Cloudflare will display new Nameservers for you to use. You will need to edit your DreamHost nameservers for this step. Keep the Cloudflare page open for easy copying!
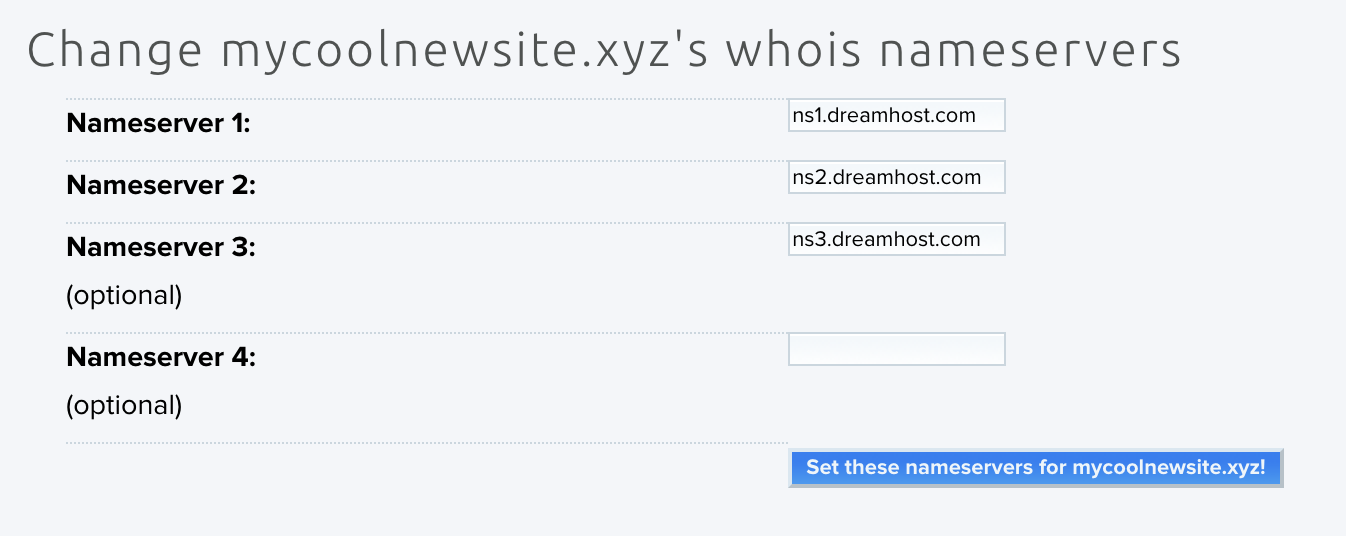
In the DreamHost dashboard, select “DNS” under your domain name. Then, change the DreamHost Nameservers listed to the Cloudflare ones instead.
After saving your changes, your DNS will be successfully pointed to WP Engine! All that’s left is to wait for propagation of the changes, which can take some time. In the meantime, be sure to review our Going Live guide to ensure you didn’t miss any important steps. To learn more about Cloudflare’s other services like CDN and SSL, head to Cloudflare Best Practices.
Option B: Point A Records to WP Engine
With this option, you will be updating the DNS records for your domain right at DreamHost. While this option works just fine, just keep in mind that you will need to update your DNS records here if your website is ever migrated.
With DreamHost, by default your domain is “parked” to point to DreamHost servers. In order to get access to add your own DNS records, you will need to “unpark” your domain, which could result in downtime until your new records are added.
You must also ensure that the Nameservers are set to those provided by Dreamhost, or you will be unable to edit your DNS records.
First, select “Deactivate parked” and confirm the change. Then select “DNS” under your domain listing.

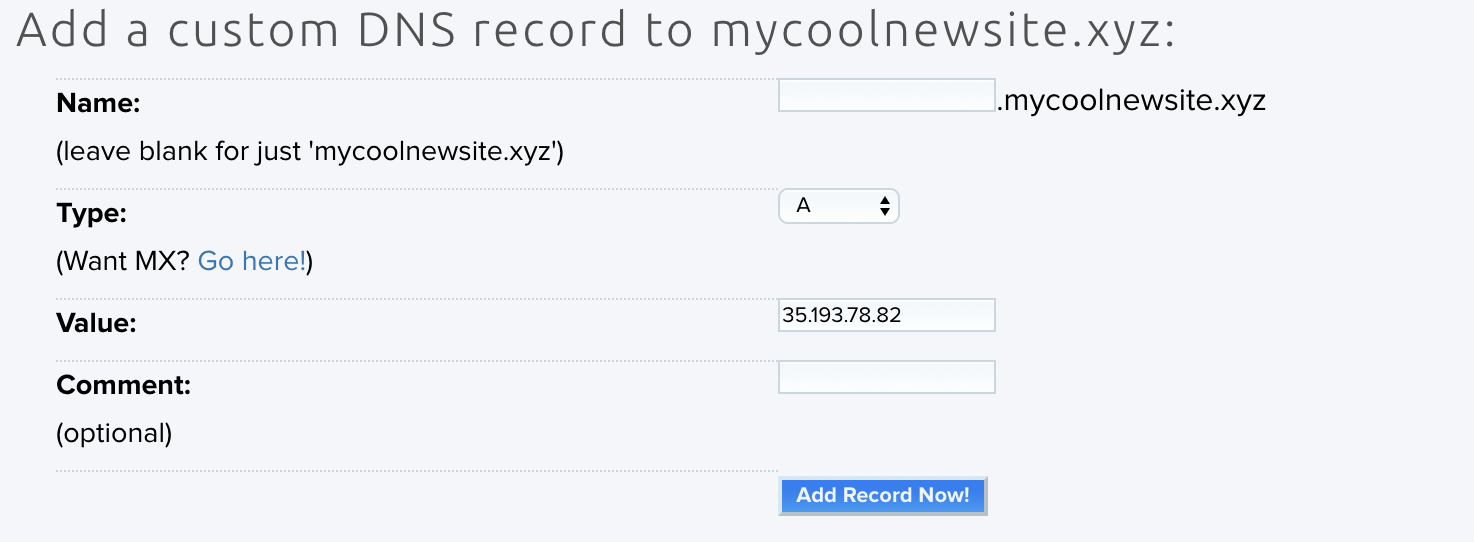
Now you will be able to add new records for your domain. You will need to add an “A Record” for your root domain first.
To do this, leave the space before your domain empty, select “A” as the Type, and as the value, enter the IP Address from the Overview page in the WP Engine User Portal. Click “Add Record Now!” to finalize your changes.
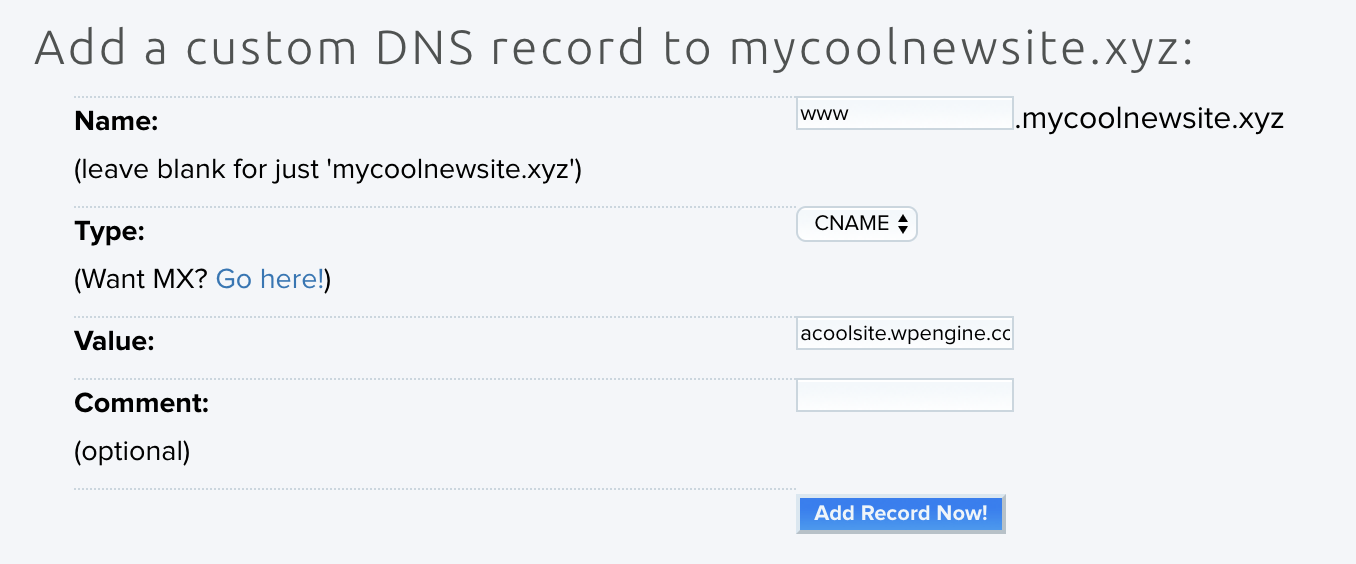
Now we need to add the “www” record as well. For this record, enter “www” in the box in front of your domain. For Type, select “CNAME.” Last, enter the CNAME from your WP Engine Overview page in the Value section. Select “Add Record Now!” to save your changes.
Once this is complete, your domain will be successfully pointed to WP Engine! All that’s left to do is to wait for the propagation of your changes, which can take some time. In the meantime, be sure to review our Going Live guide to ensure you didn’t miss any important steps.