Point HostGator DNS to WP Engine
If you use HostGator as your domain registrar, this article will guide you in configuring your DNS to point to WP Engine. This step is required in order to go live with your custom domain on the WP Engine platform.
NOTE: Before taking these steps, please add your domain in User Portal.
Step 1: Locate your DNS information in User Portal
The first step is to locate your CNAME and A Record in your WP Engine User Portal. You can find this information from the Overview page for your production environment.

Keep this page open as you continue through the following steps for easy copying!
Step 2: Log into HostGator
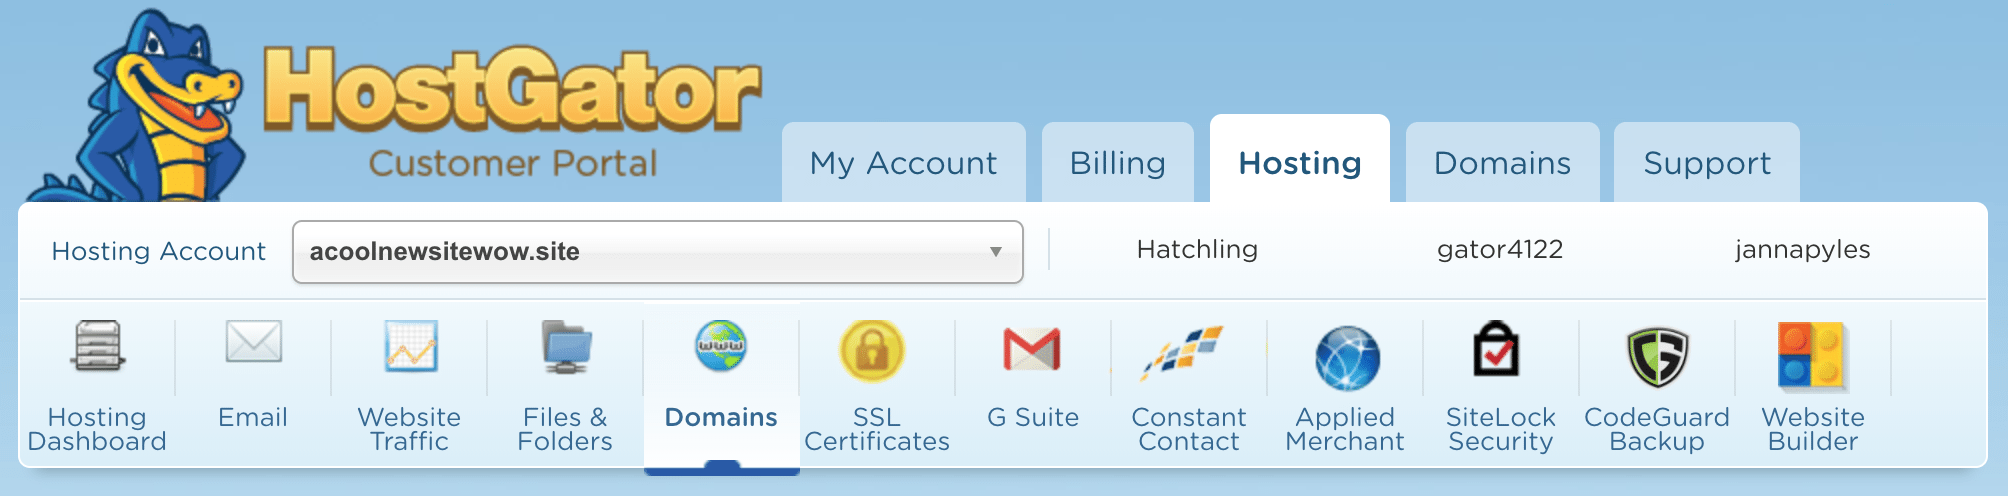
Open a new tab, and log into the HostGator Customer Portal with your credentials. You will see an account overview upon logging in. From here, click the “Domains” tab, which will automatically bring you to the “Manage Domains” screen.

Select the domain you would like to point to WP Engine in the list. In the following steps we will guide you in plugging the WP Engine settings into your HostGator account.
Step 3: Update DNS
Now it is time to plug in the settings from the WP Engine Overview page into your HostGator settings. Before doing this, it’s time to make a choice:
- Option A (preferred): point your nameservers to Cloudflare. If your site is migrated internally with WP Engine, DNS changes won’t be needed.
- Option B (still okay!): point your A record to WP Engine. This will work just fine, but you will need to update your DNS records if your website is ever migrated to a new server. This method keeps your Domain and DNS management at HostGator. Please note: HostGator does not allow customers to self-serve this option unless you have a web hosting package with them. Otherwise you will need to call HostGator Customer Support to request changes.
Option A: Point Nameservers to Cloudflare
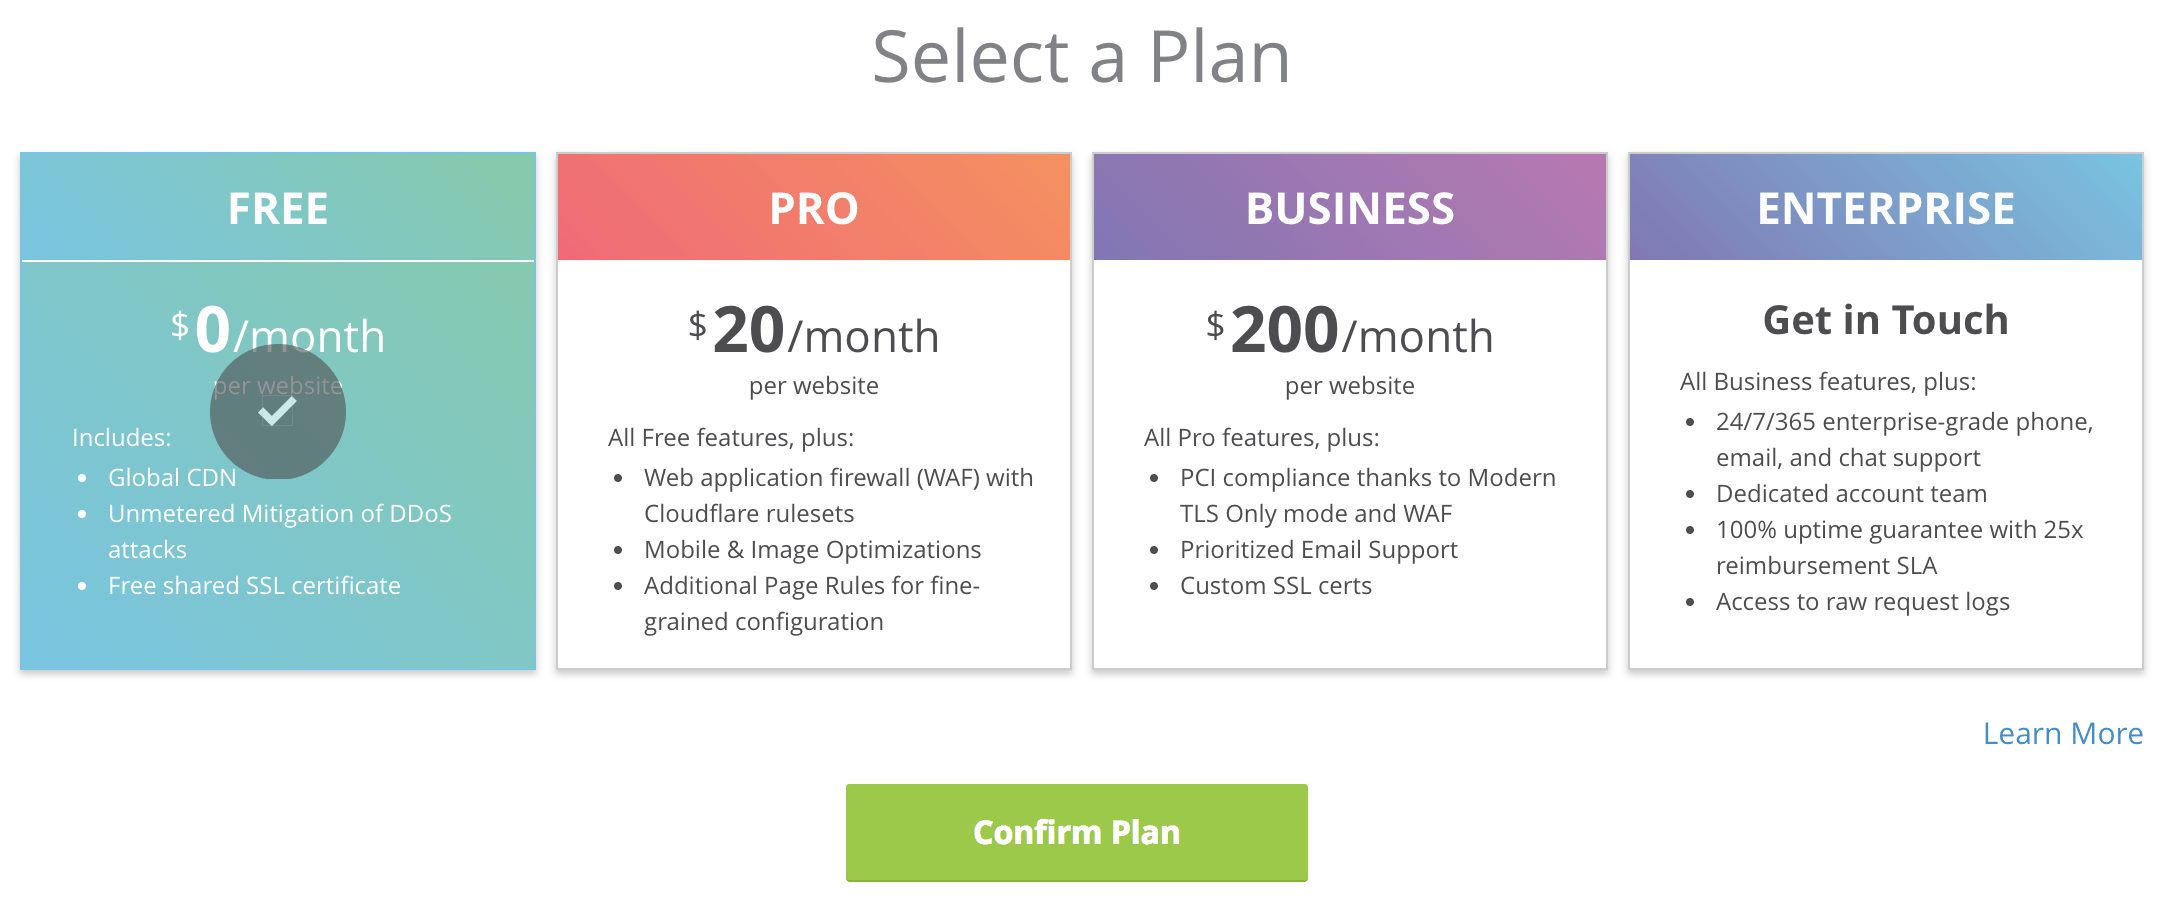
Cloudflare is a service that helps manage your DNS records, as well as managing features like CDN, SSL certificates, and helping you determine how to manage the traffic headed to your website. On the higher tier plans available with Cloudflare you can even gain benefits like advanced DDoS protection.
In order to use Cloudflare you will first need to open a new tab and head to www.cloudflare.com. Here you can set up a free account and enter your domain name to get started. While Cloudflare queries your existing DNS records, you will be asked to select a plan. For the purposes of this article we have selected their free plan.
Change Existing Records
After selecting your plan, Cloudflare will display your existing DNS records with HostGator, and give you the opportunity to edit them. Remove the existing A record for your root domain, and add it as a CNAME instead, pointing to your WP Engine CNAME from the Overview page in your User Portal.
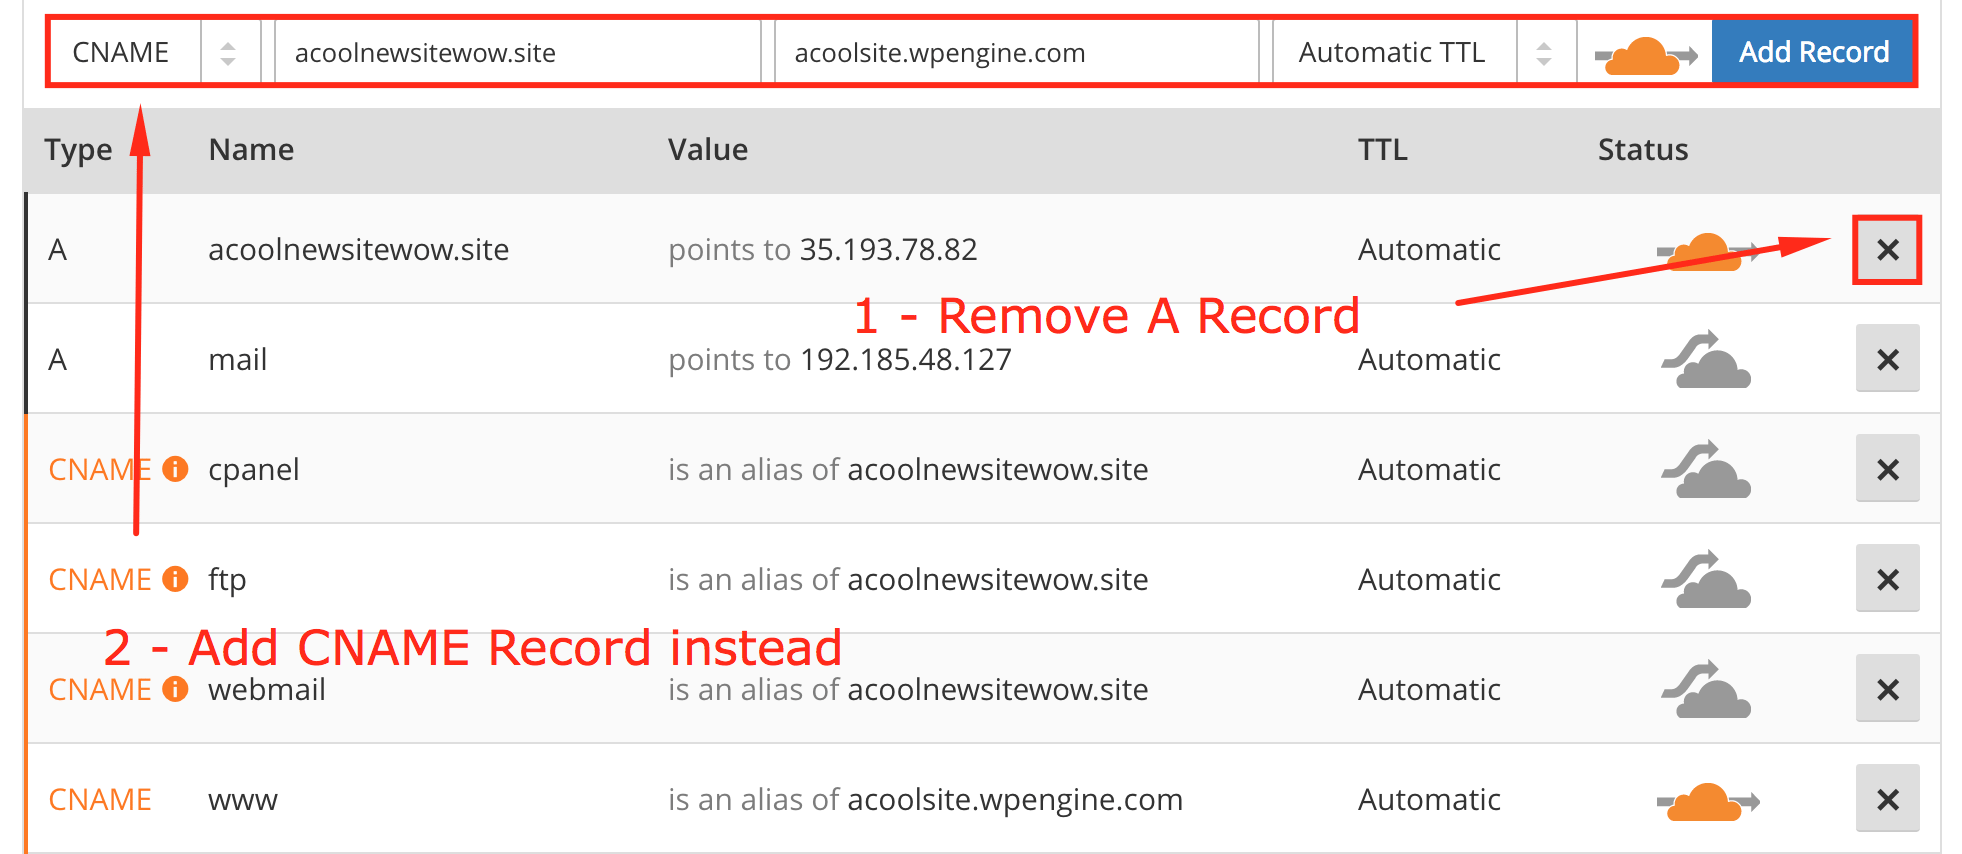
Now check the “www” record as well. Is it pointing to your root domain, or to the WP Engine CNAME? Either of these is ok, and will not require edits. However, if your “www” record is pointing to an IP address, you will want to perform the same steps for your “www” record. Save your settings and continue.
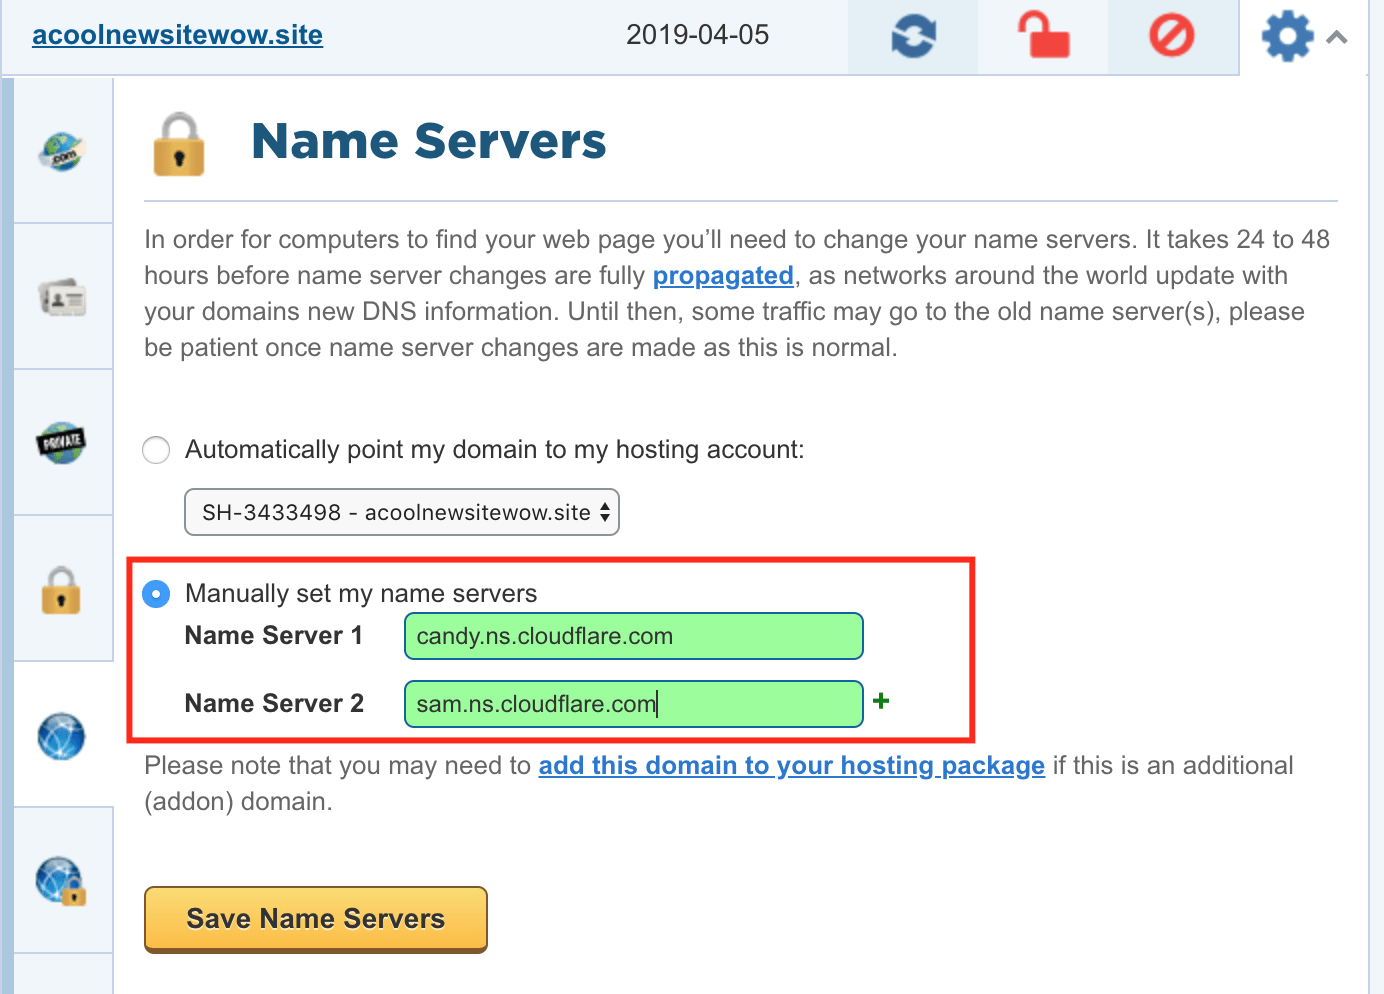
Name server update
You will be presented with two Cloudflare nameservers, which should be entered in the HostGator dashboard. In the HostGator dashboard tab, ensure you have clicked the “Domains” tab and select your domain from the list. Click the gear icon, then the “Name Servers” tab at the left. Select “Manually set my name servers” and enter the name servers from Cloudflare here, then save.
Now all that’s left to do is to wait for propagation of these changes. Name server changes can take some time to propagate, but afterward your domain will be pointed to WP Engine! Make sure you have followed the steps in our Going Live guide as you wait for propagation. To learn more about Cloudflare’s other services like CDN and SSL, head to Cloudflare Best Practices.
Option B: Point HostGator A Record
Before continuing, remember that the ability to make these changes yourself is not available without a hosting package with HostGator. However, you may still call HostGator Customer Support to request these changes.
With this option, select “Hosting” from the HostGator dashboard, then “Domains” from the menu.
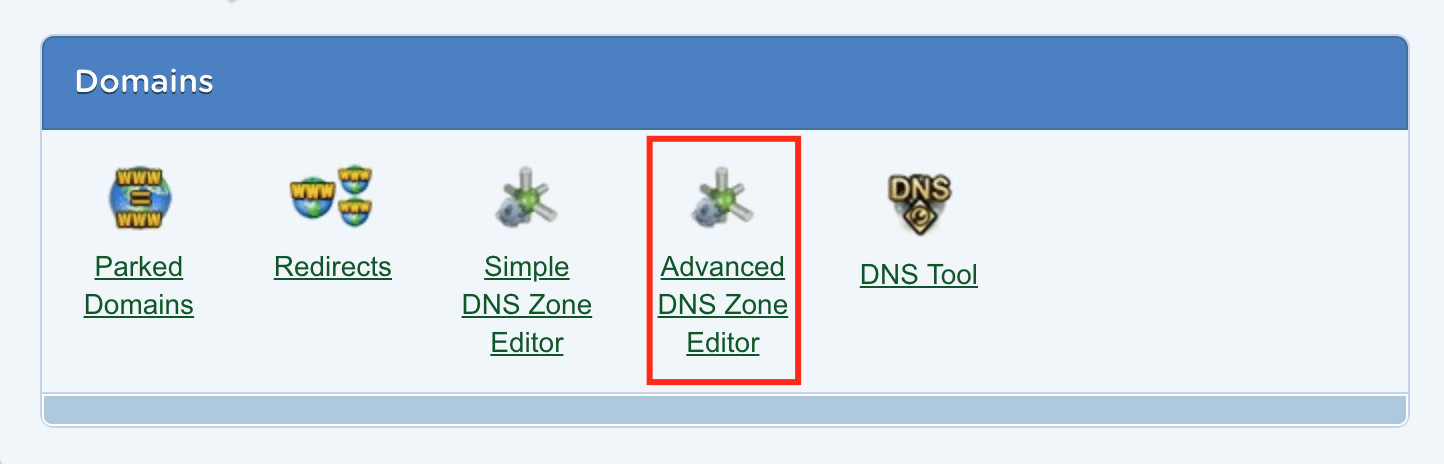
Scroll down and select “Advanced DNS Zone Editor.”
You will be taken to a page where you can view your existing DNS records. Locate the A record for your root domain, and the CNAME record for your www record.
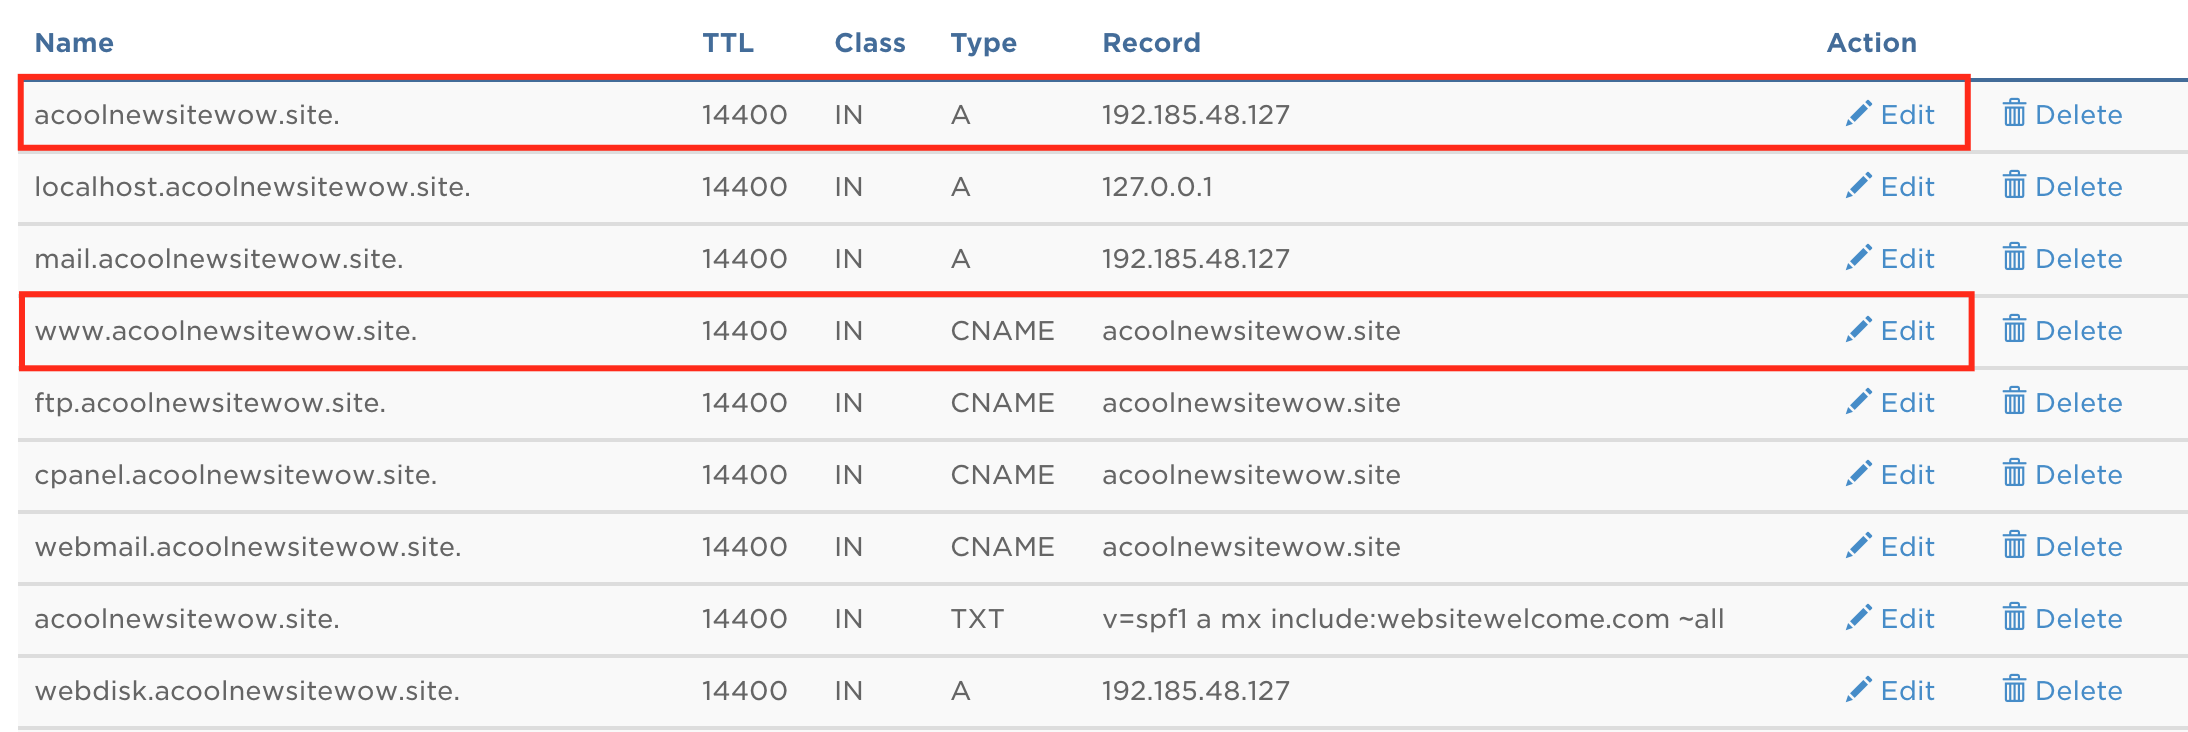
Now, edit these records to match the A records and CNAME records from the Overview page in your WP Engine User Portal. In this step, feel free to edit the “TTL,” which is the number of seconds it takes to propagate the changes you are making.
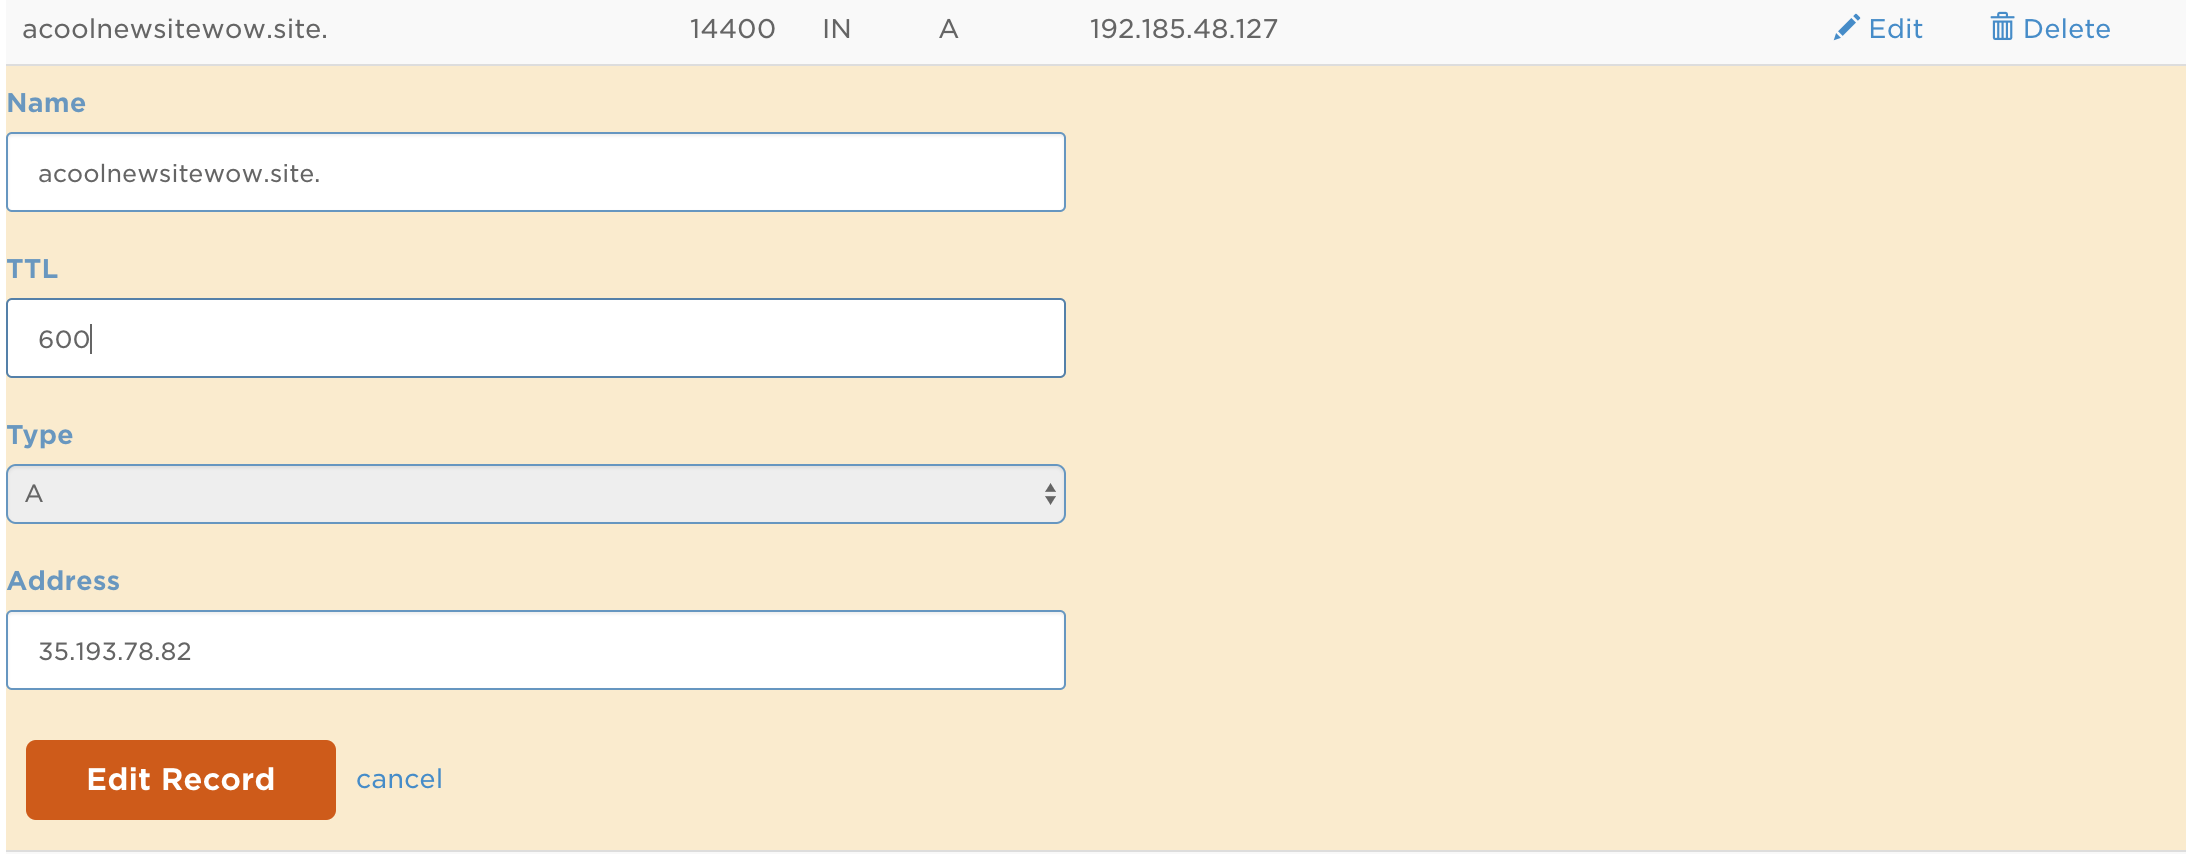
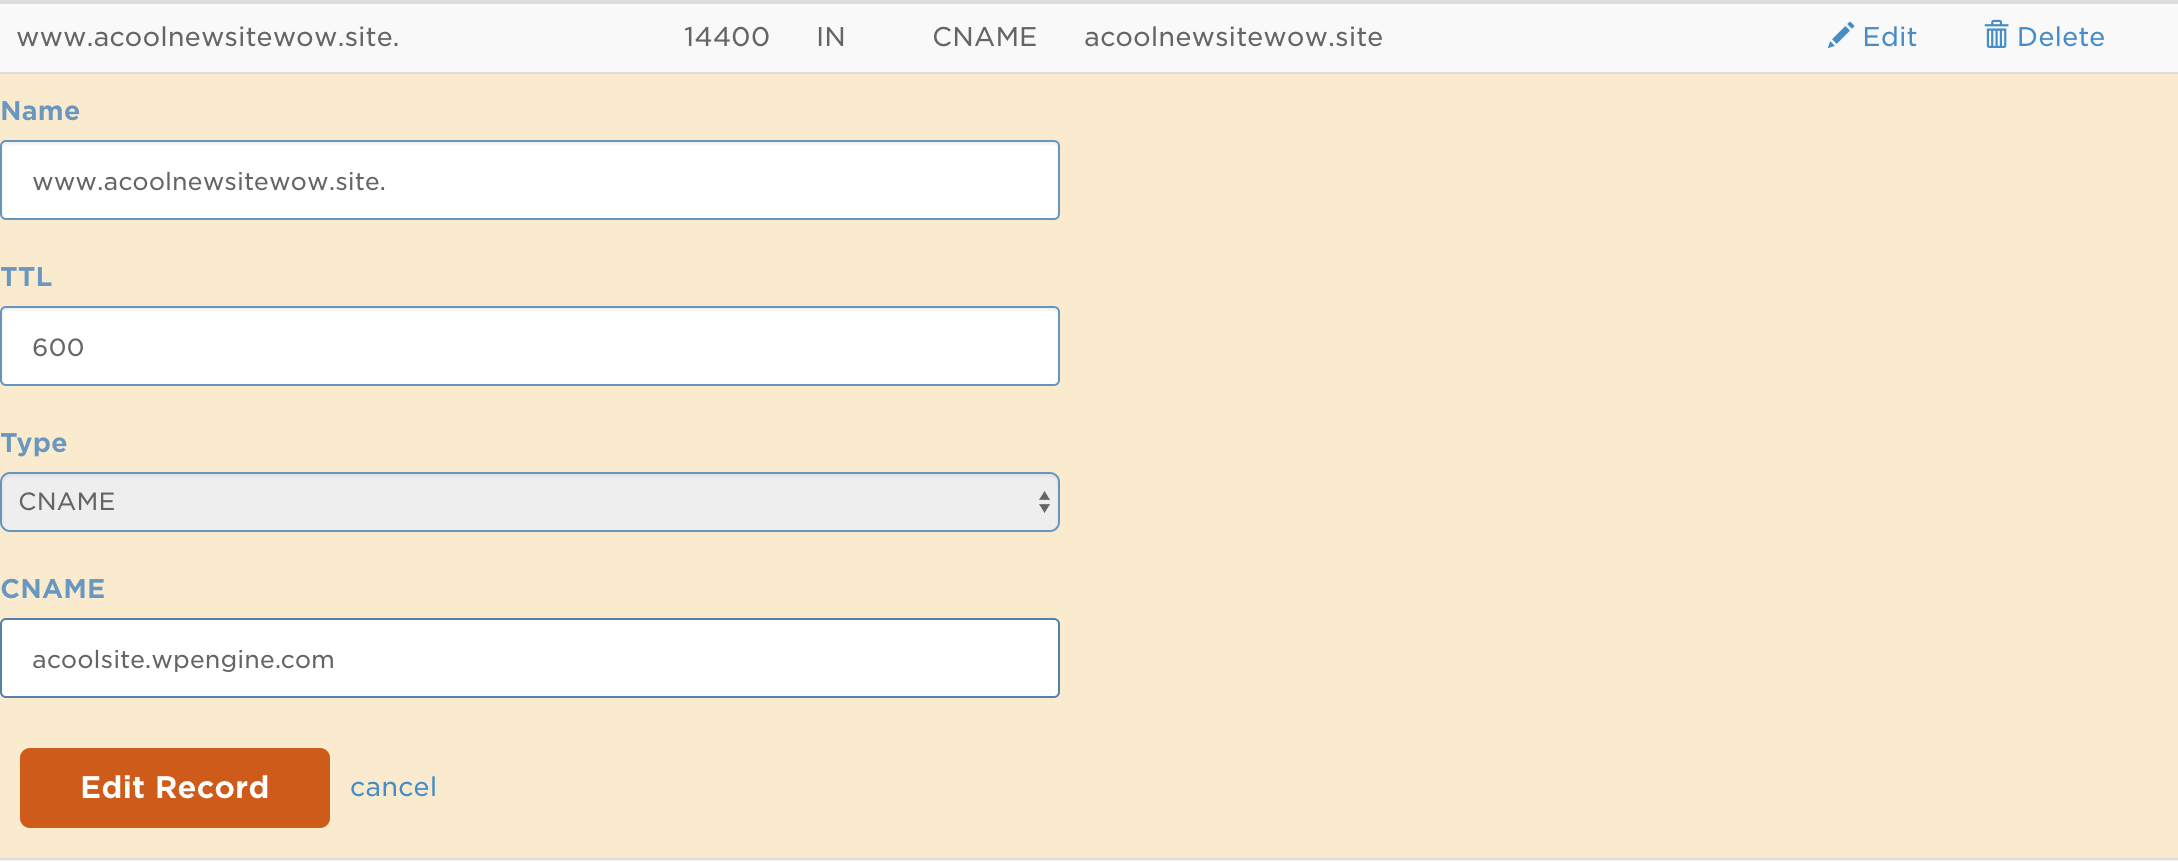
When you are done editing both records, be sure to click the Edit Record button to save the changes. After this is done, all that’s left to do is to wait for propagation! In the meantime, be sure to review our Going Live guide to ensure you haven’t missed any important steps.