Point Bluehost DNS to WP Engine
If your domain registrar is Bluehost, this guide will help you configure your Bluehost DNS settings to point to WP Engine. This is a required step to go live with your domain on the WP Engine platform.
NOTE: Before proceeding with any DNS changes, be sure to add your domain in the WP Engine User Portal!
Locate DNS Information
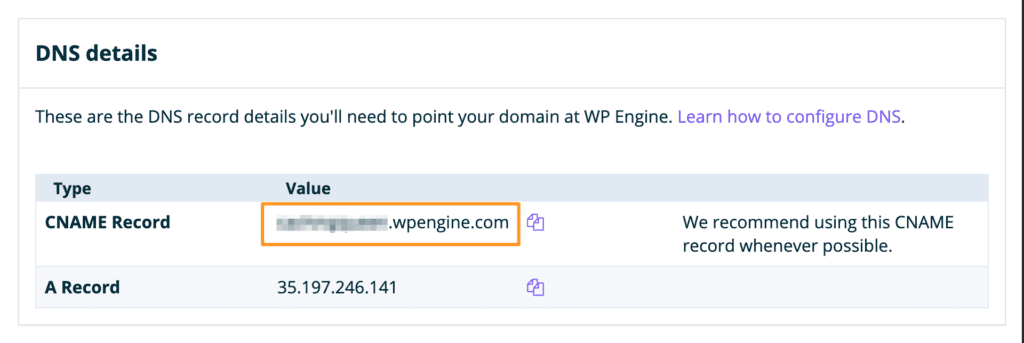
In order to configure your DNS records you first need to know what CNAME value to point to.
- Login to the User Portal
- Click on the Environment name you wish to find the DNS information for
- Click Domains
- The values will be located within the DNS Details section
NOTE: Click the copy icon to the right of the CNAME value to copy the text, or simply keep this page open as you continue for easy copying.
NOTE: Additional methods to locate your IP address can be found here.
Log in to Bluehost
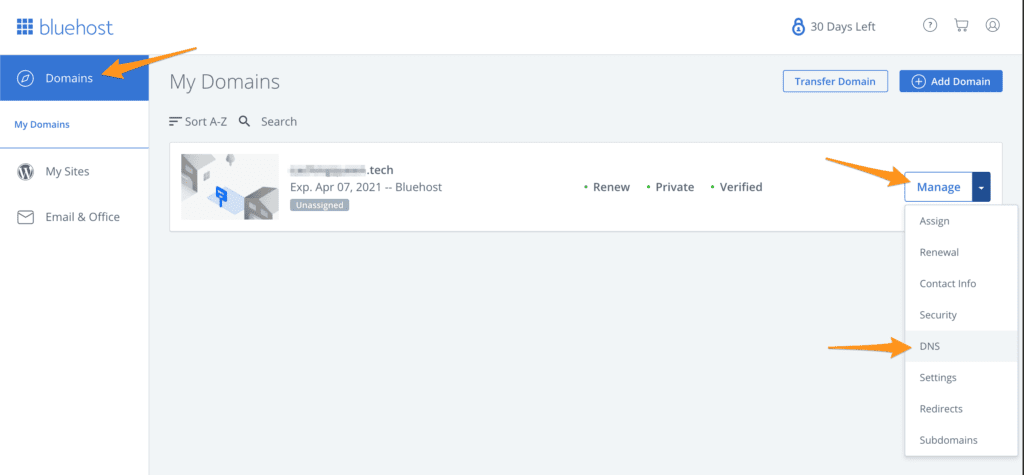
- In a separate tab, log into www.bluehost.com
- Select Domains on the left navigation
- Locate the domain you will be pointing in the main navigation window
- Select Manage
- Click DNS
Remove A Record
On your Bluehost DNS editor page you will groups of various record types (Nameserver, A, CNAME, etc). Bluehost allows for CNAME (Alias) flattening, which means you can point both your www and non-www domain to a CNAME record value, in this case your WP Engine CNAME from Step 1. In order to do so, you must first remove any A record, which will be pointed to a static IP address, that could conflict.
- Locate the A (Host) section
- There is likely a host record here already for
@, if so, click the 3 dot menu icon and select Remove - Once there are no records located under the A (Host) section for
@, continue to the next step
NOTE: If you are pointing a subdomain (blog.somedomain.com, store.mydomain.com, etc.) this step can be skipped, as your apex record does not need to point to WP Engine.

Configure CNAME Records
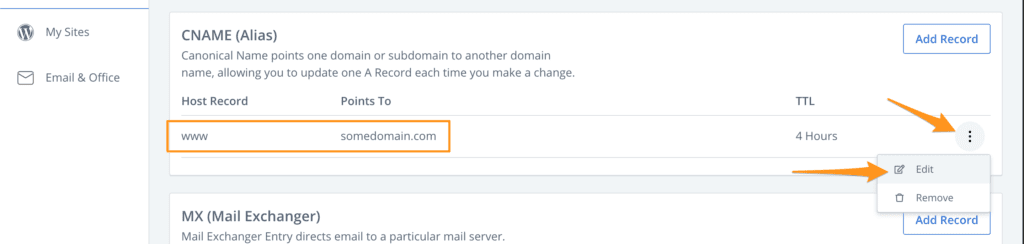
- In Bluehost, scroll down to the CNAME (Alias) section
- If your
wwwhost record is already configured as a CNAME (Alias) record, click the 3 dot menu icon and select Edit
- OR, if there is no record currently listed for
wwwclick Add Record

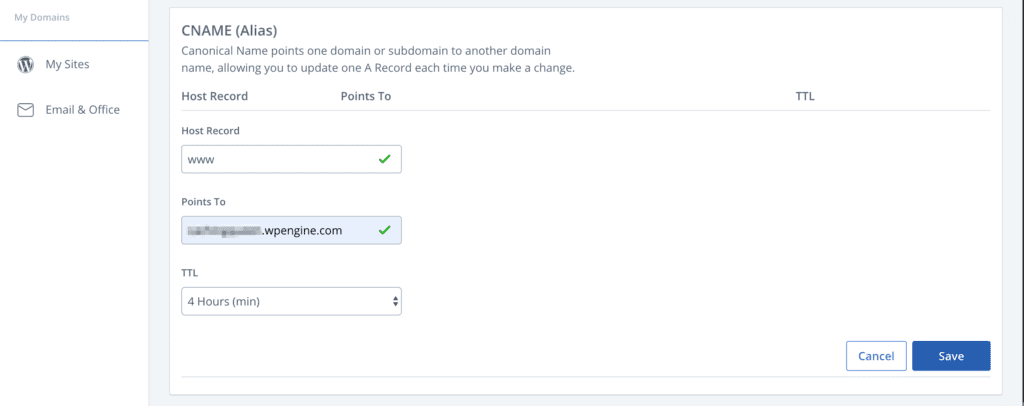
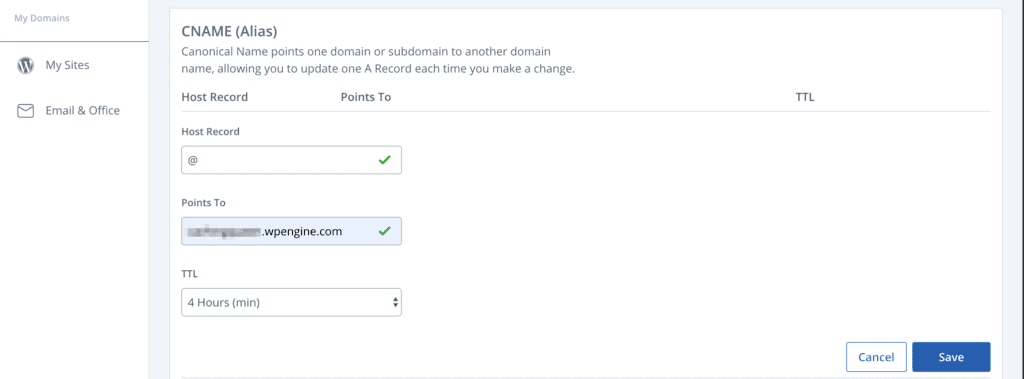
- Configure the CNAME record as follows:
- Host Record:
www - Points to: [Enter your WP Engine CNAME value from Step 1 here]
- TTL:
4 hours- 4 hours is the minimum propagation for Bluehost. If you prefer a longer propagation time, increase this value.
- Host Record:
- Click Save
- To add the second CNAME record for your apex domain (non-www), click Add Record
- Configure a second CNAME record as follows:
- Host Record:
@ - Points to: [Enter your WP Engine CNAME value from Step 1 here]
- TTL:
4 hours- 4 hours is the minimum propagation for Bluehost. If you prefer a longer propagation time, increase this value.
- Host Record:
- Click Save
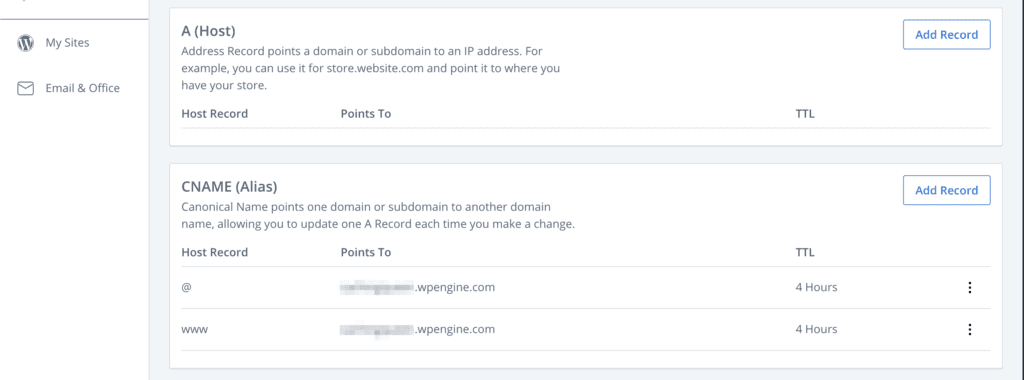
Now all that’s left is to wait for the changes to propagate! Your completed DNS panel at Bluehost should look like the following:
Verify DNS Records
The last step will help confirm your records have been configured properly with Bluehost.
- Login to the User Portal
- Click on the Environment name you updated DNS for
- Click Domains
- A green check should appear next to each domain value if it is configured properly
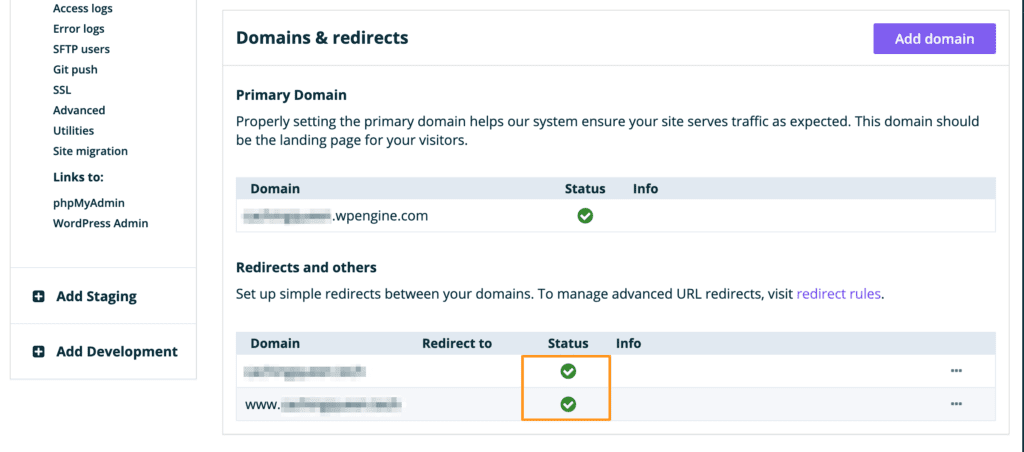
- If you see a grey icon, try refreshing the page in a few minutes. Propagation from Bluehost can take up to 4 hours.
- If you see an orange or red icon, refer to this guide to learn what each status means and double check your steps above.
- WP Engine Support is available 24 hours, 7 days a week if you require additional guidance.
NEXT STEP: Update your URL in WordPress