Configure DNS with 1&1
If you are using 1&1 (sometimes referred to as 1and1) as your DNS provider, this guide will help you configure your DNS records to point to WP Engine. This step is required in the process of going live with your domain on the WP Engine platform.
NOTE: Be sure to review our Going Live guide to ensure you have taken the necessary steps before changing your DNS.
Domain Connect
1&1 is supported by the Domain Connect feature on WP Engine. This means you can simply add your domain to the User Portal and will be prompted to have any A records automatically configured in 1&1 on your behalf.
For more information on Domain Connect, check out our guide.
If you need to configure your DNS records manually, or are using CNAME flattening, proceed with the directions below.
Locate DNS Information
- The first step is to locate your A Record and CNAME by logging in to your WP Engine User Portal.
- Click on the environment name this domain will point to.
- You will see the IP address and CNAME record on the Overview page.
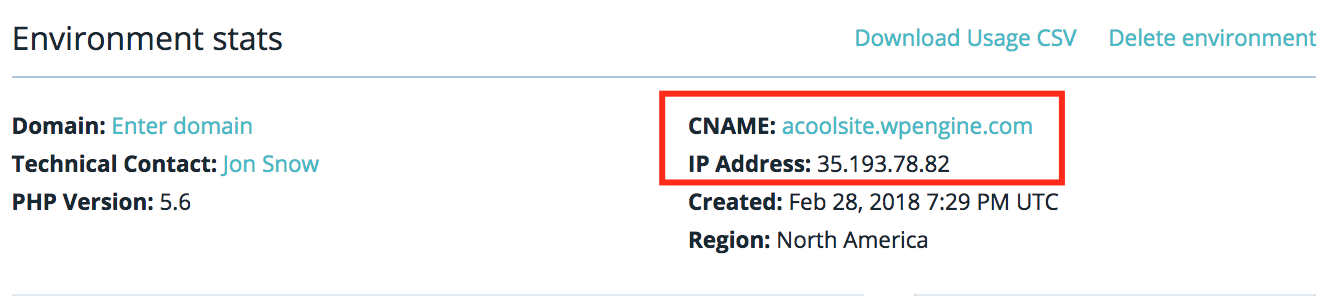
Keep your WP Engine User Portal page open as you continue through the next steps for east access!
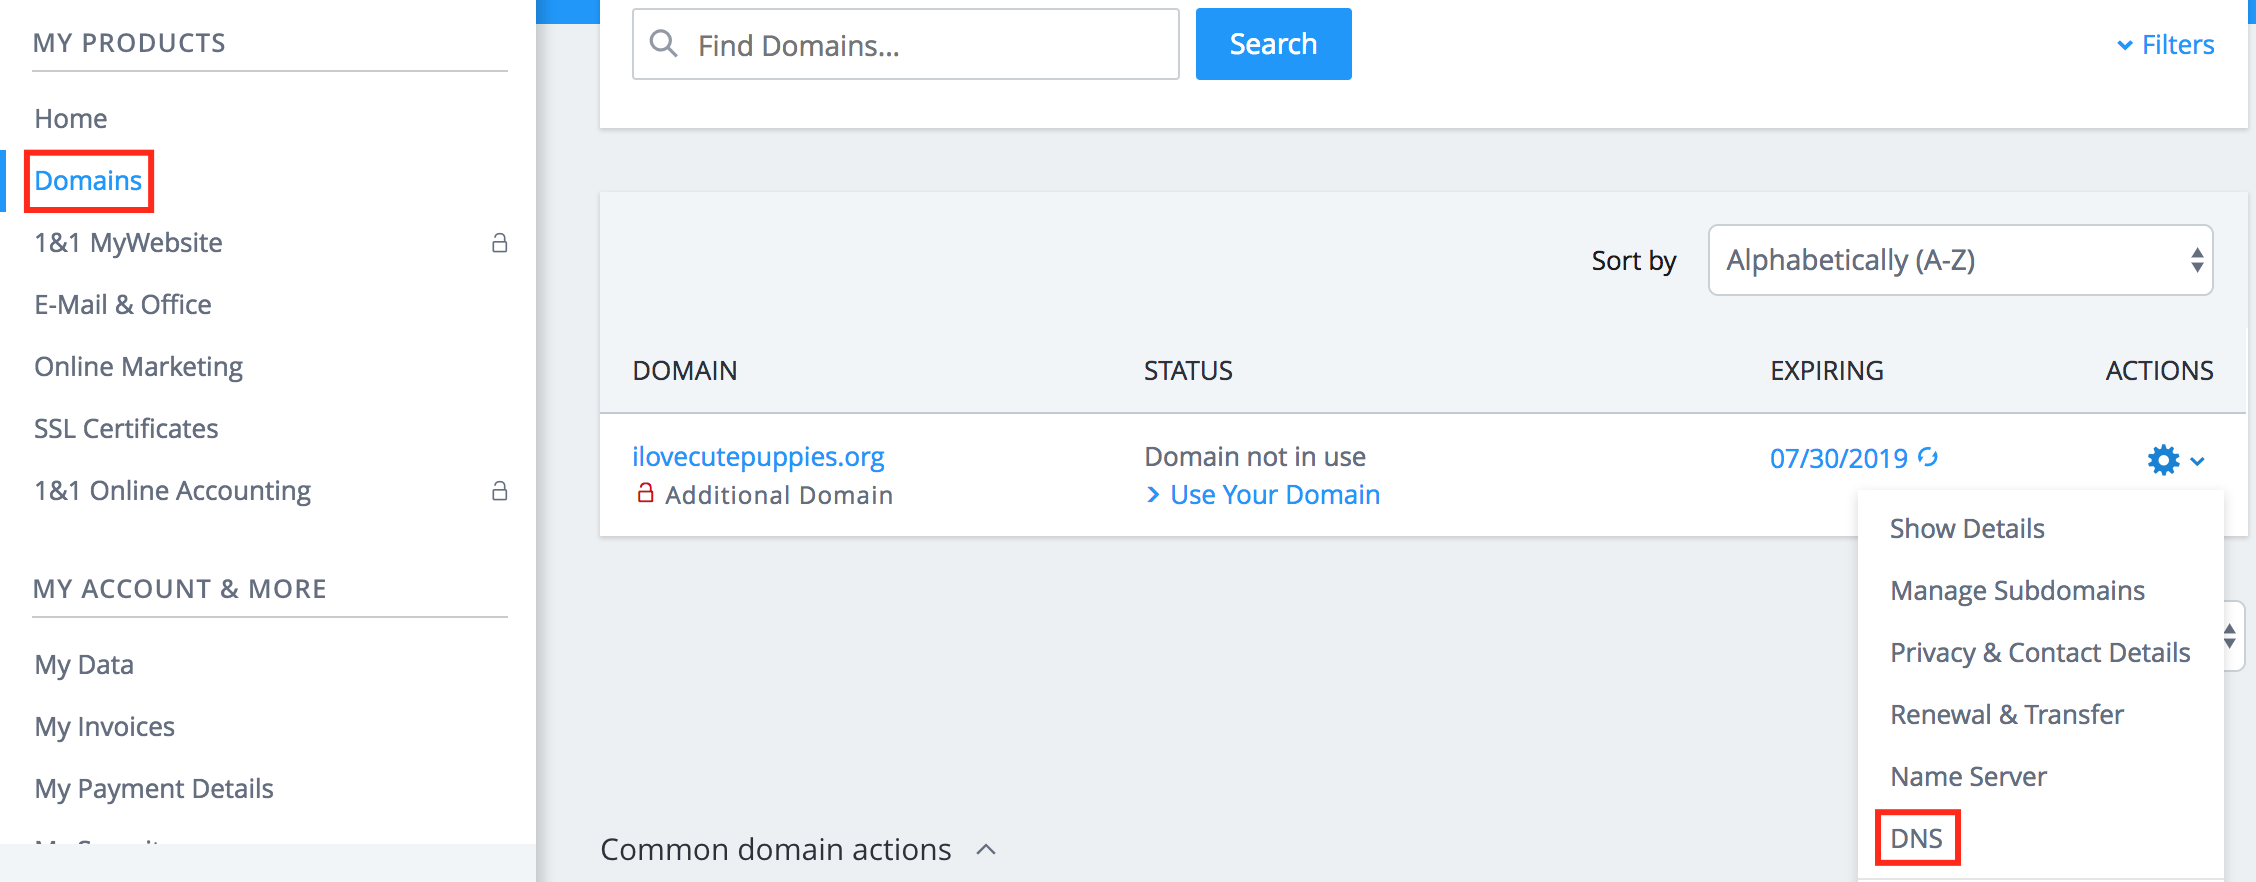
Login to 1&1
- Login to your 1&1 domains dashboard
- Click Domains under My products in the left-hand navigation
- You will see a list of your 1&1 domains in the center pane
- Click the gear icon next to the domain you wish to point to WP Engine
- Select DNS from the dropdown menu.
Point DNS to WP Engine
Now it is time to plug in the settings from the WP Engine Overview page into your GoDaddy settings. Before doing this, it’s time to make a choice:
- Option A (Preferred): Cloudflare CNAME
- If your site is migrated internally with WP Engine, DNS changes won’t be needed.
- Option B (Alternate): Point A record from 1&1
- This will work just fine, but you will need to update your DNS records if your website is ever migrated to a new server. This method keeps your Domain and DNS management at 1&1.
Option A: Point Nameservers to Cloudflare
Cloudflare is a service that offers services like DNS management, CDN, Web Application Firewall (WAF), and even DDoS mitigation services. Before continuing, at this point you should open a new tab and navigate to www.cloudflare.com. Here you can sign up for a free account to get started. Enter your domain name when prompted.
When you continue, Cloudflare will automatically lookup your DNS records. As it performs this lookup, click Next to select your Cloudflare plan. For the purposes of this article, we have chosen the free Cloudflare plan.
From here, Cloudflare will import your existing 1&1 DNS settings.
- Delete the A record next to your root domain (
ilovecutepuppies.orgin this example) - Add a CNAME record
- Enter the CNAME record from your WP Engine Overview page for your site
- Click Add Record to save
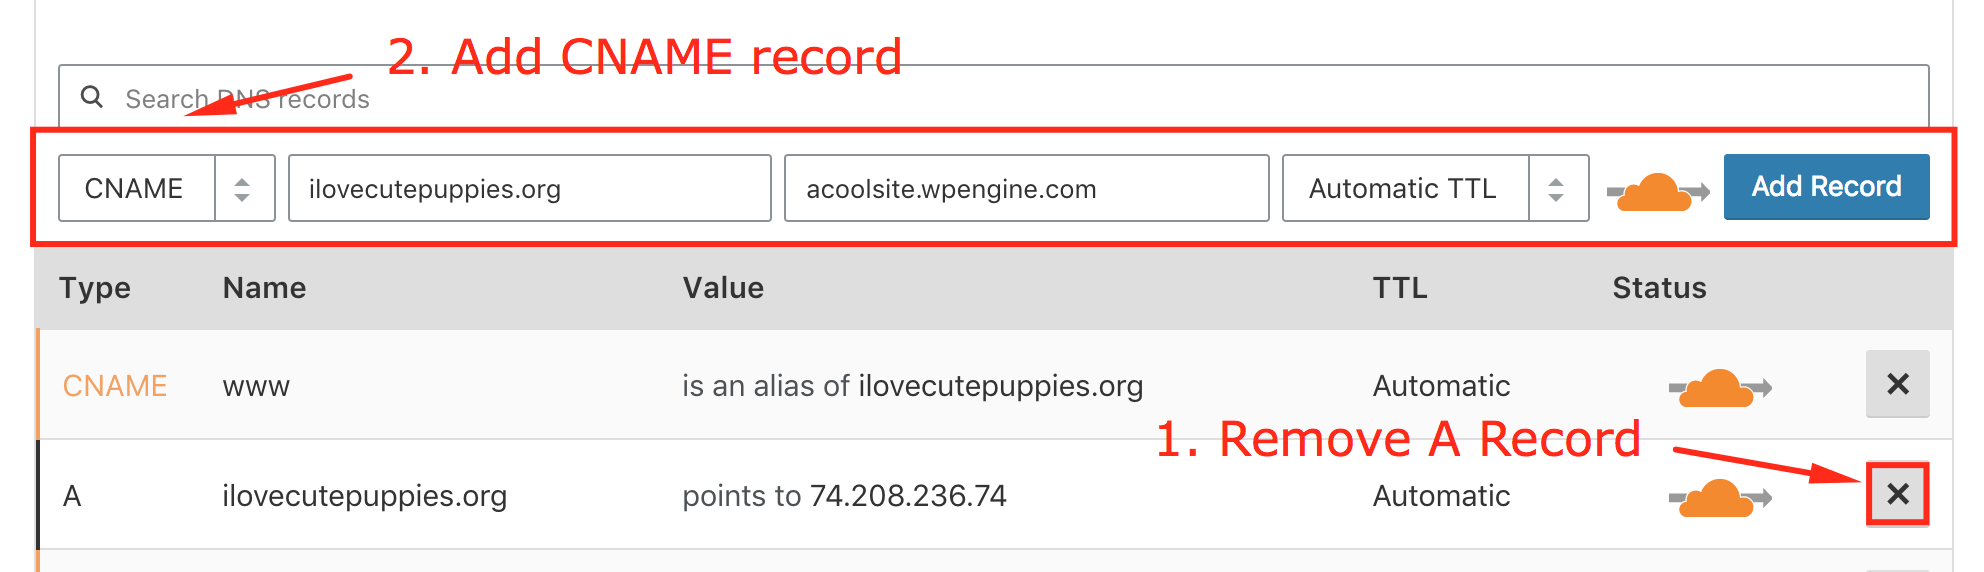
- Now, look to your
wwwrecord- If it is already a CNAME record pointing to your root domain (
ilovecutepuppies.orgin this example), no further action is needed. - If it is an A record pointing to an IP address, perform the same steps to delete the A Record and replace it with the WP Engine CNAME record instead.
- If it is already a CNAME record pointing to your root domain (
- Once these steps are complete, click Continue.
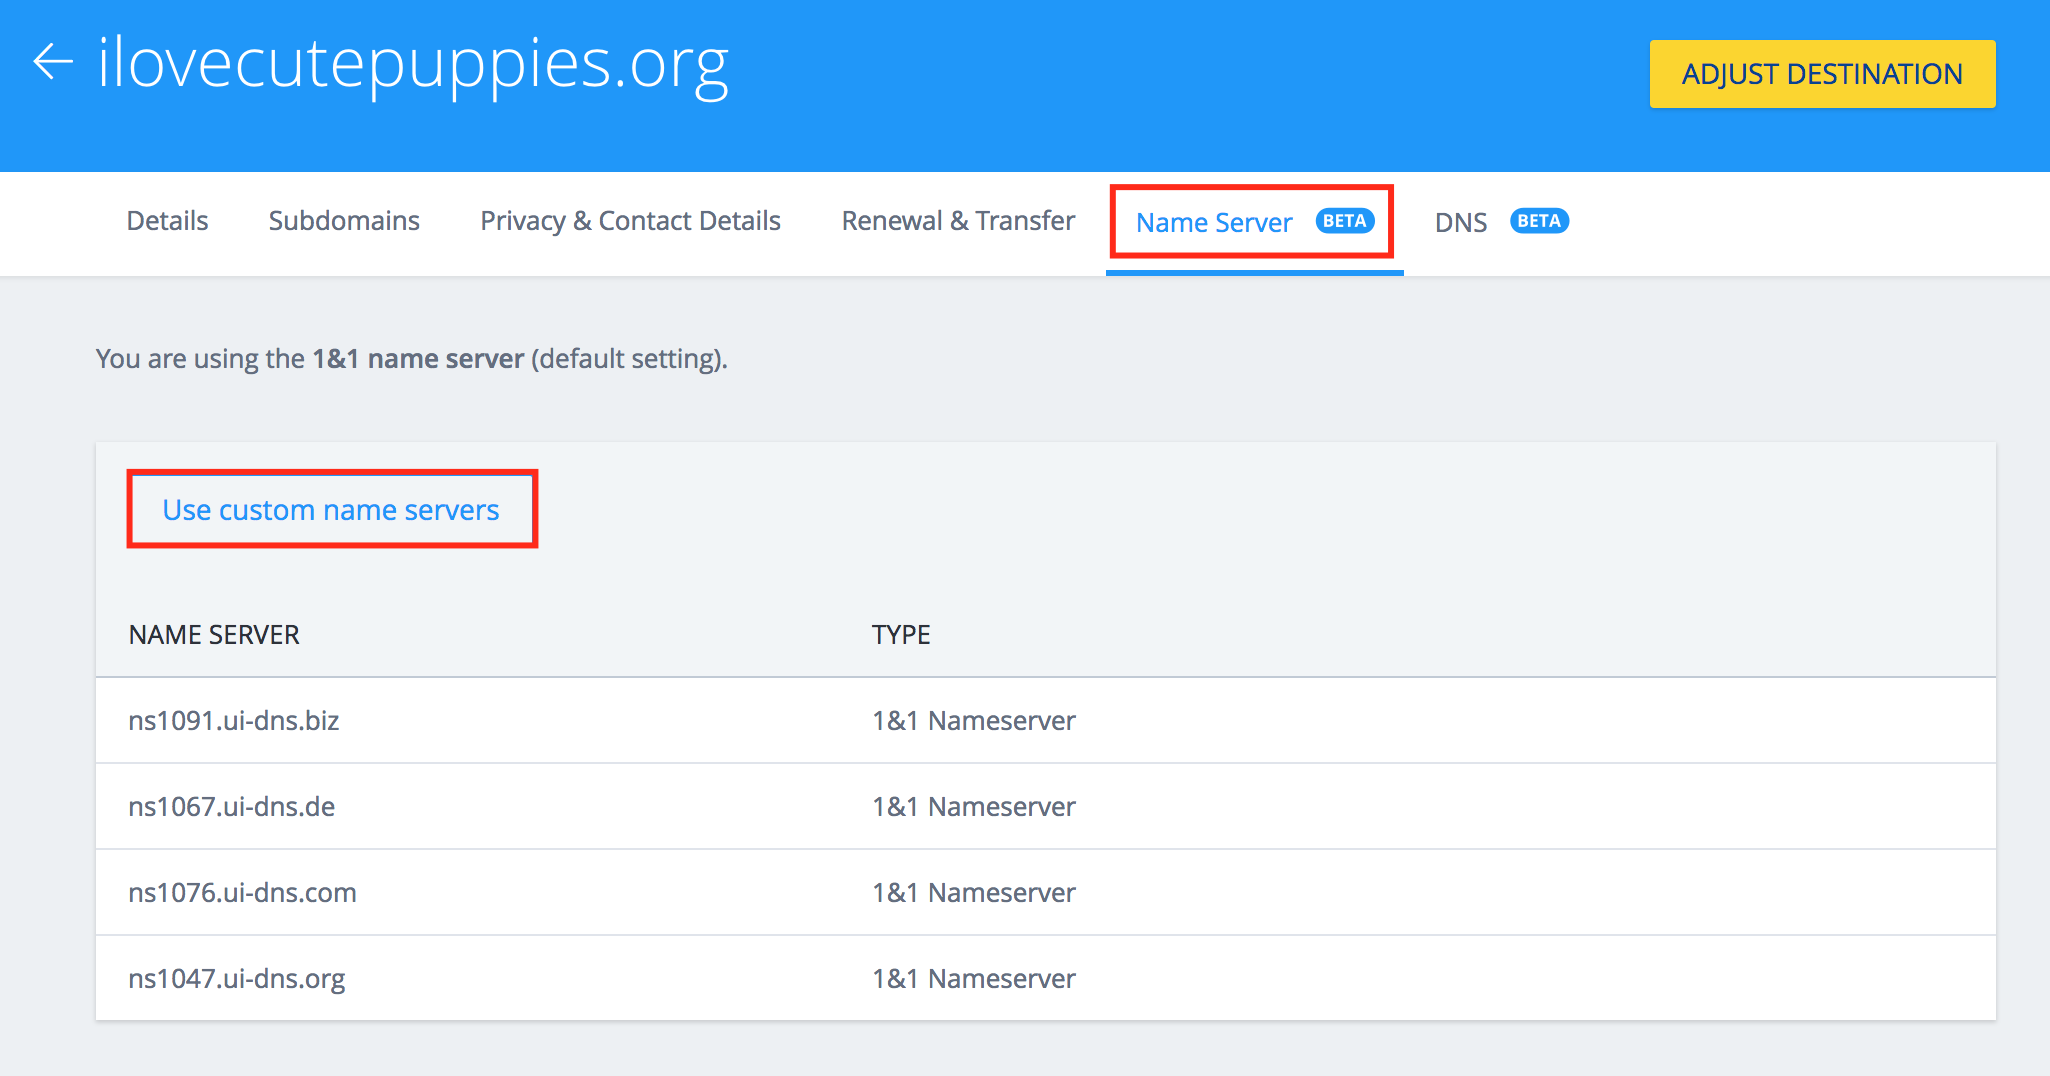
In the next screen you will be prompted to change your nameservers to point to Cloudflare. This step is performed in the 1&1 dashboard.
- Open your 1&1 dashboard
- Click Domains
- Select DNS
- Click Name Servers at the top of the screen
- Click Use custom name servers in the center pane
- Copy and paste the custom name servers provided by Cloudflare
- Save

Once the name server changes have propagated, your DNS will be pointed to WP Engine successfully! In the meantime, be sure to read our Going Live guide to ensure you haven’t missed any important steps.
Option B: Point A Record
If you choose to point your A Record to WP Engine, this will keep your DNS record management at 1&1. If you have not added your domain to the WP Engine User Portal yet, start by doing so now. On this pane, you may choose to use WP Engine’s automated Domain Connect system to configure your DNS automatically, or manually configure your DNS. Check out our Domain Connect guide for information about automatically configuring DNS.
If you prefer to configure DNS records manually, follow the steps below instead.
- Open your 1&1 dashboard
- Click Domains
- Select DNS page
- You will see a list of records, each of which have a gear icon on the right side of the screen. The two records you will need to edit on this screen are:
@Which indicates your root domain, orilovecutepuppies.orgin this examplewwwWhich indicates your www domain (www.ilovecutepuppies.orgin this example)
- Next to each of the above, click the gear icon
- Select Edit record
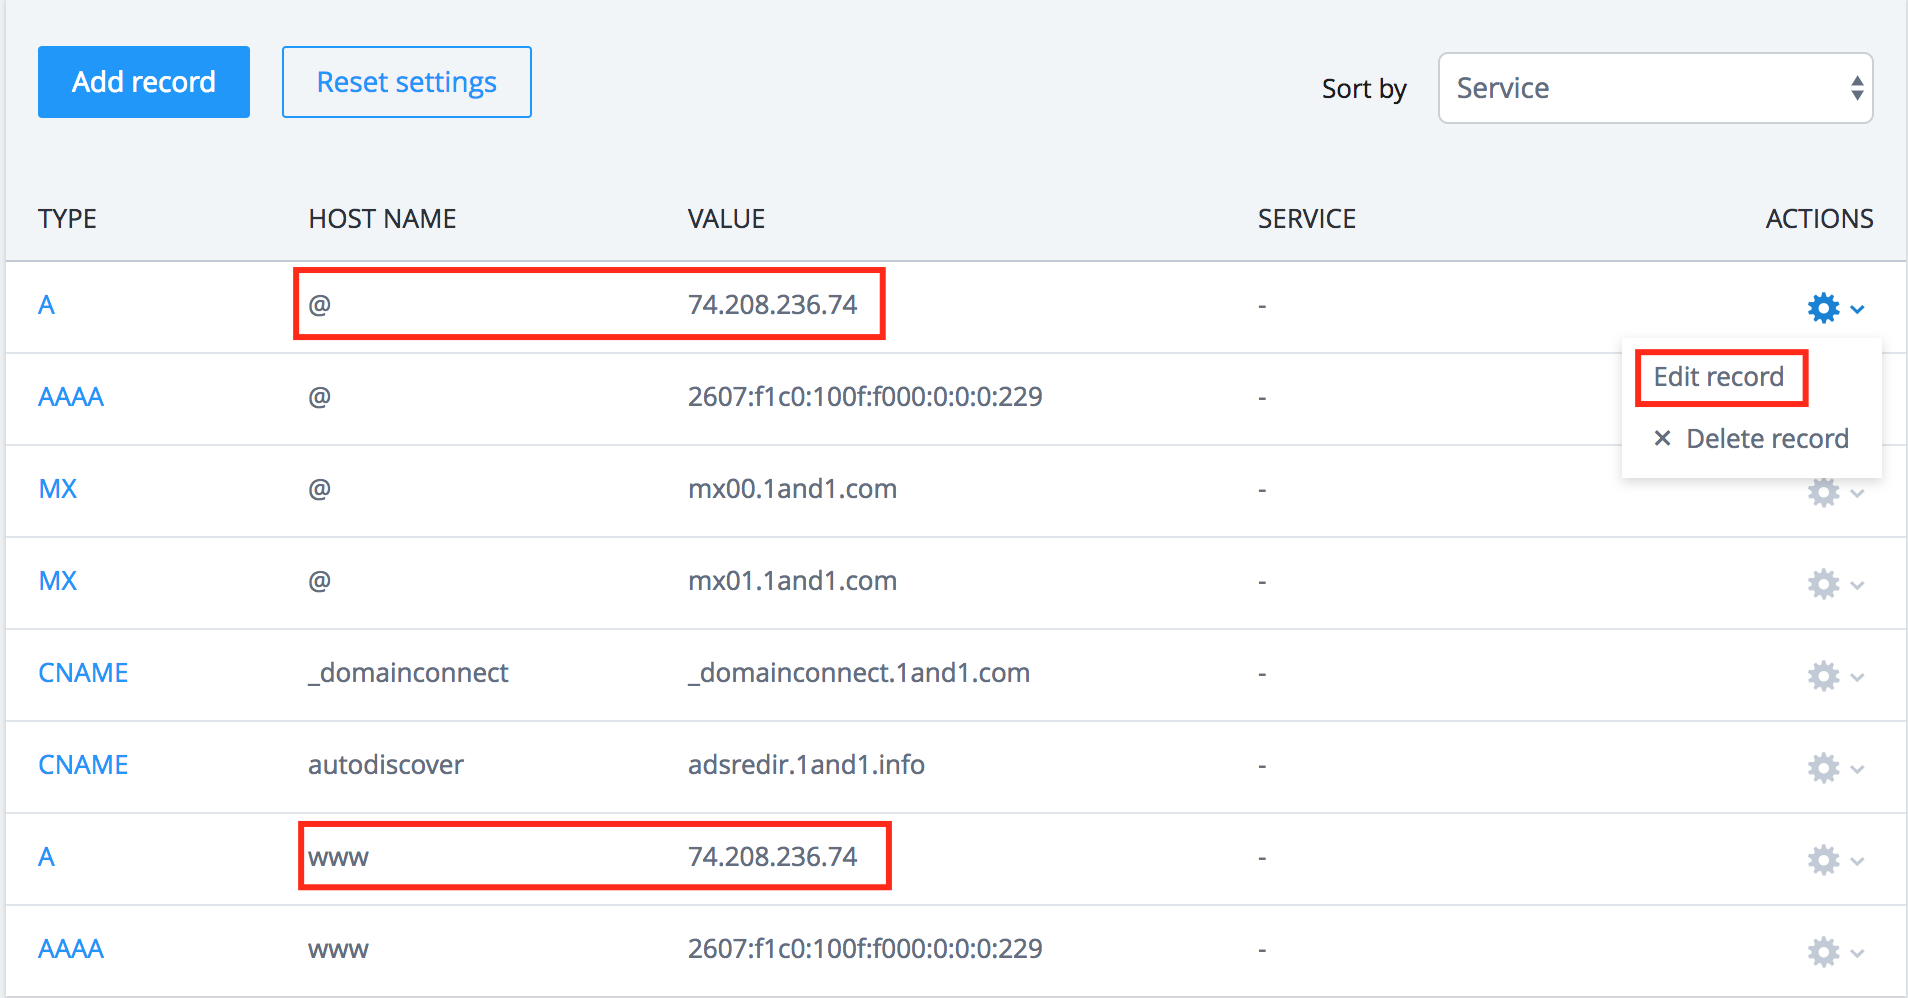
- Enter the WP Engine IP address, found in Step 1, in the Value field
- Click the TTL (length of time in seconds for the record to become active)
- In our example, we chose the lowest TTL of 1 hour.
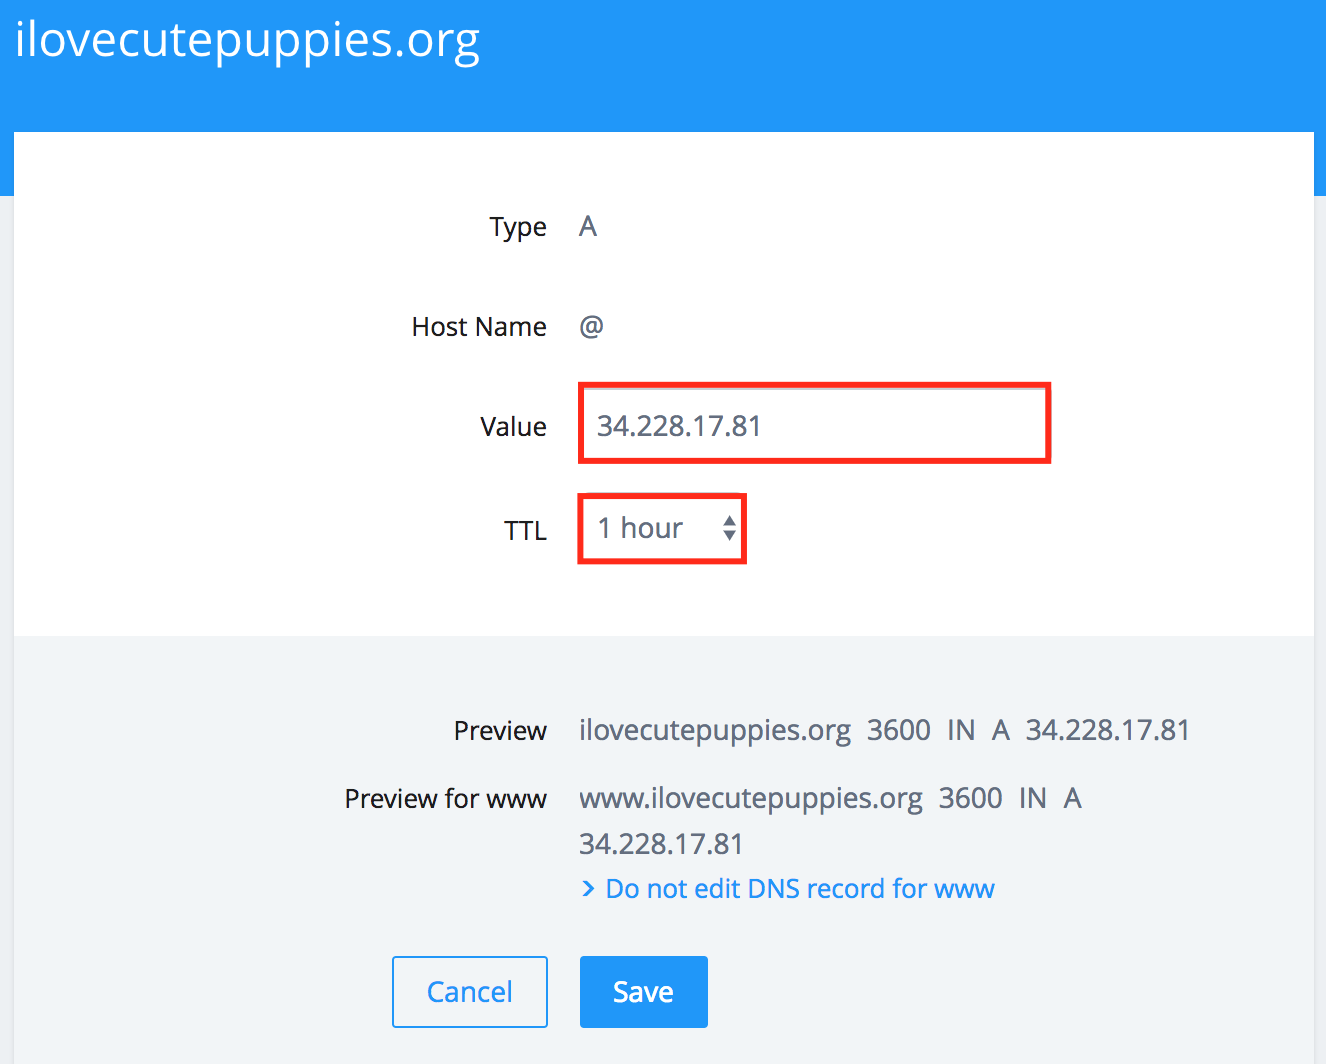
- After confirming the DNS changes are correct, click Save
- Perform the same steps for the
wwwrecord.
After the changes finish propagating across the web, your DNS will be successfully pointed to WP Engine! In the meantime, be sure to review our Going Live guide to make sure you didn’t miss any important steps.
NEXT STEP: Learn about automatically configuring A records with Domain Connect