Get Started

If you use a non-standard prefix for your database tables, this article will assist you in changing your WordPress database table prefix set in the wp-config.php file.
The database holds most of the website’s content and settings, and the database prefix affects how tables within the database are named. By default, WordPress® uses the prefix wp_ for its tables, but many users prefer to change it for security reasons (like preventing MySQL injection attacks).1 WP Engine does not automatically alter the default database prefix on your behalf because we secure your website in many other ways at a platform level, although your previous host may have chosen to make this change.
It’s crucial to know your custom database prefix when working directly with the database or running SQL queries. If you need to view or change the WordPress database prefix, refer to this guide.
About the Database Table Prefix
Every WordPress website has a default set of tables where all information is stored, such as users, posts and options. These tables are named in the database with a prefix which is appended before these default table names. By default this prefix is set to wp_ which will make the tables called wp_users, wp_posts, wp_options, etc.
The prefix used by the database tables must match the prefix set in the wp-config file.
To learn more about WordPress database tables, see the WordPress codex.
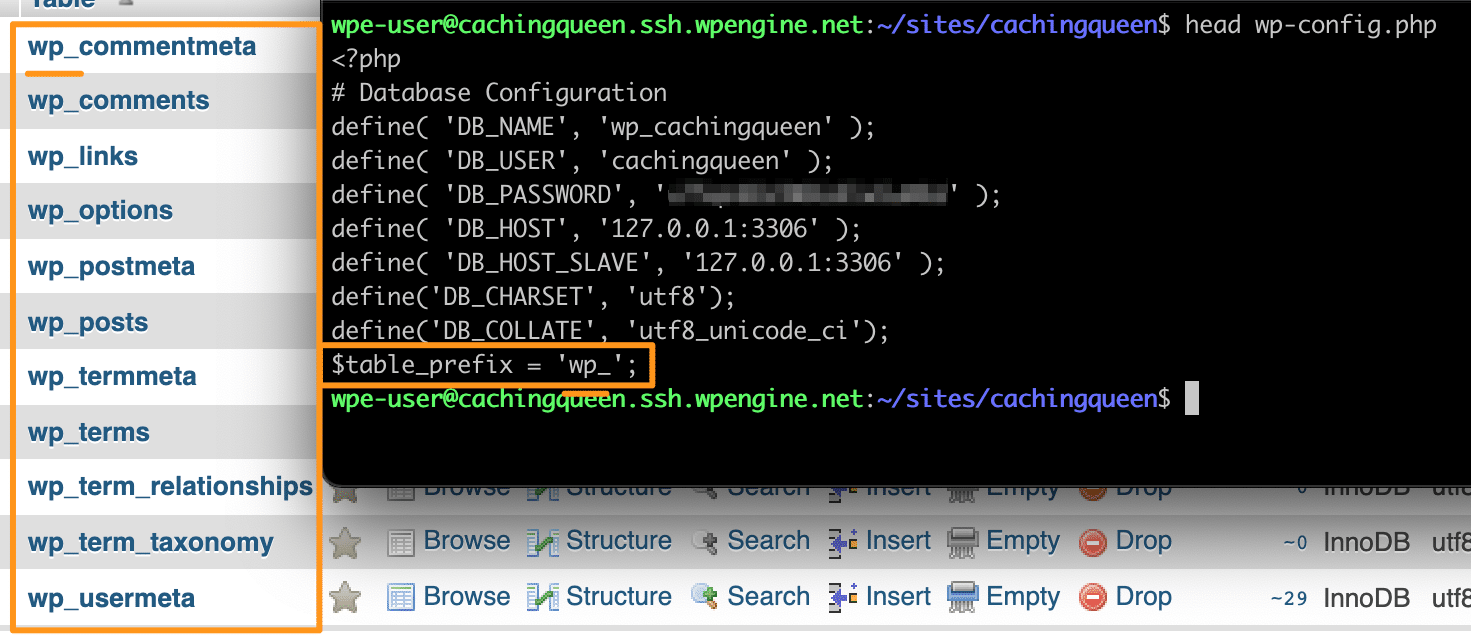
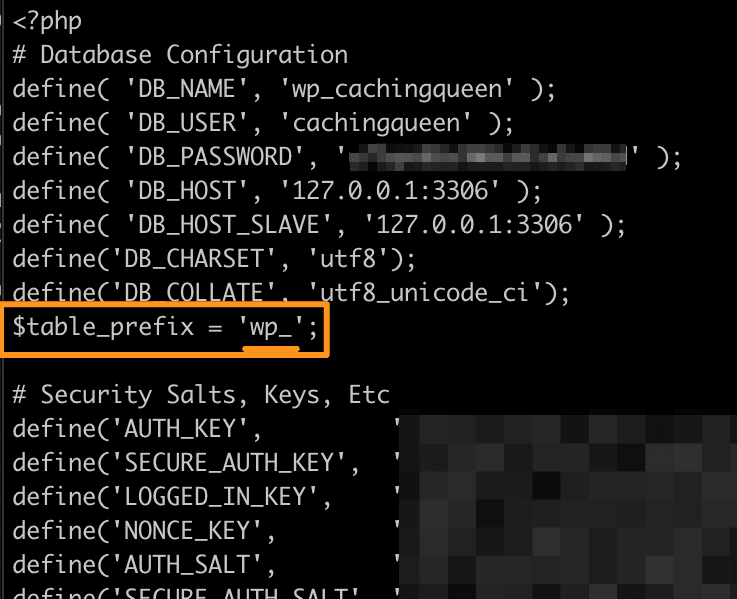
Default Prefix
A default configuration will look like the example below. Notice how all the default tables begin with the wp_ prefix, which matches the prefix set in the wp-config file for the website.
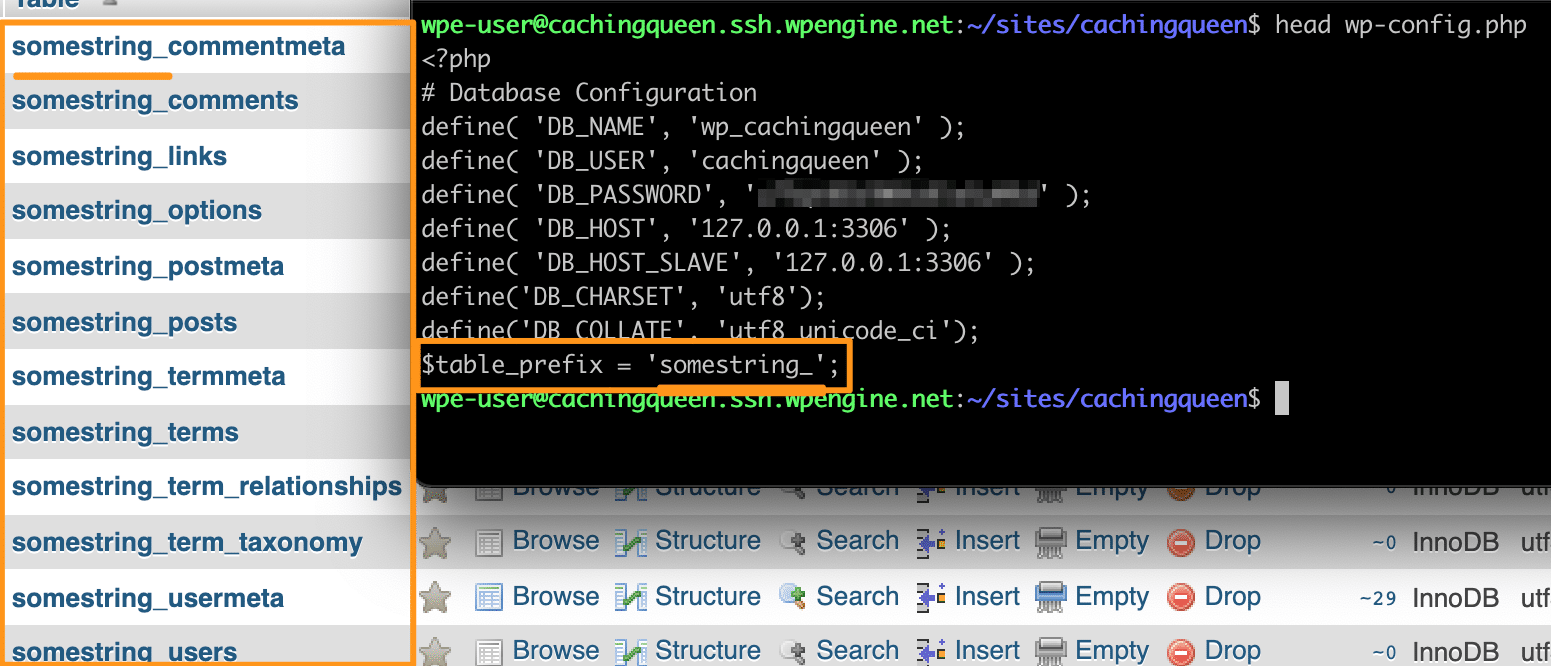
Non-Default Prefix
The database prefix does not have to be set to default to be correct and functional. However, the table prefix set in the wp-config file must match the database prefix used by the WordPress tables in your database in order for the website to function correctly.
This example shows a non-default database prefix correctly configured, where the prefix matches in both the database tables and the wp-config file.
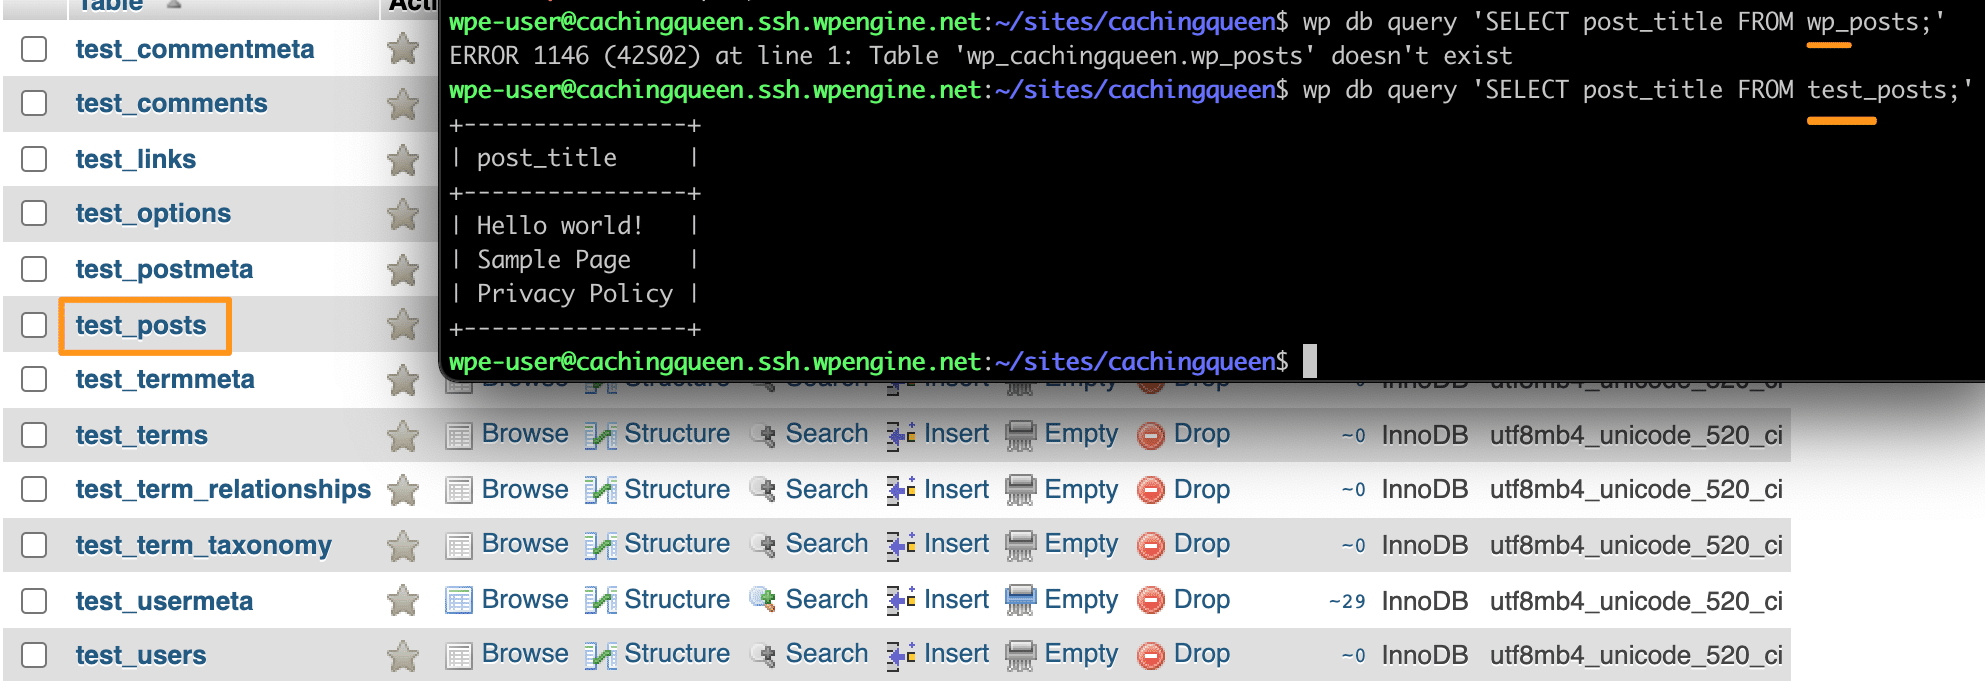
The most common issue with this configuration comes when running queries, because most queries available online will reference the default WordPress database table names. If this is the case, you may see an error like Table 'wp_yourdatabase.wp_sometable' doesn't exist.
For example, running wp db query 'SELECT post_title FROM wp_posts;' returns an error, because on this website the table prefix is test_ meaning wp_posts would actually be called test_posts.
In this case simply changing the prefix in the command will work: wp db query 'SELECT post_title FROM test_posts;'.
Alternatively, you can change BOTH the prefix in the wp-config file to the default wp_ AND change the name of the database tables to the default wp_.
Incorrect Prefix
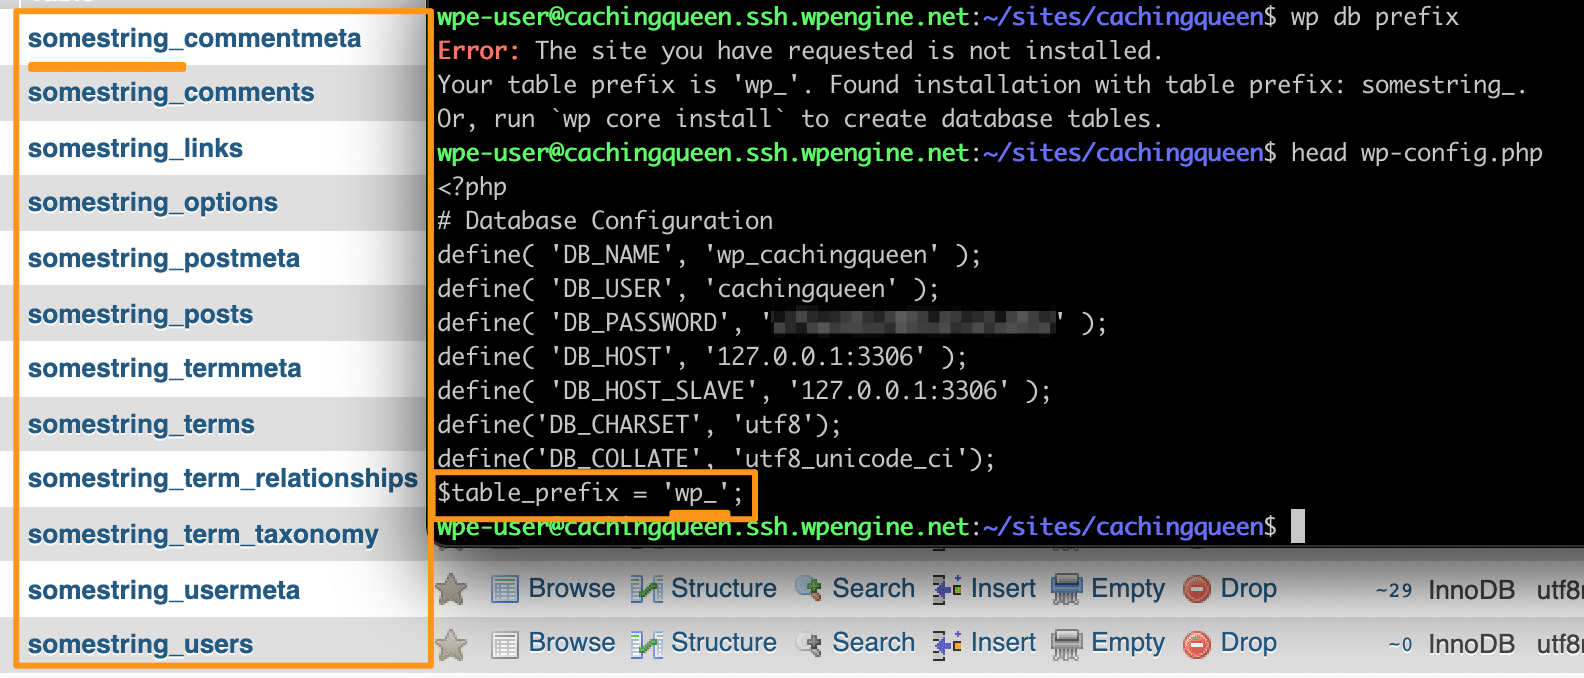
While WP Engine does not modify your prefix, some hosts or services may have changed this default database prefix on your behalf. This is will only cause issues if the prefix of your database tables do not match the prefix set in the wp-config file. When the prefix doesn’t match between the database tables and the wp-config setting this can cause your site not work (Error: The site you have requested is not installed), or to load the incorrect information (such as the wrong theme or users).
The easiest option to correct this is to view the database prefix your tables are using, then update the wp-config to match.
Alternatively, you can change your database table names to match the prefix used in the wp-config file.
View Database Table Prefix
The database prefix is configured in two locations that must match each other; the WordPress prefix define and the database table names.
You can access both of these locations in two of ways, depending on what you are most comfortable with.
View WordPress Prefix Define
The database prefix that WordPress will look for can be found in the wp-config.php file which is located in the root directory of your website. Within this file, locate the define called table_prefix which is usually near the top of the file. The content in single quotes is the table prefix that your website is currently using. Ex:
$table_prefix = 'wp_';
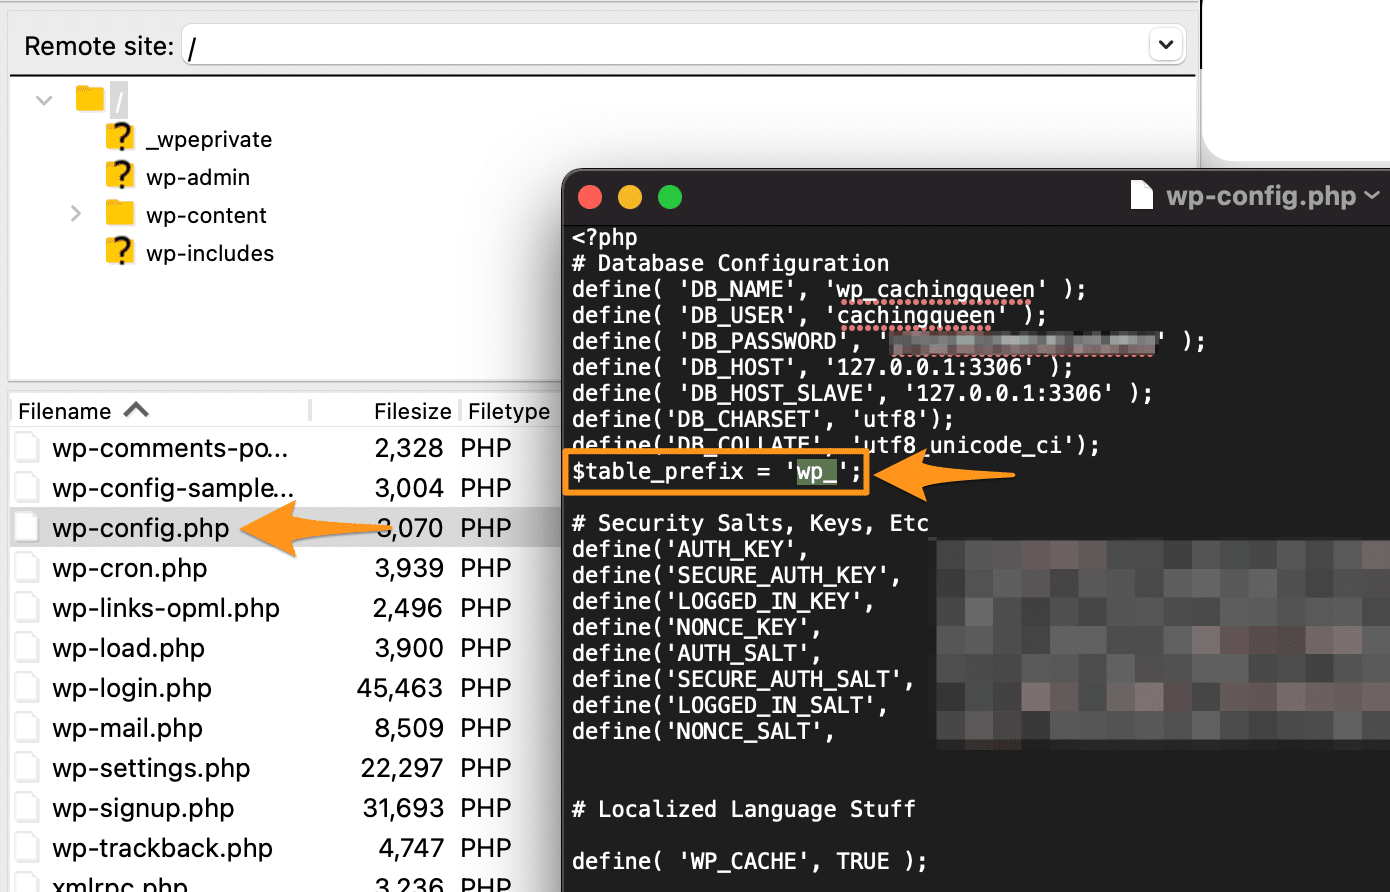
Option A: SFTP
- Connect to your website using SFTP
- Download and view the
wp-config.phpfile - Locate the line
table_prefix - The content in quotes is the database prefix
Option B: SSH Gateway
- Connect to SSH Gateway.
- With your site directory open, run
wp db prefix.

Note
You can also cat wp-config to view the file or use grep "table_prefix" wp-config.php to search it. Just be aware there may be multiple lines that show this information but are commented out, and therefore are not being used.
View Database Table Names
When viewed, the database tables names will have the prefix appended to the beginning of the name. By default each table (users, usermeta, options, posts, etc) begins with wp_ and should look like this:
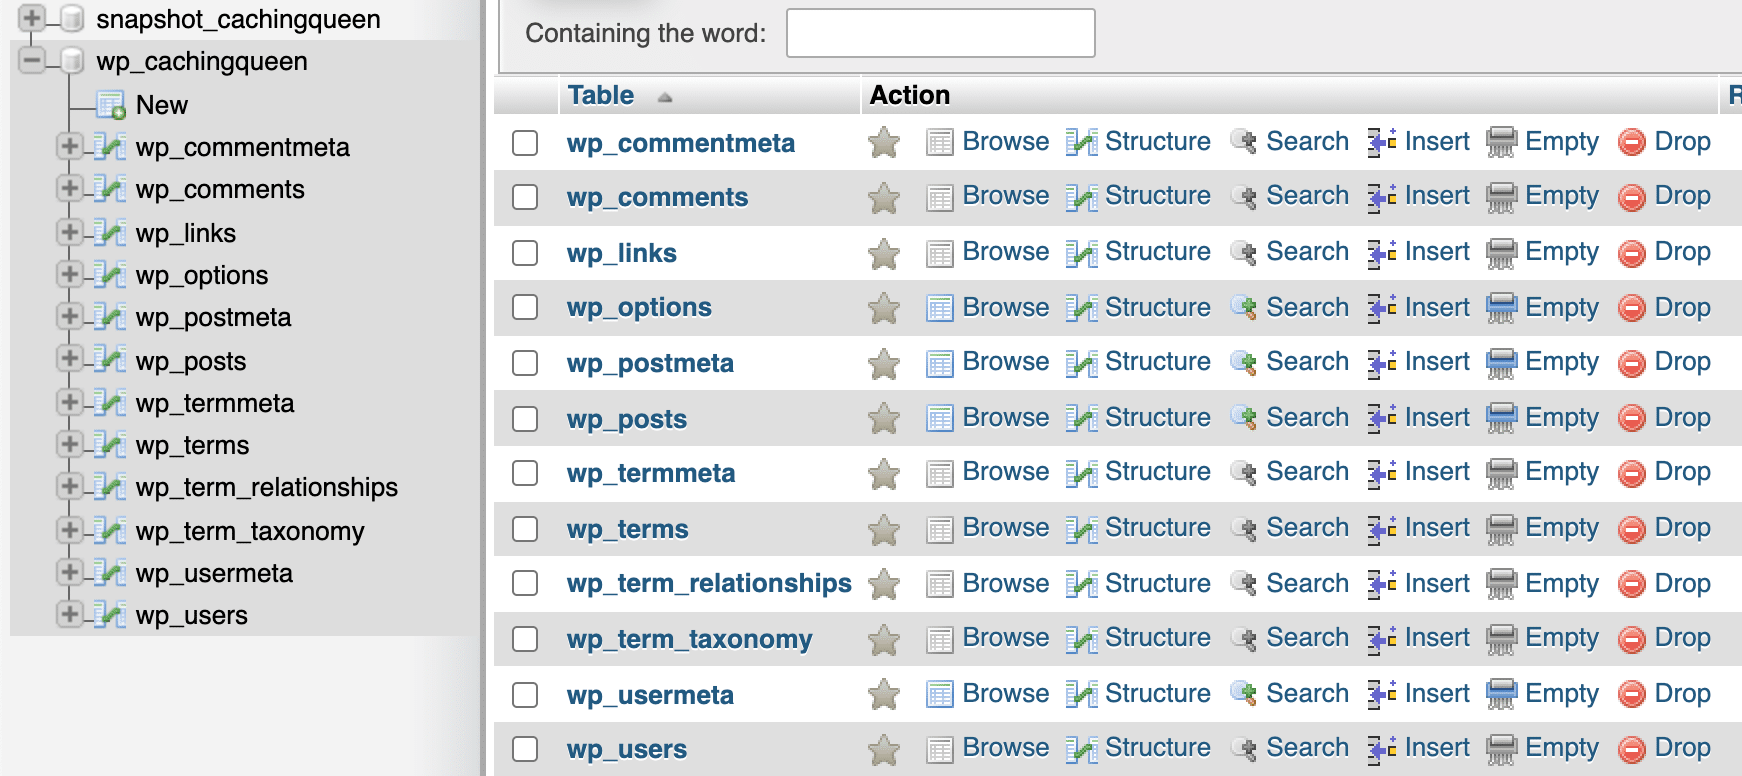
View Tables with phpMyAdmin
- Log in to the User Portal
- Select the environment name
- Click phpMyAdmin
- Select the database name (typically
wp_yourenvironmentname) - You will see your list of database tables displayed
In this example you will see the database tables begin with test_

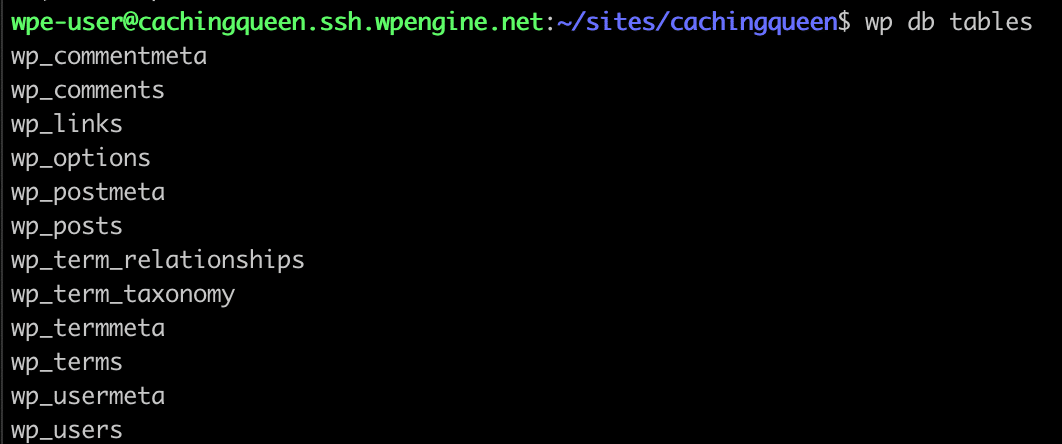
View Tables with SSH Gateway
- Connect to SSH Gateway
- With your site directory open, run
wp db tables
Seeing a few prefixes in the database?
- If your website is a multisite you will see tables with an additional numerical prefix for each subsite. For example
wp_2_options. This is normal! If you’re wanting to edit the main website, look for the tables that do not include the additional numerical prefix.
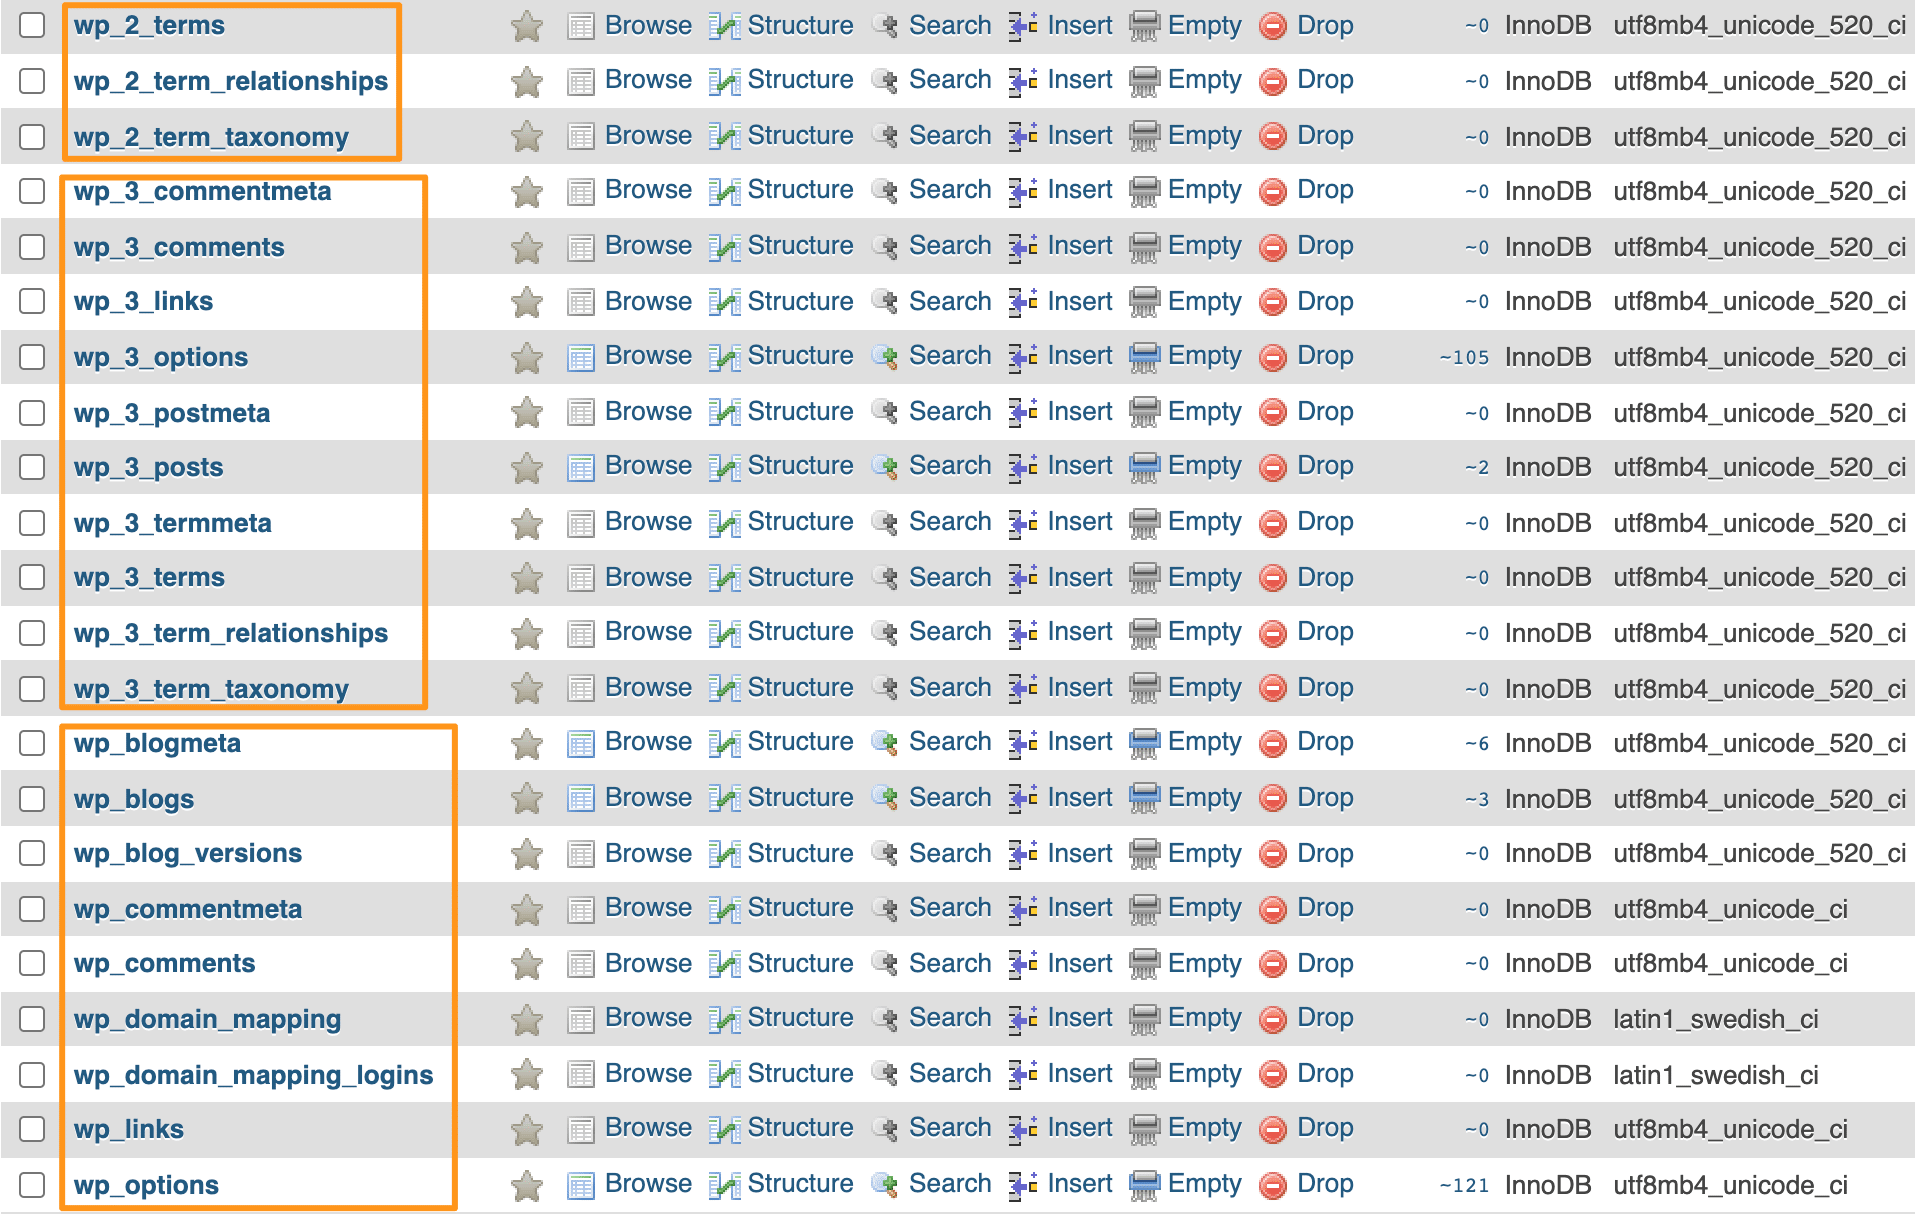
- It’s also possible to have multiple sets of database tables with different prefixes, even if only one is being used. Look for the options table and open it. Check that the siteurl, template/stylesheet and other information are correct for your website. If they are, the prefix used on this table is likely the correct one. If they are not, look for another options table to perform the same check. You may need to change pages!
Change Database Prefix
The database prefix can be changed from the wp-config file or by renaming the database tables. Remember, the must must match exactly in each location!
An underscore is not required at the end of the prefix, however it is recommended.
Edit Prefix in wp-config
Use SFTP or SSH Gateway to open the wp-config.php file. Once the file is opened in your text editor, locate the line beginning with:
$table_prefix =
Change the value within the single quotes to reflect the desired table prefix. Be sure to save! If you’re using SFTP you will also need to upload and overwrite the remote file.
For example, if you wish to change your table prefix to default wp_ you would want this to read:
$table_prefix = 'wp_';
Edit Database Table Names
Changing the prefix of your database tables requires renaming them entirely. The following SQL can be executed using SSH Gateway or phpMyAdmin.
Be sure to edit this to reflect the correct old and new prefixes you wish to use.
RENAME table `oldprefix_commentmeta` TO `newprefix_commentmeta`;
RENAME table `oldprefix_comments` TO `newprefix_comments`;
RENAME table `oldprefix_links` TO `newprefix_links`;
RENAME table `oldprefix_options` TO `newprefix_options`;
RENAME table `oldprefix_postmeta` TO `newprefix_postmeta`;
RENAME table `oldprefix_posts` TO `newprefix_posts`;
RENAME table `oldprefix_terms` TO `newprefix_terms`;
RENAME table `oldprefix_termmeta` TO `newprefix_termmeta`;
RENAME table `oldprefix_term_relationships` TO `newprefix_term_relationships`;
RENAME table `oldprefix_term_taxonomy` TO `newprefix_term_taxonomy`;
RENAME table `oldprefix_usermeta` TO `newprefix_usermeta`;
RENAME table `oldprefix_users` TO `newprefix_users`;
If you wish to change the database tables to the default prefix, be sure to set newprefix_ to wp_.
Note
This query only includes the default WordPress database tables. If you have additional tables you may need to modify this command to include them.