Continuous Integration with Bitbucket
Bitbucket is a service from Atlassian that allows you to continuously integrate and deploy your code from your local machine to a Git repository using a service called Pipelines. Unlike DeployBot which allows you to push your code to their platform with Git and then uses SFTP to sync your code to WP Engine, Bitbucket only uses Git connections.
WP Engine Git Setup
- Ensure that you are able to connect to WP Engine’s Git system
- You don’t need to make any pushes from your local machine yet.
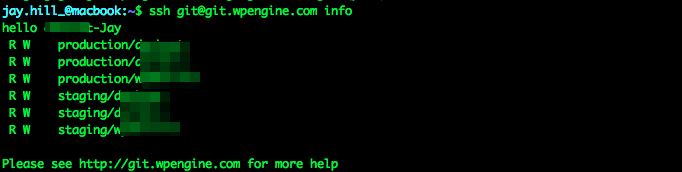
- You should be able to run
ssh [email protected] infoand see your remote repositories.
- Ensure that you have your files setup locally that you’re wanting to push.
- We suggest ignoring WordPress core files and only tracking changes on the files you are working with. Our suggested gitignore files can be found here.
- You will also need to have initialized your repository per WP Engine’s Git instructions.
NOTE: If you have not setup Git for WP Engine yet, then follow the directions outlined in our Git guide first.
Bitbucket Setup
- Create an Atlassian account through Bitbucket
- For most individual developers as well as small teams, the free account will be sufficient as it allows up to 5 users per month for no cost. However, you are limited in the number of allowed “Build” minutes per month when deploying through your Pipelines. Depending on how often you deploy, and the time it takes to build, you may need to consider a paid plan with Bitbucket
- Once you’ve created your Bitbucket account, it’s time to create your repository.
- Click the
+sign in the left menu bar - Select Repository
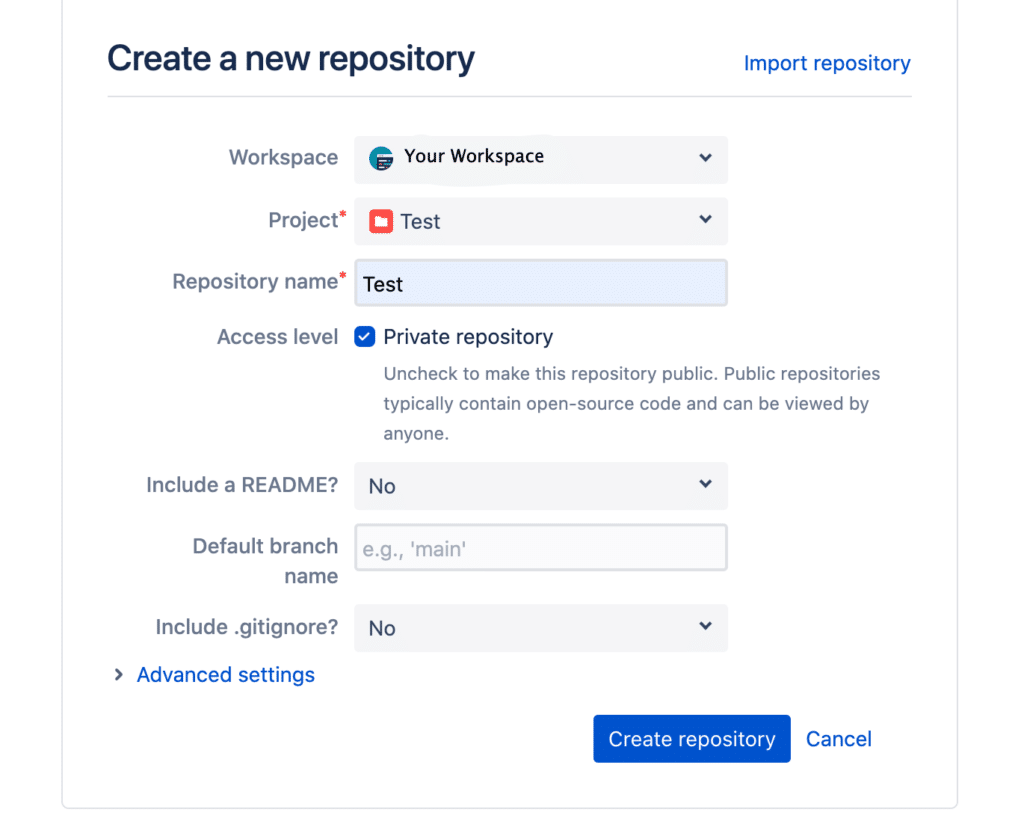
- Fill out your repository name (you could use your site name here, for example).
- Select an access level, we suggest using a private repository
- Under Include Readme, select No
- Set Git as the version control system
- Under Include .gitignore, select No
- Click the Create Repository button
Set Bitbucket as a Remote Repository
Now that you’ve created your repository you will need to add Bitbucket as a remote. This will allow you to deploy code from your local machine to Bitbucket.
- Open your Bitbucket dashboard to your new repository
- Select the Source page for your new repository
- You’ll see commands to use locally to navigate to your project folder and run the Git remote command listed on the page.
- Use the commands as directed from your local machine:
cd path/to/your/repo
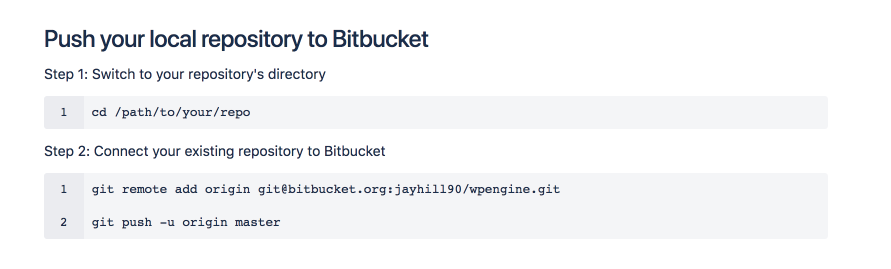
- In Step 2 via Bitbucket you will perform your first push to the origin of your master branch:
git remote add origin https://[email protected]/PROJECT/REPO.gitpush -u origin master
- This will create your initial push and get your files into the BitBucket repository. For example:
~/newrepo/ [master] git remote add origin https://[email protected]/username/repo.git

~/newrepo/ [master] git push -u origin master
Enumerating objects: 3, done.
Counting objects: 100% (3/3), done.
Writing objects: 100% (3/3), 239 bytes | 239.00 KiB/s, done.
Total 3 (delta 0), reused 0 (delta 0)
To https://bitbucket.org/username/repo.git
 * [new branch]      master -> master
Branch 'master' set up to track remote branch 'master' from 'origin'.
- Now that the initial commit has taken place, create a new branch for your staging environment with the following commands locally:
git checkout -b staginggit push origin staging
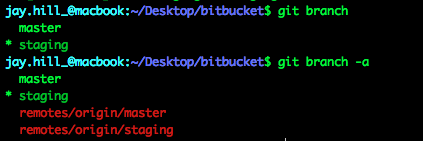
- Now if you run
git branchyou will see the two local branches - If you run
git branch -ayou’ll see both the local master and staging branches, as well as the origin remote branches.
Setup Pipelines
Once the branches are setup, it’s time to configure your Pipeline on the Bitbucket website.
- Open your Bitbucket dashboard to your new repository
- Select Pipelines in the menu
- Choose PHP as the Language Template
- Delete everything that’s provided by default in the
yamlfile - Paste the following into the yaml file.
- Replace
YOUR_ENVIRONMENT_NAMEwith your unique WP Engine production and staging environment names.
- Replace
pipelines:
 branches:
   master:
     - step:
         script:
           - git push [email protected]:production/YOUR_ENVIRONMENT_NAME.git master
           - echo "Pushed to Production"
   staging:
     - step:
         script:
           - git push [email protected]:production/YOUR_ENVIRONMENT_NAME.git staging
           - echo "Pushed to Staging"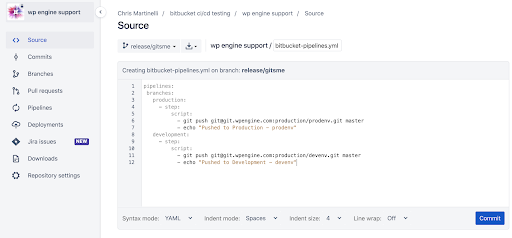
- Commit your changes
- The pipeline will try to run but will fail, as we have not yet provisioned our SSH keys and put them into the WP Engine User Portal.
- Navigate to the Settings page of your repository
- Click SSH Keys in the menu
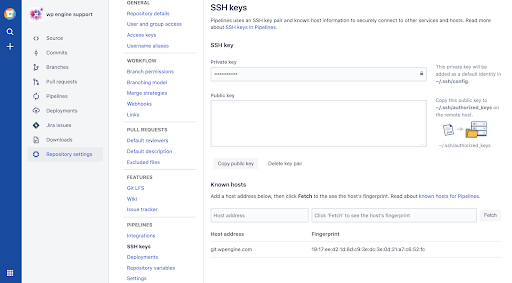
- Toward the bottom of the SSH Keys page, in the Host Address box, input
git.wpengine.com - Click Fetch
- Ensure the Host Key Fingerprint matches those listed in WP Engine’s Git documentation and then proceed.
- Once the host is setup, you can either generate a SSH Key provided by Bitbucket or upload your own key pair.
- Once this is generated or uploaded, go back to the User Portal at my.wpengine.com
- Select your WP Environment name
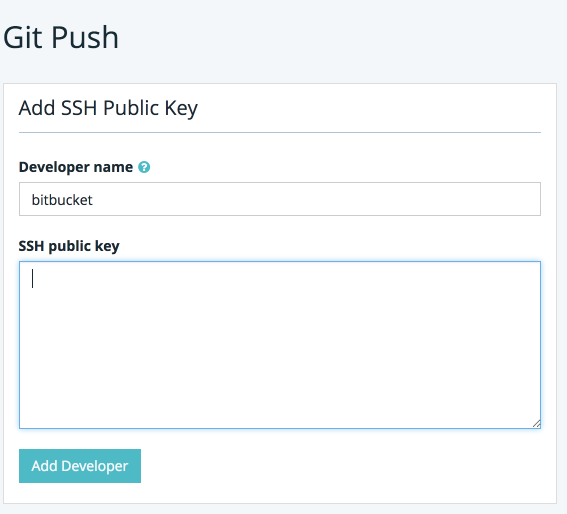
- Click Git Push
- Select Add a New Developer
- We recommend simply using “bitbucket” or something similar so you can easily identify the role of this key.
Now that you have added Bitbucket as a Git user for WP Engine, you’ll need to wait around 20 minutes before you can begin pushing your codebase while the user is fully established.
Not to worry, there are more configuration steps to be performed while you wait!
Fetch Pipeline YAML File
When you setup the Pipeline in a previous step, this created a bitbucket-pipelines.yml file that needs to be fetched into your local repository.
- In your terminal, run
git pull origin master - Now, when you list out the directory you’ll notice that the new file that was pulled down.
Test Pipeline
- Once it’s been about 10-20 minutes since adding your SSH Key, make a small change locally, then commit and push to the staging branch by running
git push origin staging- This pushes up your changes to the staging branch on BitBucket, that triggers the staging section of the pipeline to run, which if you configured the pipeline per this guide, will only perform a Git push to your staging environment.
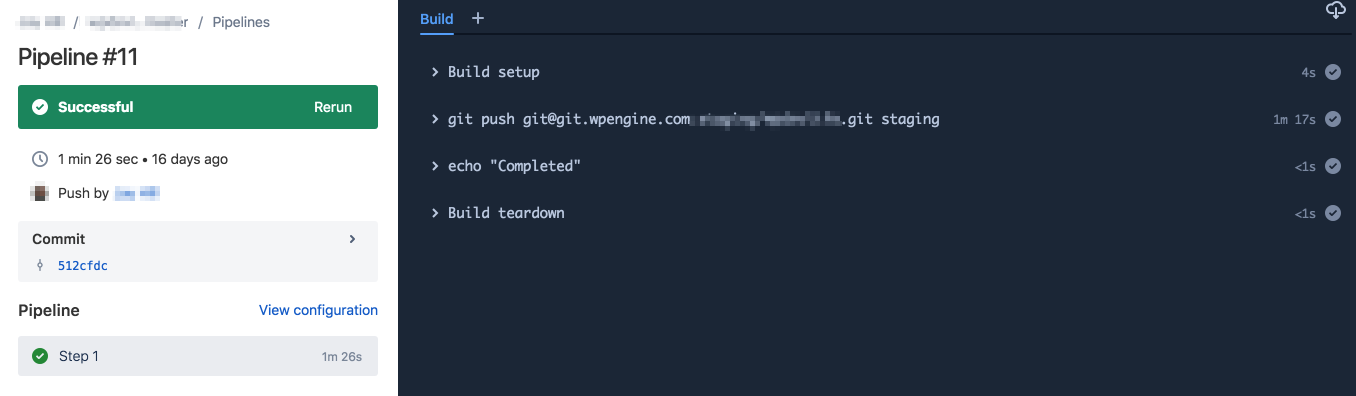
- Once the push completes locally, navigate back to the BitBucket repository and go to the Pipelines page again.
- You’ll see a list of the pipeline runs and their status.
- Click into the most recent one, in order to get a better look at the status.
- If all went well there will be a success message.
- Otherwise the specific error that WP Engine’s Git server returns will be displayed.
- If you check your files on WP Engine you’ll see that your changes have now been deployed.
- To deploy to production you would merge your staging branch (but not delete it), and then perform your push with
git push origin master.
Possible Issues
If you do not see your changes, we recommend adding the --force flag to your push command. For example:
git push --force [email protected]:production/wpeprod.git master
This may not be a permanent solution though but can be valid to get the pipeline in a desired state. Please note the following implications of the –force flag:
–force: Usually, the command refuses to update a remote ref that is not an ancestor of the local ref used to overwrite it. The –force flag will delete your previous commit(s) on that branch and push your current one.
More information on configuring pipelines can be found here.
In Conclusion
Now that your pipeline is functioning, you can expand upon this by customizing the bitbucket-pipeline.yml file to compile assets such as SASS or JavaScript files, run tests, and other important steps of your development process. For more information regarding Bibucket Pipelines and the customizations you can make to the YAML file can be found on the Atlassian documentation.
For further reading on CICD pipelines, we recommend the following resources as well:
- https://carlalexander.ca/continuous-integration-wordpress/
- https://carlalexander.ca/introduction-wordpress-unit-testing/
NEXT STEP: Check out our best practices for deploying when using version control