
What Is a Staging Site? How Do You Set One Up?
Website development often presents numerous challenges, including the peril of a site crash following modifications. This is where the importance of a “staging site” comes into play. A staging site serves as a secure platform for website enhancements, significantly reducing the risk associated with real-time changes. It’s an optimal solution that ensures your live website remains uninterrupted and functional during the development phase.
In this blog post, we will comprehensively cover different types of development environments, emphasizing their comparison with staging sites. Additionally, we will explore various techniques you can employ to establish your very own staging site. Dive in as we unfold the world of staging sites!
What is a Staging Site?
To put it in straightforward terms, a staging site is essentially a replica of your active web presence. It provides a safe sandbox for you to try out modifications or significant new additions you aim to integrate. Staging sites are a favorite tool amongst developers, being a reliable way to evaluate adjustments, rectify errors, and ensure everything runs smoothly before transitioning to the live environment. This technique has high relevance within the web development process, particularly when it comes to safeguarding website functionality and user experience.
The primary feature of your staging site is its precise replication of your live site, from plugins to settings and widgets. This mirroring ensures a seamless transition once updates are implemented. Despite their similarities, the key distinction between your active website and a staging site lies in their operational status, as the staging site remains offline. This distinguishing attribute is critical for in-depth testing and fine-tuning before going live, thus underlining the importance of the staging site in your web development process.
Think of your staging site as a sort of sandbox where you can see how your WordPress website would react in everyday scenarios. Anything that happens in the staging environment won’t affect your live website.
Development vs. QA vs. Staging vs. Production Sites
Visitors often only view the final version of a website, unaware of the extensive operations that occur backstage. In actuality, developers often utilize a staging site to rigorously test their code before deployment. This practice ensures the seamless function and optimal performance of the website, thwarting any potential glitches before the site goes live.
Let’s take a look at the most common types of WordPress testing environments that are used during development:
- Development website. This environment contains all the latest iterations of the code you’re working on. It’s perfect for initial testing of new features.
- Quality Assessment (QA). During the QA process, changes to your website will be tested thoroughly to find any issues that you may have missed while coding. This type of environment is most often used by large companies, since they can’t afford to have bugs pop up on live sites.
- Staging website. A staging website acts as the bridge between the development and live versions of your site. At this point, any remaining errors should be addressed, and the changes should be ready to roll out.
- Production website. This is the live version of your website that users will see. If you’ve been careful throughout the development process, this iteration of your WordPress site should be bug-free and provide a flawless user experience.
Importantly, the usage of a staging site should remain concealed from the public or any search engine, such as Google. Proper utilization of the staging site ensures that any modifications to your WordPress site code won’t disrupt your live site’s visitor experience. Therefore, any operational glitches should be rectified during the staging phase, further enhancing the webpage’s stability and usability.
At this point, you’ve grasped how a staging site integrates with the web development workflow. Yet, you might be contemplating if implementing a staging site aligns with your requirements. Let’s evaluate the advantages and drawbacks to aid you in making a well-informed decision centered around a staging site.
Staging Environment vs. Testing Environment
Both staging environments and testing environments involve putting your website to the test. The difference between the two comes from what is being tested and to what degree.
In a staging environment, your website will exist in its final, most current form. Everything should be up to date; the only factor that should separate your staging site from your live site is the feature(s) that you’re testing.
So, what is staging used for? Staging typically comes at the very end of the web development process, and its goal is to test the website as a whole before changes are published.
A testing environment is for experimenting with smaller, specific changes. Because you’re only testing a portion of code, you don’t need to have every aspect of the website in its completed state. In general, testing comes before staging—a test environment is a place to quickly check on subtle changes as you go.
The Advantages of a Staging Site
It doesn’t take much to sell the benefits of a WordPress staging site. They:
- Enable you to produce better websites
- Provide you with the opportunity to catch errors and bugs without putting your site at risk
- Are usually simple to create
- Can be set up locally or online (depending on your preferences)
Having said that, there are some drawbacks to consider as well.
The Challenges of a Staging Site
The major drawbacks of using a staging site are:
- It takes longer to update your website (as you need to test changes first).
- Web hosts often charge for a staging site service (although you can always set one up locally).
- Staging sites may not be exact replicas of a live website (caching is not usually enabled on a staging site, for example).
Thankfully, there are ways to mitigate the potential issues associated with website development. For example, all of our hosting packages at WP Engine come equipped with free complimentary staging sites, ensuring a hassle-free experience for you. Notably, our staging sites provide genuine sandbox environments, ensuring full caching capabilities (among other benefits). The use of a staging site ensures pre-deployment testing for flawless website functionality.
Who Needs a Staging Site?
For optimal website management, everyone should consider the use of a staging site. Realistically speaking, when it comes to large-scale operations, the use of a staging site becomes a crucial component. This trial website serves as an essential tool to test and refine your website enhancements before making them live.
If you’re comfortable with the knowledge that one of your updates could break your site and alter its functionality, or render it unusable while you fix it, then you probably don’t need a staging site.
To ensure your website continues to generate revenue, offer services, or meet the needs of consistent users, establishing a staging site is absolutely a strategic decision. This website testing ground is key for maintaining your site’s functionality and user experience. Moreover, there are various methodologies you can select according to your requirements for the staging site, which we will delve into below.
How to Create a Staging Site for WordPress
When preparing a staging site for WordPress, there are three key strategies to consider. Firstly, establish a staging environment using your hosting service. Next, consider utilizing a WordPress staging plugin as an alternative. Alternatively, you can also consider creating a standalone local installation of your website platform, isolated from your main website, where modifications can be experimented with. This enables detailed testing and troubleshooting of changes, boosting the overall efficiency and effectiveness of your website development process.
In the following sections, we’ll take a look at all three options. Plus, we’ll point you towards some resources to help get you started!
Option 1: Set Up a Staging Site Through Your Host
Not every web hosting service includes the provision of a staging site within their package. However, even in such scenarios, it is still possible to establish a staging site, although this might come with an additional cost. Optimizing your website with a staging site can significantly contribute to enhancing its performance.
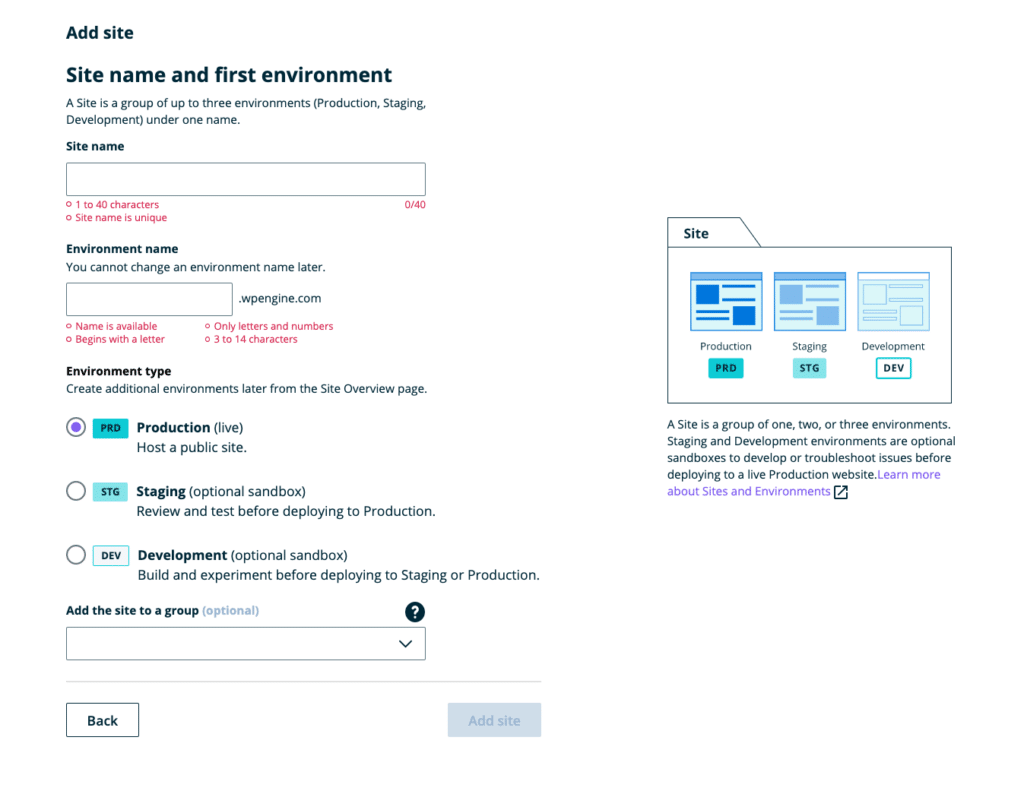
If you’re a WP Engine customer you can access staging site functionality right on your User Portal by going to Sites > Add Site and naming your new staging site:
After that, you can select a Staging environment and you’re all set! To access your new staging site, you can go to Sites in your User Portal menu:
To access more options for your staging site, you can click the STG icon next to its name. From there, you’ll be taken to a dashboard for that staging site where you can push and pull changes, view data, and access your WordPress administration login page.
Best of all, our staging service enables you to set up full copies of your website in a matter of clicks, and then merge them back with your live installation just as easily. As far as staging goes, it doesn’t get any simpler than that.
Option 2: Use a WordPress Plugin to Create Your Staging Site
If setting up a staging site with your web host is not an option, you can also use a plugin like WP Staging:
This WordPress plugin essentially makes a clone of your existing site, including all of its files and the database. Once it’s cloned, you can access the staging site using a distinct URL, and experiment to your heart’s content without impacting your live site.
Once you’ve installed and activated the WordPress plugin, you can select Start Cloning This action will set off a thorough examination of your site for pertinent information. Following this, you can make a calculated decision on whether to duplicate all components of your site’s database and files for your staging site or only specific ones. This ensures you have a reliable and efficient staging site perfectly mirroring your live site.
After making your choices, click on Start Cloning again. You’ll get a real-time readout of the cloning process as it takes place. How long it takes to clone your site will depend on the overall size, but once it’s done you’ll be ready to use your new staging site.
Option 3: Set Up a Local Staging Site
Both of the previous methods involve setting up online staging sites. Those can be very flexible, and enable multiple people to work on them easily. However, you can also set up a local, offline staging site, which only those with access to your computer will be able to use.
There are several ways to go about creating local WordPress websites. One of the most popular options involves using a tool such as Local:
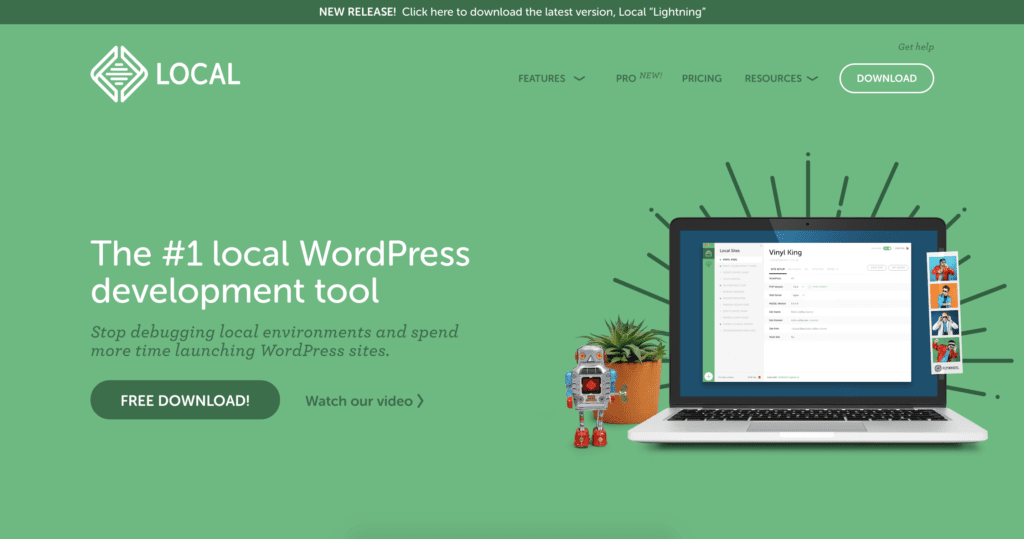
This is a free application that turns your computer into a simple hosting environment. Once you download the software, you’ll be guided through the steps needed to set up your local development site, starting with its name:
Once you set a name for your website, it’s crucial to select a unique username and password for your WordPress account. The software will then oversee the creation of your staging site, which is an essential step for pre-testing modifications before they go live. The staging site will be accessible via the Local interface, immediately following the completion of the setup process. This staging site permits you to assess and tweak your WordPress dashboard before finalizing its features.
Should You Create a Staging Site Manually?
Manually creating a staging site is not especially difficult, but it can pose problems, particularly for a WordPress beginner.
Creating a staging site in this way involves multiple steps—making a subdomain and an FTP account, importing your database, and hiding your staging site (since it’s technically still live). A mistake in any of these steps can mean that unpublished features become accessible to the public. Deploying the changes you’ve made in your manual staging site is also more difficult, as modifications can get lost in the transition.
In short, you should only create your staging site manually if you’re confident in your abilities. Otherwise, it’s best to work with professionals, like our team at WP Engine. Regardless of the route you take, be sure to save a recent backup of your website before making any changes.
Deploying Changes From Your Staging Site to Live Production
Regardless of which method you use to create your staging site, pushing the changes you make on it over to your live website can be tricky. Fortunately, most of the options we listed above have built-in functionality to help you navigate this step.
If you’re using a staging site provided by your web host, pushing changes to your live site should be pretty simple. For example, with our staging environments, you can use the Copy To and Copy From buttons in your User Portal:
These options enable you to push your staging site to your production site, and vice versa.
If you’re using the WP Staging plugin, you’ll need to check out the premium upgrade if you want to enable updates to your live site:
After updating your WordPress staging plugin, it is crucial to establish backups for your live and staging sites. Notably, the concept of a “staging site'” is indispensable in this process. You can then utilize the plugin’s interface to select the data that you plan on transferring to your live website.
Local environments often provide ‘push to live’ options as well. With Local, you can use the Connect feature:
This enables you to use your account login credentials to connect Local to your website’s hosting provider if you’re using WP Engine or Flywheel. Once you complete that step, you can use the Connect icon to push and pull updates between your website and your local environment as needed.
Develop on a Safe Staging Site With WP Engine
Creating a staging environment for making changes to your WordPress website safely doesn’t have to be hard. Here at WP Engine, we include a staging feature with all of our WP Engine plans.
Ranging from Personal subscriptions ($29 per month) to custom-priced Enterprise packages, all our users have access to staging websites and around-the-clock support. Set up your first WordPress staging site today!